Downloads for Connect Storyboard and Code
To follow this tutorial, you’ll need Xcode 9 and the finished Xcode project from Adapting for iPhone X. You can download the final Xcode project to help you compare with your own progress.
One Class Per View Controller
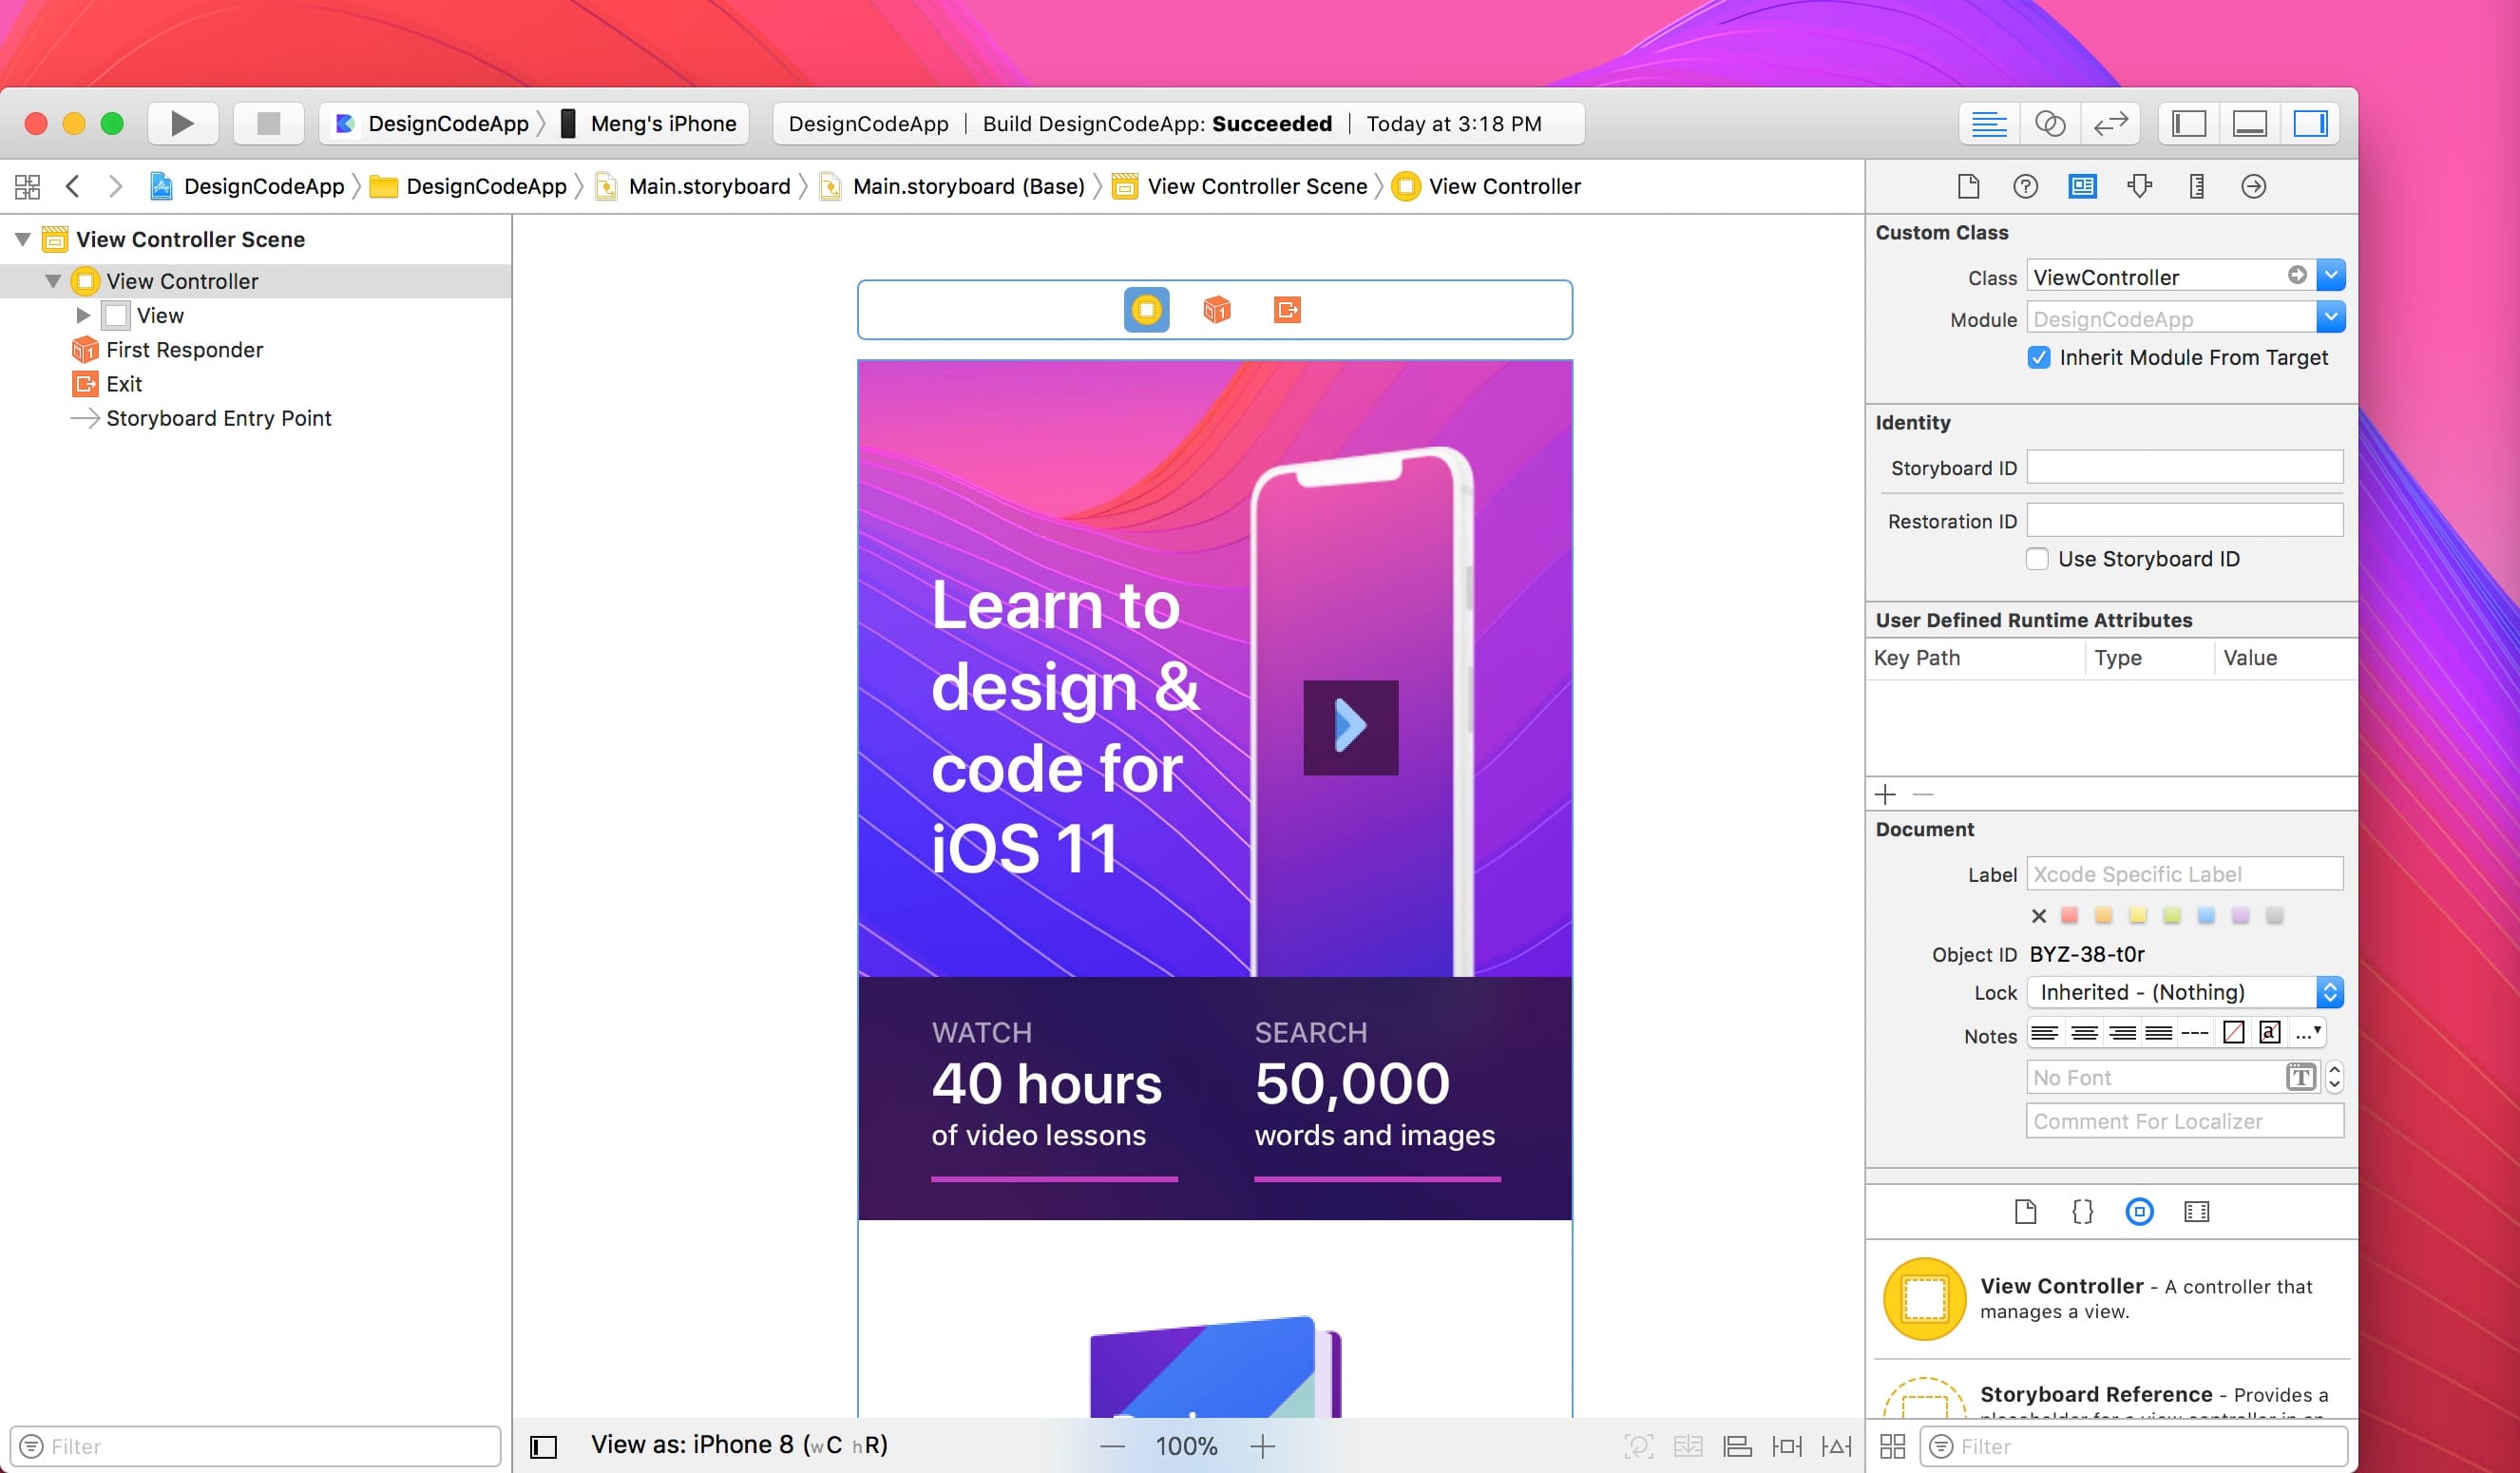
Typically, you have one .swift file per Storyboard View Controller. When you first created your Xcode project, you had one View Controller, which is connected to ViewController.swift, as set up in the Identity Inspector. In the Project Navigator, you can select the Class file and find the Swift code inside.
Assistant Editor
We learned to use the Assistant Editor for previewing your code in Playground. The Assistant Editor can also be used for showing the Class file next to the Storyboard. This way, it’s easier to connect the UI objects to the code.
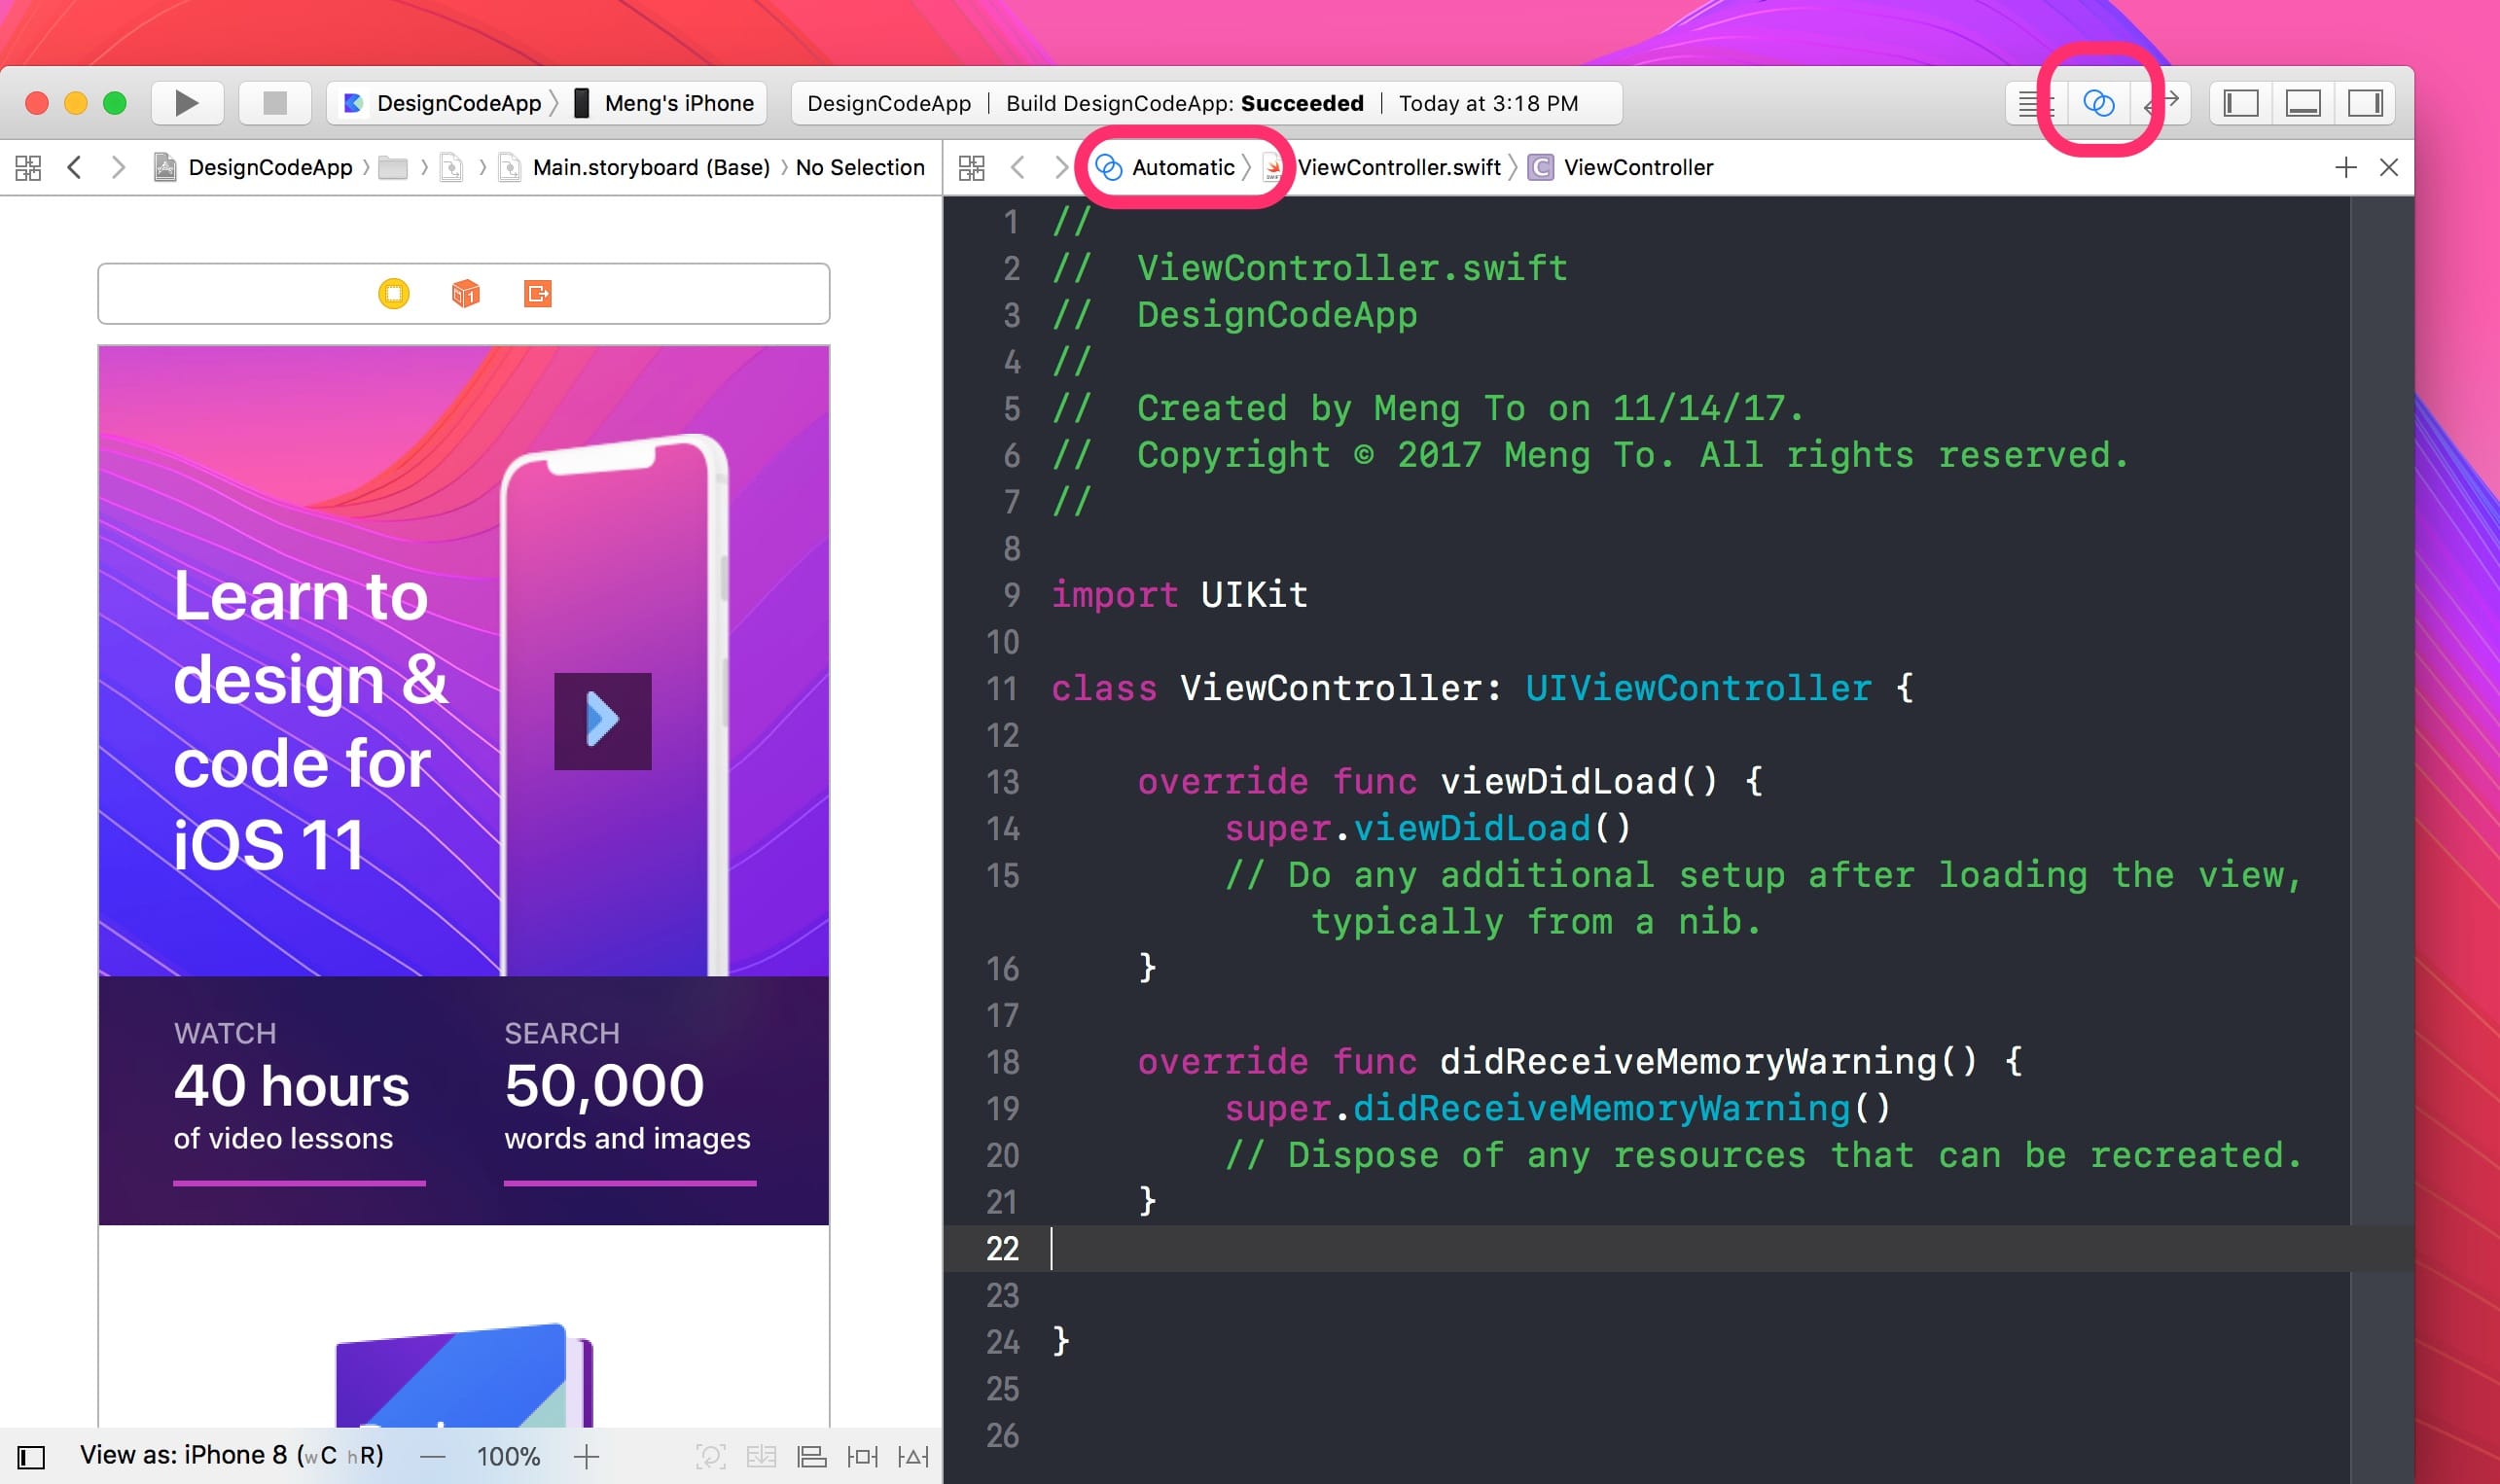
Let’s open the Assistant Editor by clicking the Circles icon in the Toolbar. Click the Circles again, but this time inside the Assistant Editor and select Automatic.
Automatic will find the Class file attached to your View Controller in Storyboard if you connected to Identity Inspector.
The Class File Explained
In the Assistant Editor, we can find the Swift code. Let me explain a little about what’s going on.
import UIKit
This is the framework that we’re using. Think of it as React or Bootstrap (although way more complex). Swift itself isn’t a framework — it’s a language. UIKit is the underlying framework. It’s what allows us to code UI objects specific to iOS and use cool features like Storyboard or smaller things like Background Blur.
class ViewController: UIViewController { }
Our Class ViewController is a subclass of UIViewController, meaning that it can use the same properties and methods, like viewDidLoad(). These are pre-made by Apple, allowing you to focus on building your app interactions, rather than building the framework. If you don’t understand everything, that’s fine because you’ll get better with time.
override func viewDidLoad() { }
As the name suggests, viewDidLoad is when the screen loads. Whatever is coded inside the curly brackets will run.
We can delete didReceiveMemoryWarning() and the green comments below. This stuff is more advanced and not necessary for beginners to understand. So far, your Class file should look like this.

Create an IBOutlet
Right now, the Class file is connected to the View Controller in Storyboard, but none of the UI objects are referenced.
Let’s create an IBOutlet for the title. Control + Drag the title to the Class file. Important: it has to be dropped inside the ViewController’s curly brackets and outside the viewDidLoad function.
When you drop the connection, a dialog will appear. We need to name the object to titleLabel. title is the name we give it and Label is the type. Once done, click Connect.
Storyboard Connections to IBOutlets
Let’s create more IBOutlets for the device image and play button. This time, you can use the Document Outline to Control + Drag from, which is easier for the play Visual Effect View.
So far, our project should look like this. If you mouse over the circle on the left of that line of code, it’ll show you where it’s connected within Storyboard.
Important: don’t change the name of the IBOutlet or anything in your code. Once created, there is no going back unless you understand the steps it takes to refactor.
Fade In Animation (Optional)
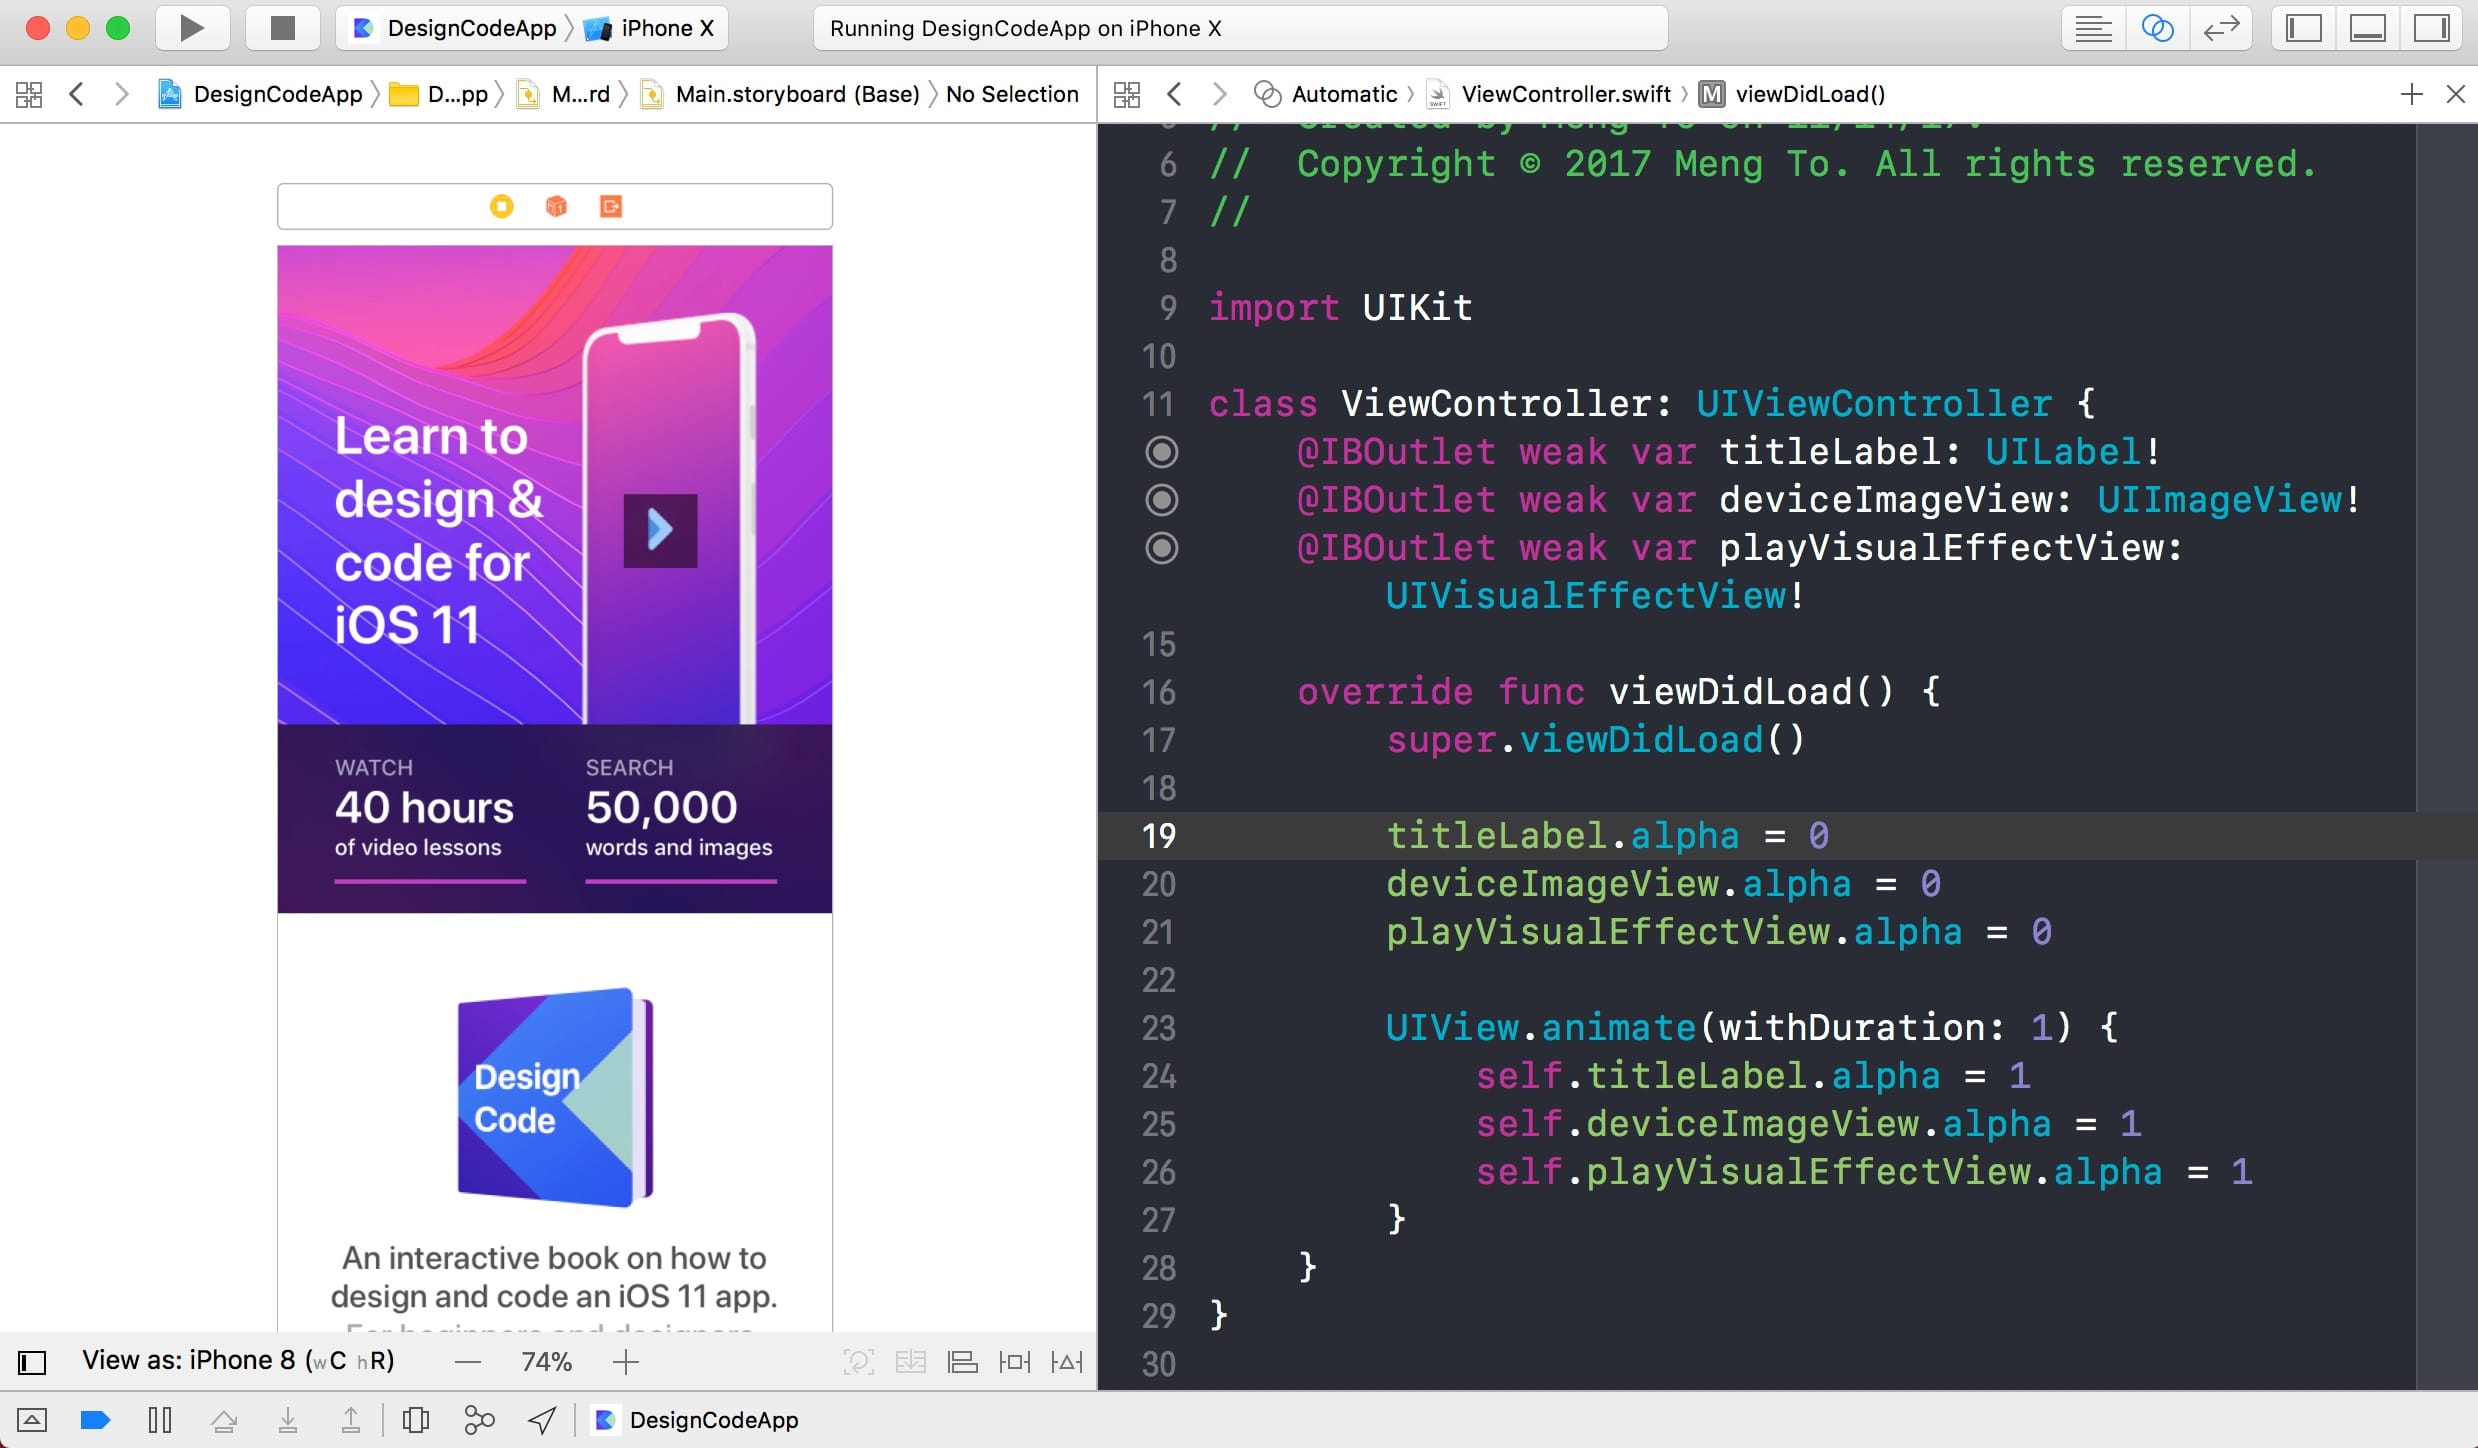
Now that we have declared our objects, we can manipulate them in the viewDidLoad. For example, we can set the alpha opacity to 0.
titleLabel.alpha = 0
deviceImageView.alpha = 0
playVisualEffectView.alpha = 0
Using UIView.animate, we can do a simple fade in animation.
UIView.animate(withDuration: 1) {
    self.titleLabel.alpha = 1
    self.deviceImageView.alpha = 1
    self.playVisualEffectView.alpha = 1
}
Creating an IBAction
As a designer learning code, we’re interested in custom events, like when a user presses a button. Let’s create one for the play button which would play the intro video.
Control + Drag the Play Button right below the IBOutlets. Once you see the popover window, you have to change the Connection from Outlet to Action. This is only available for interactive elements such as the UIButton.
We’re naming it play + type + action. So playButtonTapped. That’s the naming convention recommended by Apple. The IBAction creates a function. You can code inside the curly brackets.
Play Video When Button is Tapped
Now that we connected the Play button, we can write some code for playing the intro video. The following code is a little more advanced, so if you feel a little lost, I suggest heading back to the Swift Playground sections.
First, we must import the AVKit framework. Type this code right underneath import UIKit.
import AVKit
Inside your playButtonTapped’s curly brackets, let’s start with declaring the URL of the video file.
let urlString = "https://player.vimeo.com/external/235468301.hd.mp4?s=e852004d6a46ce569fcf6ef02a7d291ea581358e&profile_id=175"
Then, we must transform the String into a URL, so that the AVPlayer class can read it. The AVPlayer is a UI object used to play the video with default controls such as play, pause and forward.
let url = URL(string: urlString)
let player = AVPlayer(url: url!)
Let’s create a View Controller for showing our Video player, then attach the player to it.
let playerController = AVPlayerViewController()
playerController.player = player
Finally, as with any View Controller, we can use the present function to animate it like a modal. When the animation is complete, we’ll start the video right away.
present(playerController, animated: true) {
    player.play()
}
Section View Controller
Let’s learn how to create a second View Controller in Storyboard for the Section screen. Disable the Assistant Editor to give full space to the Storyboard by clicking on the 5 lines icon.
Drag and drop a View Controller from the Object library.

Create a New Class File
A Class file is needed to attach to the Section View Controller we’ve just created. To create a new Class file, go to the Project Navigator (Command + 0), right-click the ViewController.swift and select New File. In the first window, select Cocoa Touch Class.
The Class name is Section. Since we’re using a View Controller, we have to type UIViewController in the Subclass of field. ViewController will automatically be added to the Class name. Apple suggests that for every Class file, we should specify the type to avoid conflicts and to make things as clear as possible.
Once we created the SectionViewController.swift file, it’ll appear right below ViewController.swift.
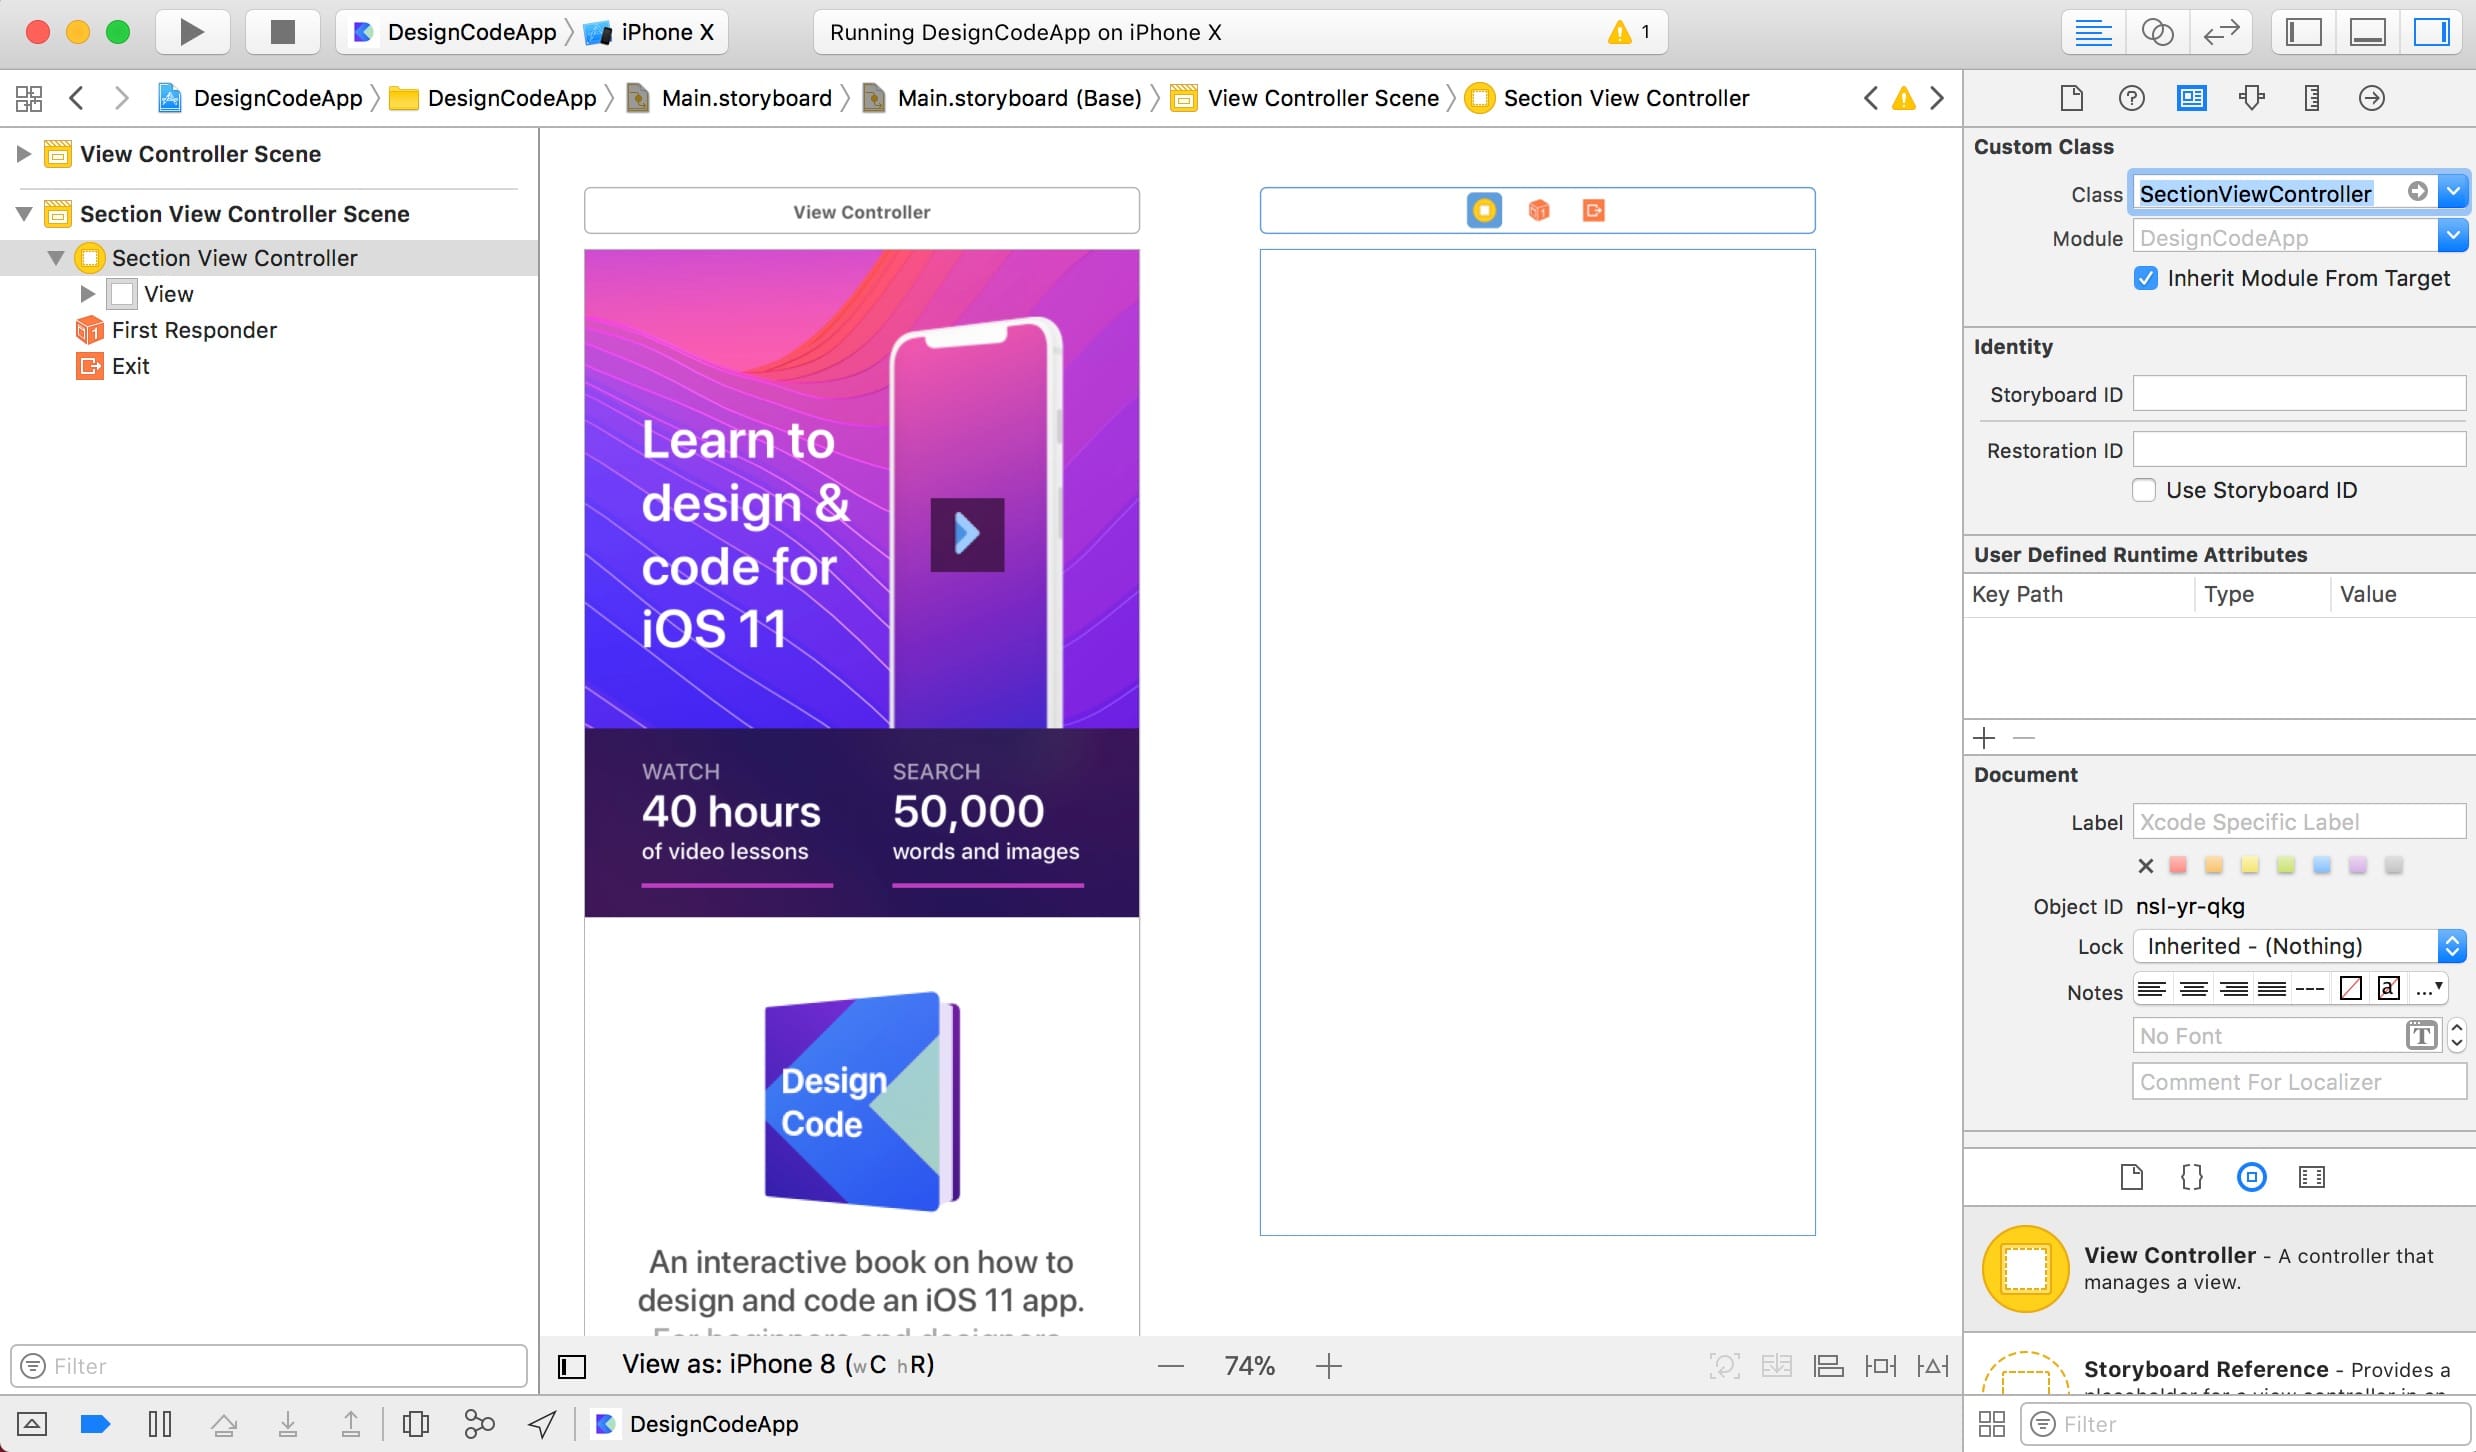
Connecting to Storyboard
The new Class file isn’t connected to any Storyboard View Controller yet. So, let’s head back to the new View Controller in Storyboard and open the Identity Inspector.
Type SectionViewController. Notice that the auto-completion kicks in, which makes it easier to avoid typing mistakes.
Both Ends of the Connections
Important: when you create an IBOutlet or IBAction, it creates one connection in code and another connection that exists in the Storyboard’s Connections Inspector. The two have to be in sync and have the same names. If you modify the name in the code, you also have to delete it in the Connections Inspector.
Select the View Controller in Storyboard and go to the Connections Inspector to find all the connections made.
Replicating a Connection Error
Optional: don’t follow this part if you don’t feel comfortable yet. I’m showing an example how the app can break if you’re not careful with the connections.
- I change titleLabel to title in ViewController.swift and immediately get errors. I then change the references to title to fix the errors.
- The circles in the left are no longer filled, hinting that there is no longer a connection.
- In the Connections Inspector, the old names are still there. That’s the danger because Xcode will still try to make the connection, which ultimately will crash your app.
Debug Area
For those who have developed Websites before, you’re probably used to inspecting elements in the browser and looking at console logs. The Debug area has similar features. Whenever you have errors, you can find them on the right side of the Debug area.
Development tools can be unforgiving when it comes to crashes. If you’re lucky and followed all the steps successfully, you’ll be fine. But should you run into a crash, you need to follow these instructions.
- Look at the bottom Debug area and scroll the error messages to the top. Look for the word reason. Look for keywords that stand out. In this case, we can see mainButton. Google the sentence to look for solutions.
- Go back to the Project Navigator.
- In your main editor, click the left arrow button to go back to where you were.
- You can close the Debug area by clicking on the down arrow at the top left.
Fixing your Connections
The solution is to either Undo (Command Z) or rename back to the original name. Otherwise, if you wish to go forward with the new name, make sure to delete the old connections in the Connections Inspector, and repeat the steps.
If you don’t wish to recreate the IBOutlet, you can click on the circle and connect back to the appropriate object. The lesson here is that both ends have to be in sync.
Conclusion
This is the hardest part for anyone who’s never used Storyboard before. It’s an entirely new concept, even for many developers. Once you understand it, you can do so much. If you made it here, you should pat yourself on the back, because you made a giant step into iOS development.