Downloads for Introduction to Xcode 9
To follow this tutorial, you’ll need Xcode 9 and the assets. You can download the final Xcode project to help you compare with your own progress.
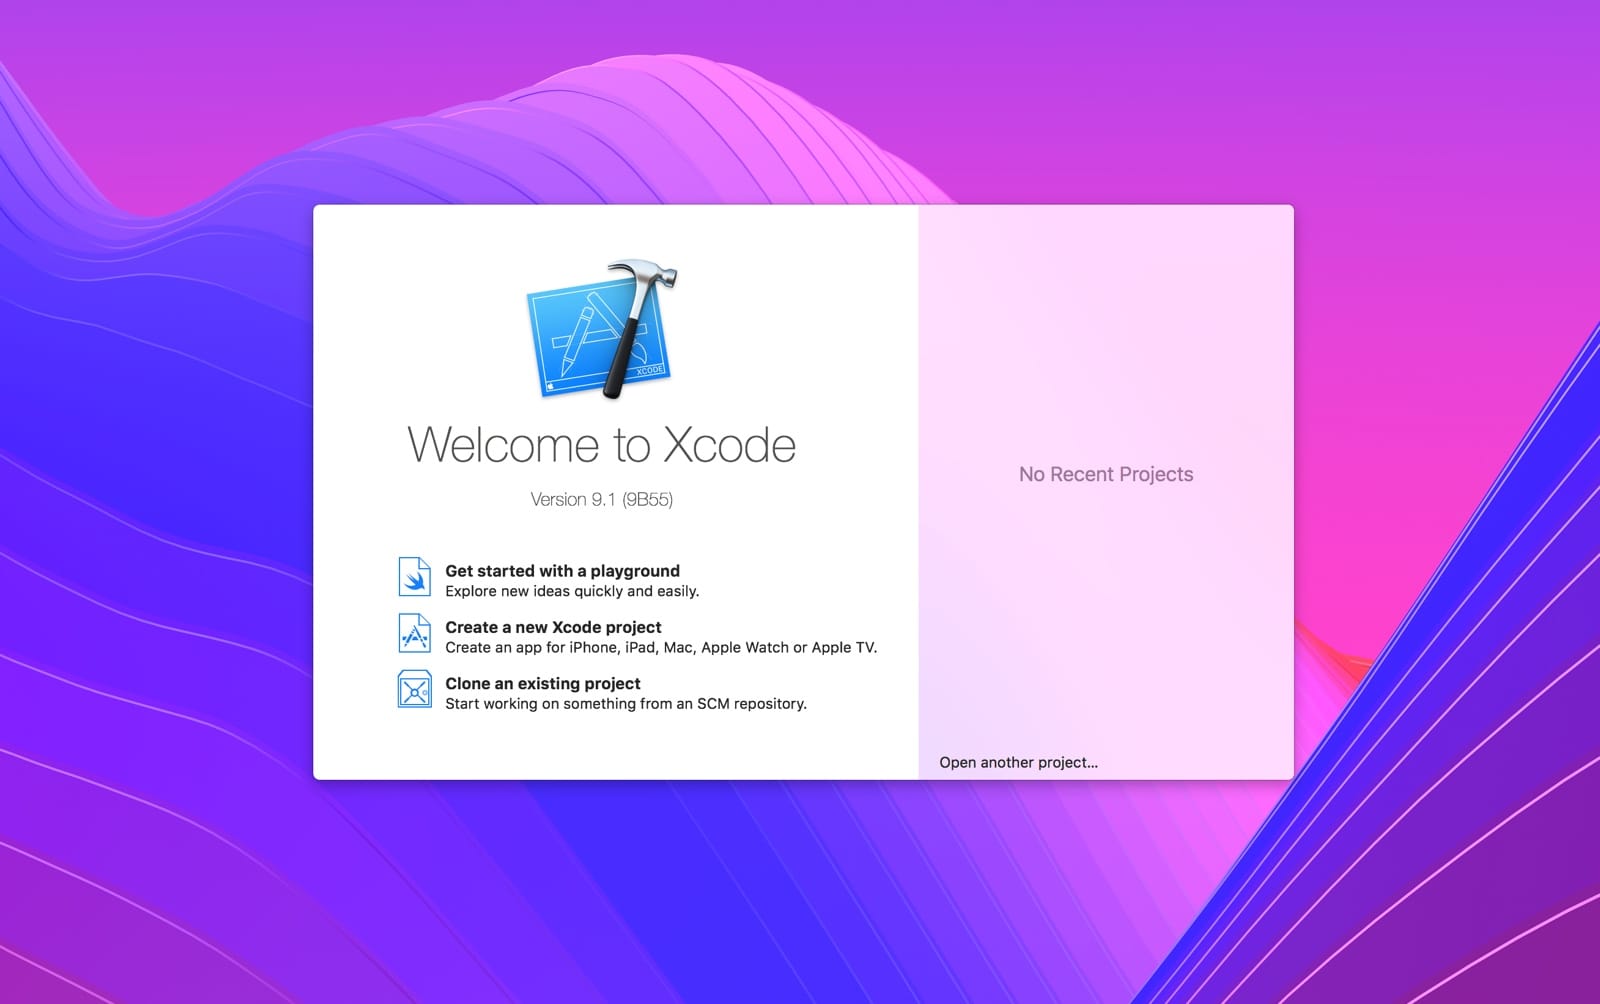
Xcode’s Welcome Screen
First, let’s download Xcode in the App Store. The first time you run Xcode, you’ll see this screen. This is the starting window, allowing you to start a Playground file, create a new Xcode project or Clone an existing project.
A Playground allows you to experiment your code and see results in real-time. Before writing a lot of code, I think it’s important to have fun with the user interface first. As for Cloning, this is something we’ll explore later.
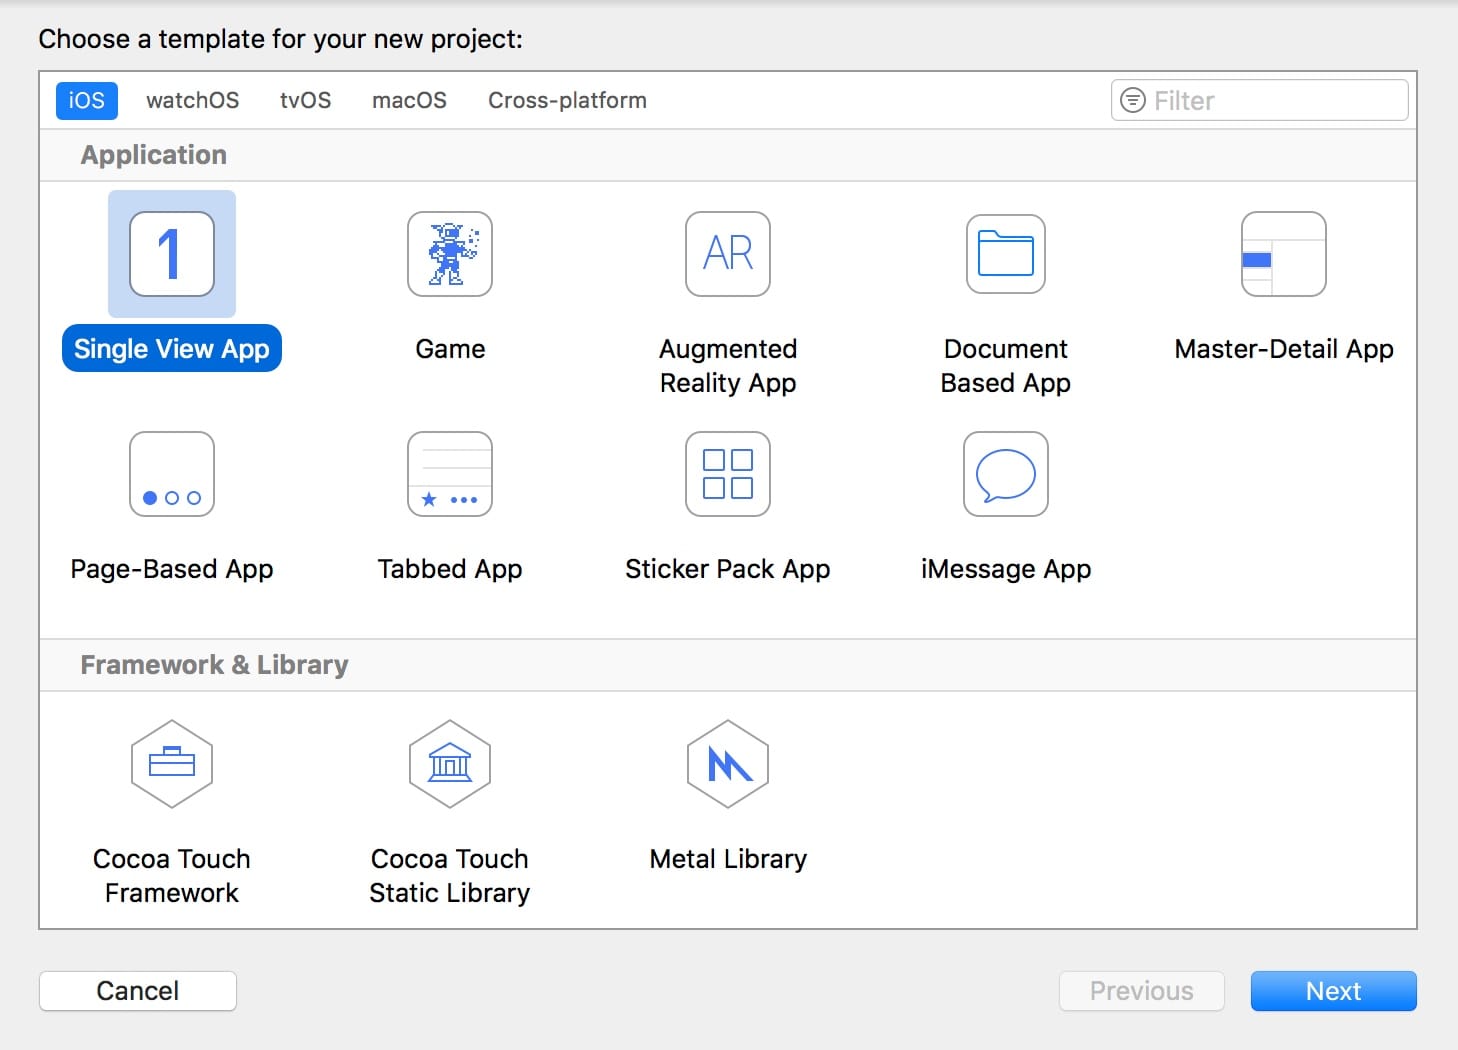
Create a New Xcode Project
Let’s click Create a new Xcode project. In this screen, you’ll find a bunch of starting templates for different needs, ranging from iOS, macOS to tvOS. Normally for an iOS app, you’ll want to use Single-View Application. Go to iOS > Application > Single View Application.
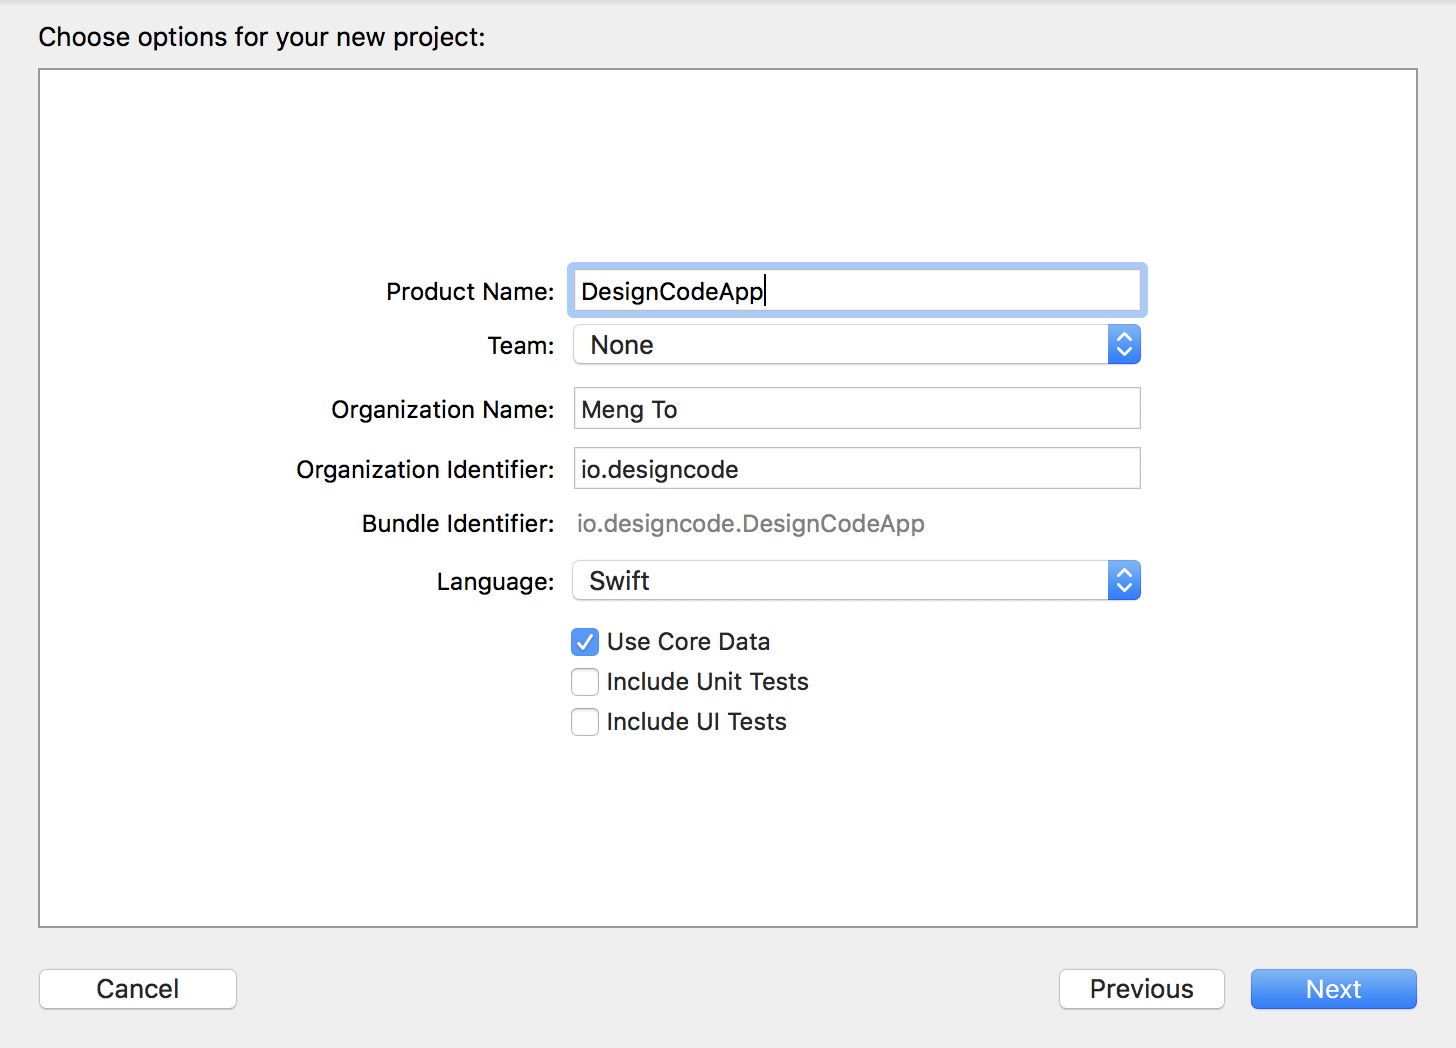
Project Name
This is where you’ll set your project and organization names. Set the name of the app DesignCodeApp.
The Organization Name is your name, or your company name. The Organization Identifier is typically your domain name in reverse. Language will be Swift. Let’s check CoreData since we’ll need it later.
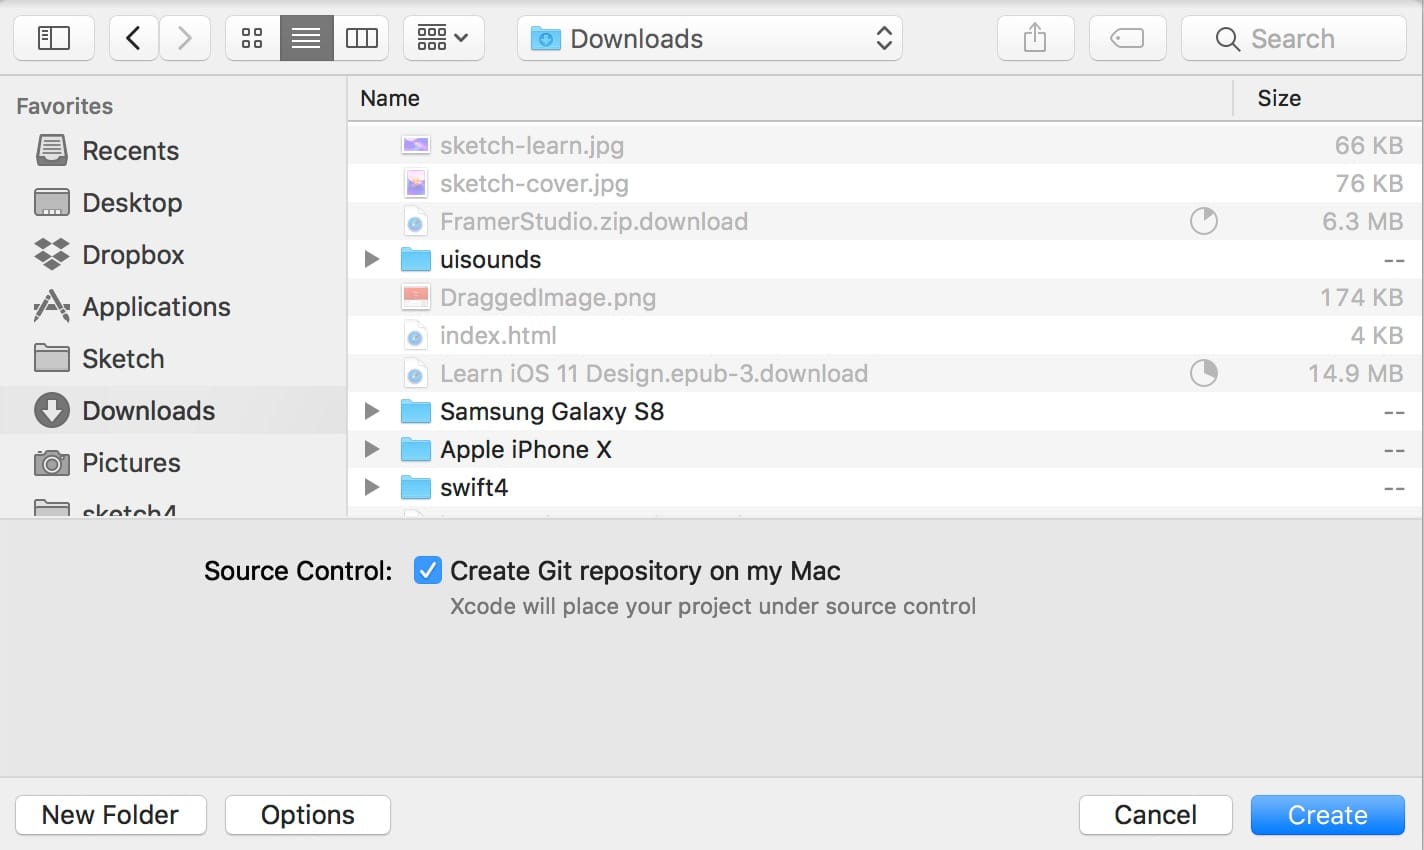
Saving the Project
Click Next. Now, save the Project to your Mac, typically in Downloads or Documents. Make sure to enable Create git repository on my Mac; this allows you to keep a version history of your project. It’s similar to Abstract.
Finally, click Create. That’s it, you’ve created your first iOS app!
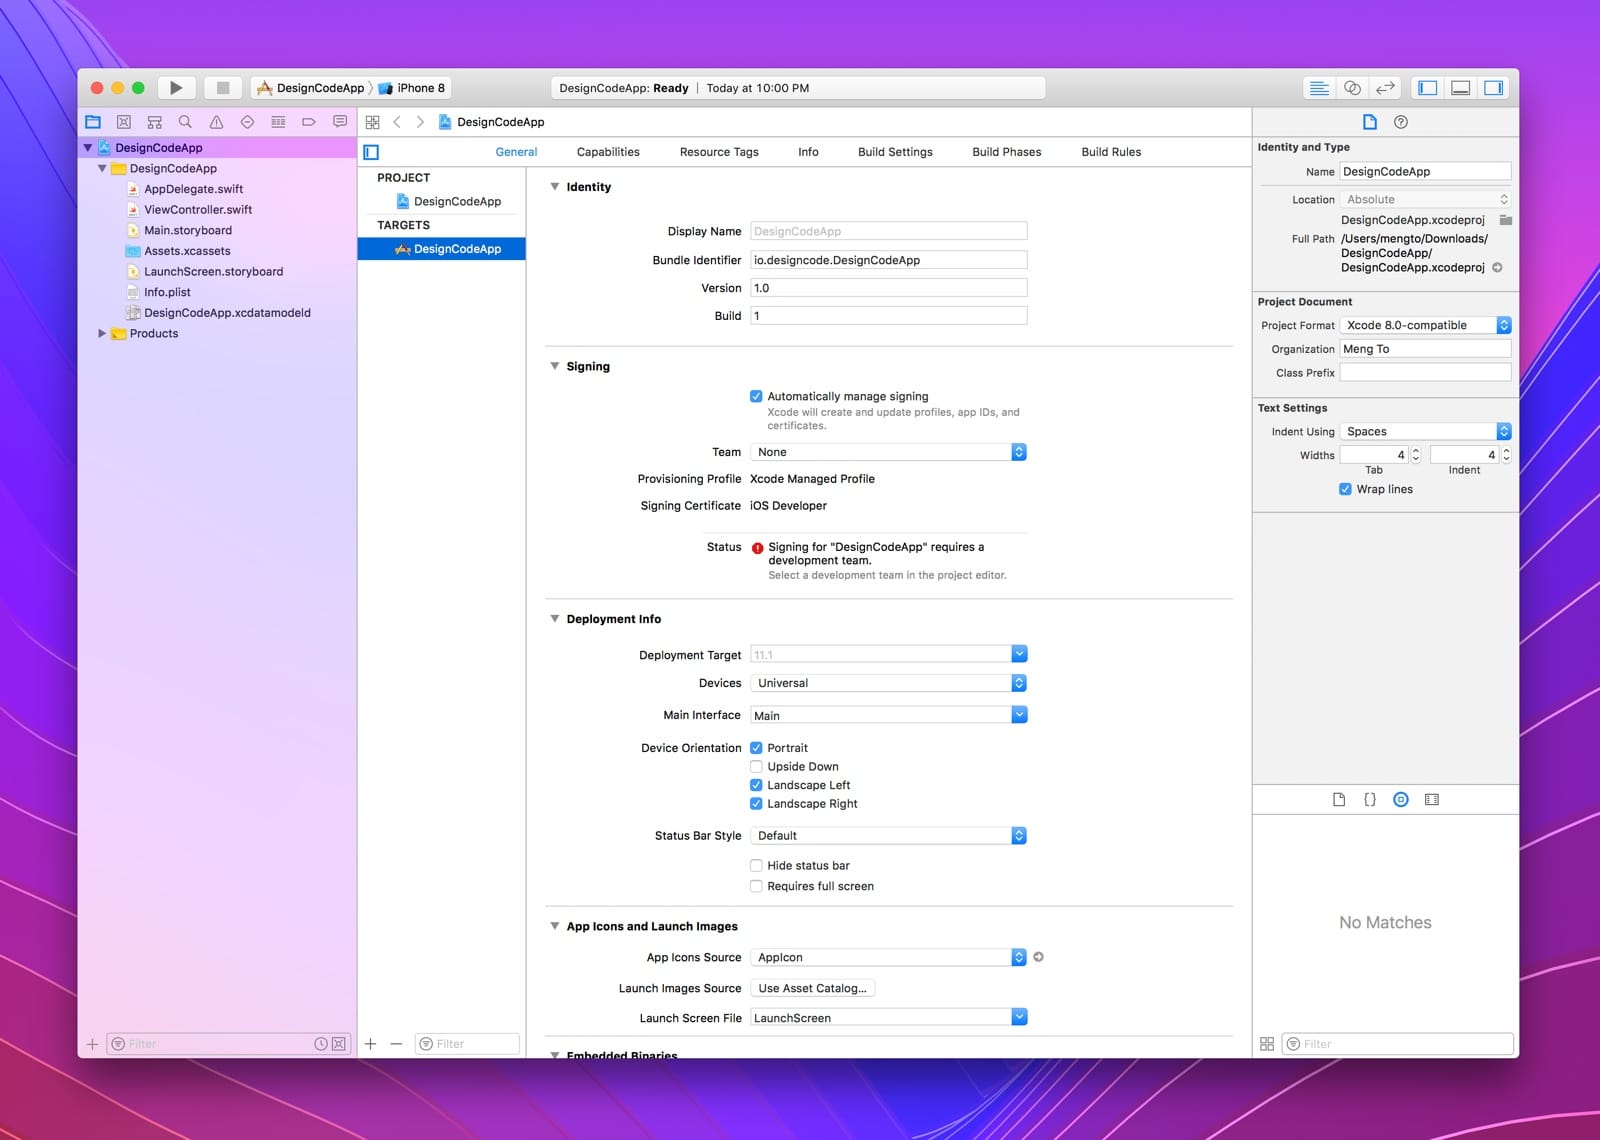
Xcode’s Layout
The first time you land in Xcode, it’ll look overwhelming. Rest easy, I’m here to guide you. I like to compare Xcode to a big, do-it-all application like Photoshop, because as a tool, you can really do anything with it. You can build your dream app without jumping between many applications. It’s scary at first, but once you learn how to navigate through the complex layout, you’ll love features such as Assets Catalog, Storyboard and the iOS Simulator.
But unlike Photoshop, Xcode is unavoidable. The large majority of iOS developers use it. You need everything in Xcode for designing, coding, testing, debugging and a multitude of other tasks. After 3 years of developing for iOS, I still find myself learning simpler ways to design things and that’s really exciting. So that’s why I’m writing this book. I want to teach you my workflow and guide you through this experience. Now, let’s explore some of the most important aspects of Xcode.
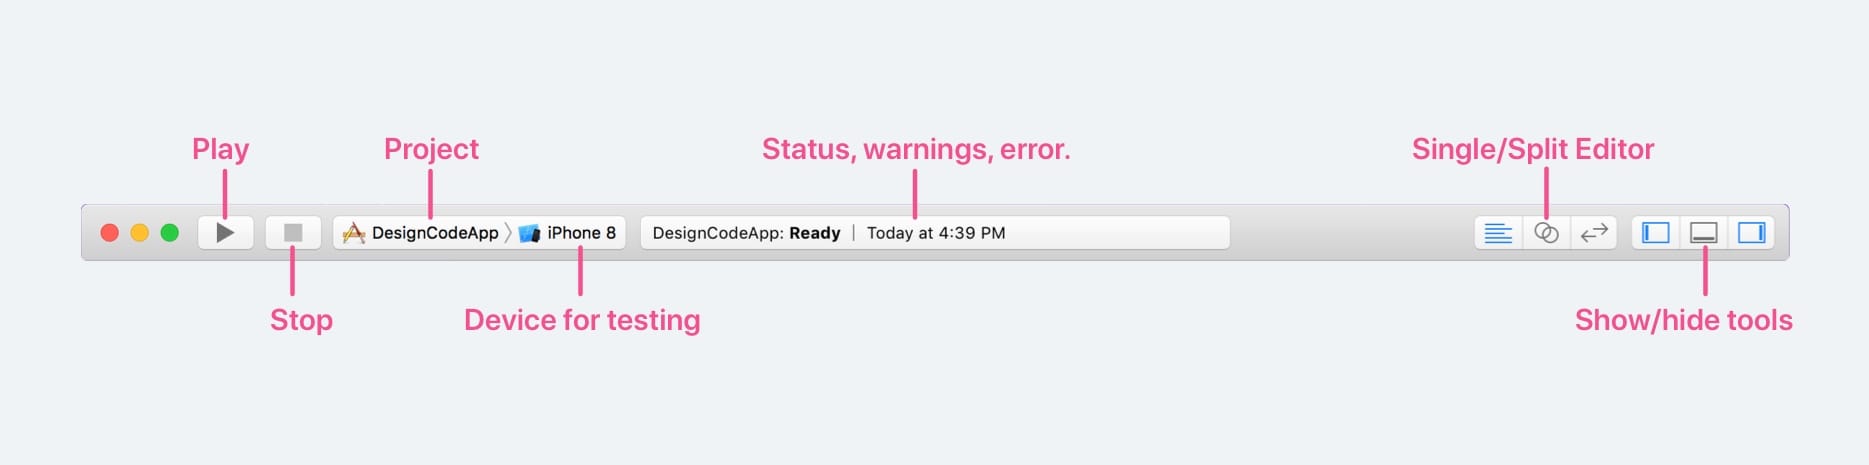
The Toolbar
First, the toolbar. Just like most Mac apps, the toolbar is always present. It allows you to quickly do things that you often perform.
The left part of the toolbar lets you run, stop and select which device to test on. If you have a registered device, you can even test on your iPhone. Since we’re working with an iPhone 8 design, let’s select the iPhone 8.
The middle portion shows you what’s going on with your app. Whenever you have warnings or errors, it’ll show up there.
The right part shows the editor and utilities. The show/hide tools on the far right are especially useful for showing and hiding parts of your Xcode UI. Because Xcode can be pretty busy, I suggest hiding parts that you don’t need. Useful keyboard shortcuts are: Command + 0 to show/hide the Navigator and Command + Option + 0 to show/hide the Inspector.
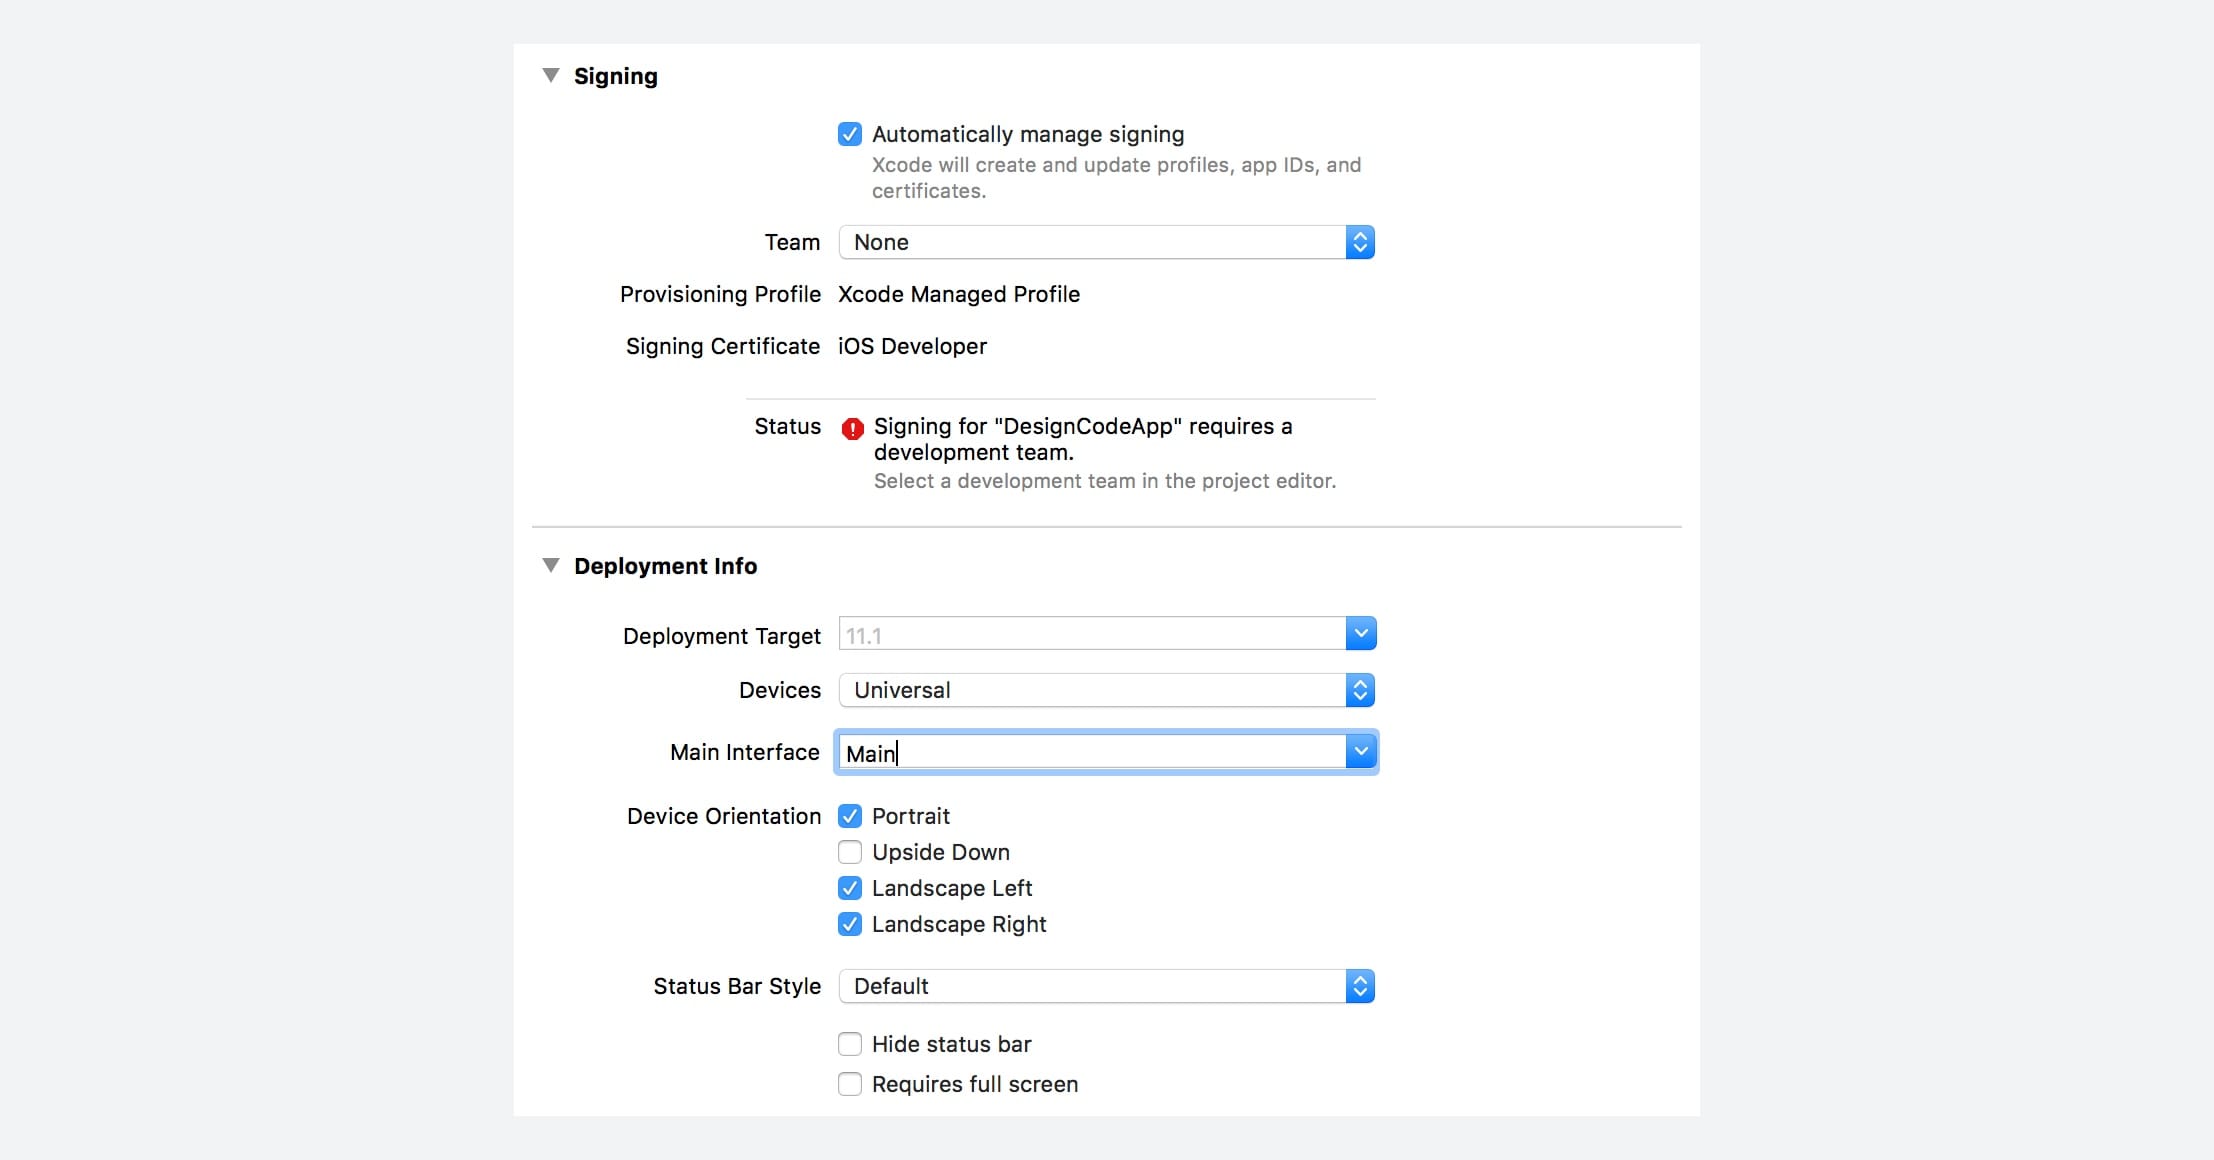
Project Settings
Your project is already set up and ready to go thanks to the first dialog you filled. But if you need to edit settings, this is where you go. For example, you can select which device orientations to support. Also, you can change your status bar style to Light or Dark, or completely hide it.
The Project Navigator
If you’ve ever built a Website, you’ll remember that a site always starts with a few files: index.html, images, css and javascript files. Well, the same concept applies here. The project navigator is a reflection of your own Xcode project folder.
.swift files are the equivalent of your javascript files. They allow you to script your app.
AppDelegate.swift is where you put all the scripting at launch.
ViewController.swift is your screen. Normally, you create a new script per screen.
Main.storyboard is where you do all the layout and styling.
Assets.xassets is where you put all your images.
LaunchScreen.storyboard is where you set up the first launch screen.
The M means that the file has been modified. That’s because we enabled up Create git repository on my Mac. It’s like in Abstract for Sketch. If you’re not familiar with Git, I suggest watching this video.

The Other Navigators
Above the main Project Navigator, you’ll notice a bunch of sub-navigators. They’re mostly for source control, searching and debugging, which you can ignore at this stage. However, whenever your app crashes, Xcode will automatically change to the Debug Navigator tab. As a beginner, you probably won’t understand much, so I suggest to always go back to the first Project Navigator to avoid being lost.

Inspectors
Just like most Mac apps, Inspectors on the right are used for editing selected elements. This is purely contextual, so we’ll explore more when we edit specific elements.
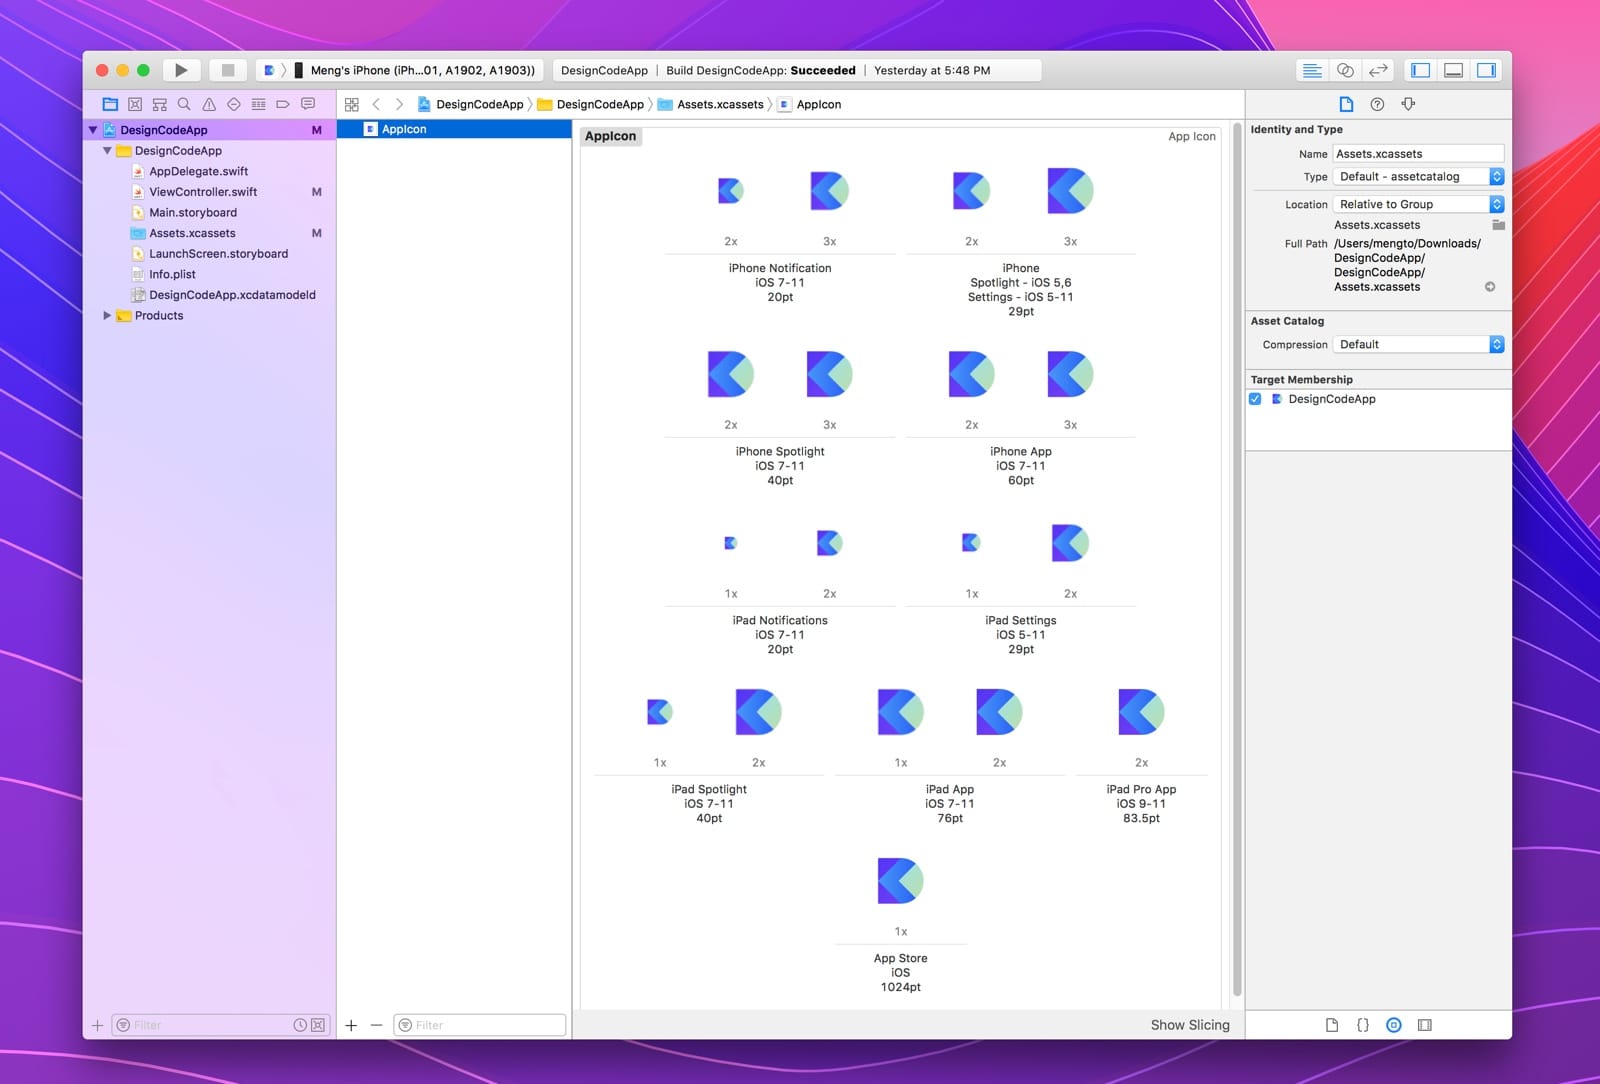
The Asset Catalog
One of my favorite features about Xcode is how easy it is to organize images for different resolutions. In the Asset Catalog, you can quickly edit your AppIcon and images for your app.
App Icon
Using Apple’s Icon template, you can quickly export icons of all sizes and resolutions for both iPhone and iPad. You can drag and drop the images to their respective fields, by following the size in pt, at 1x, 2x or 3x.
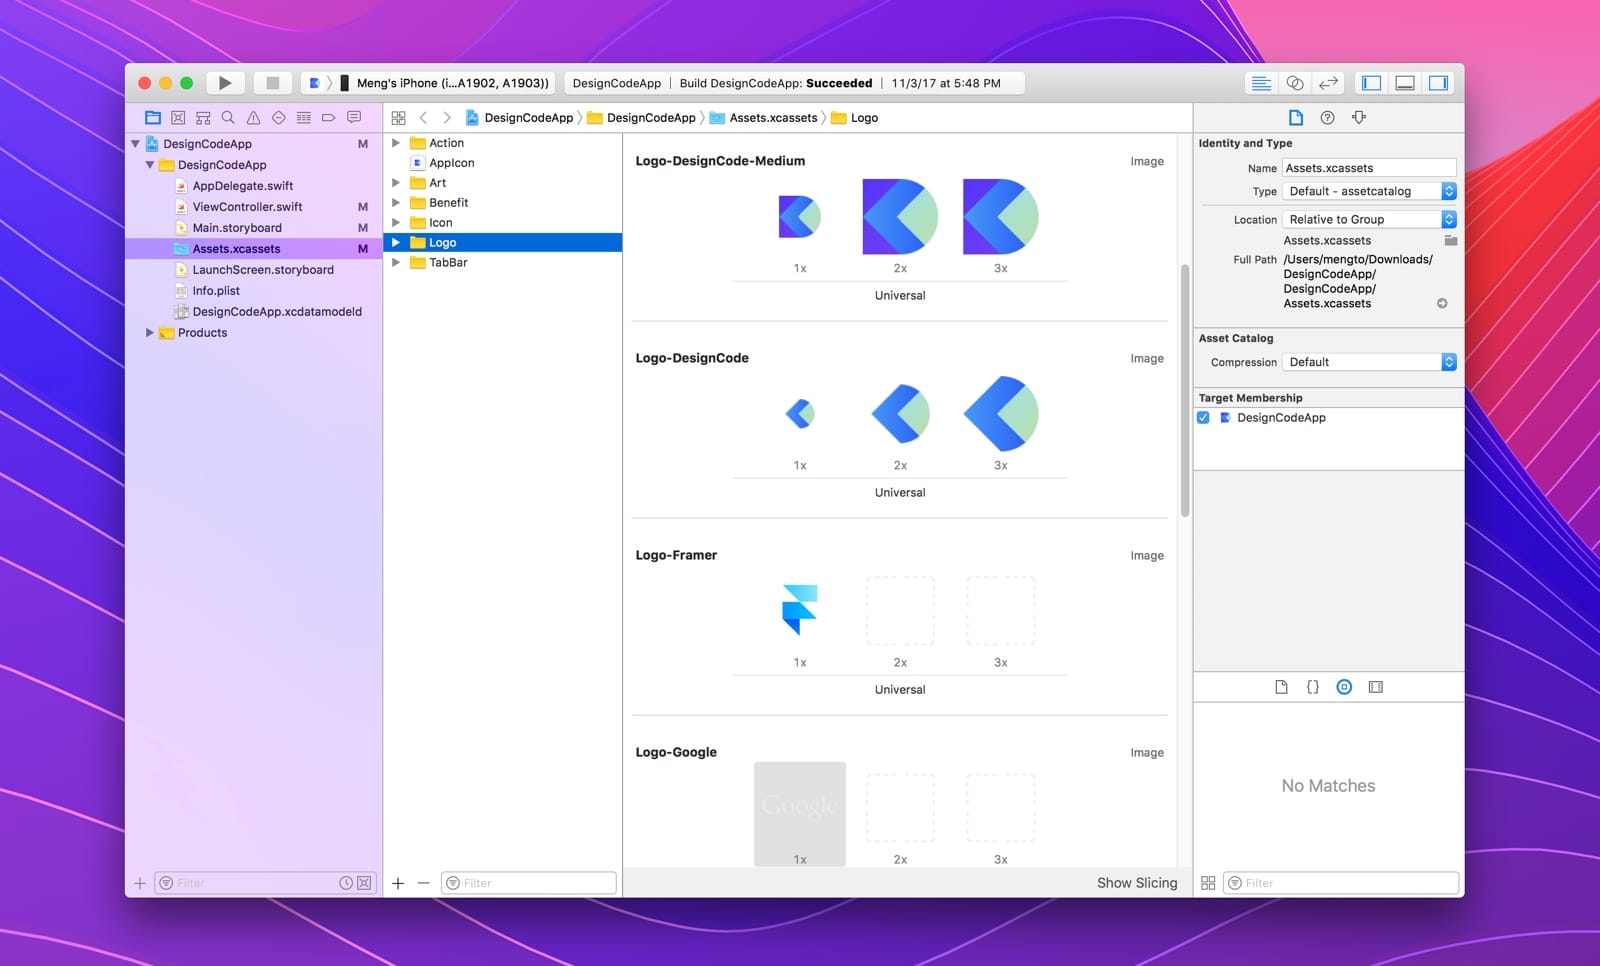
PDF Assets
For the rest of the assets, we’ll mostly use PDF files, since it can be challenging to manage 3 resolutions per asset. Except for backgrounds, photos and avatars, PDF is the perfect choice for glyphs and other flat vector assets. But, just like SVG, PDF can act weirdly sometimes, depending on how you set up your glyphs. So, it’s nice to have the PNG format as a backup.
Instead of generating 3 images (1x, 2x, 3x) per asset, you only need one single file. In Sketch, you need to export them in PDF at 1x. However, there are a few things to note. The resolution matters. You must export at 1x to make sure that it looks good in Storyboard. Xcode re-renders them to PNG files to 1x, 2x and 3x for you.
To import your assets, simply drop the entire folder. If named correctly, Xcode will automatically bundle the assets together in their respective resolution.
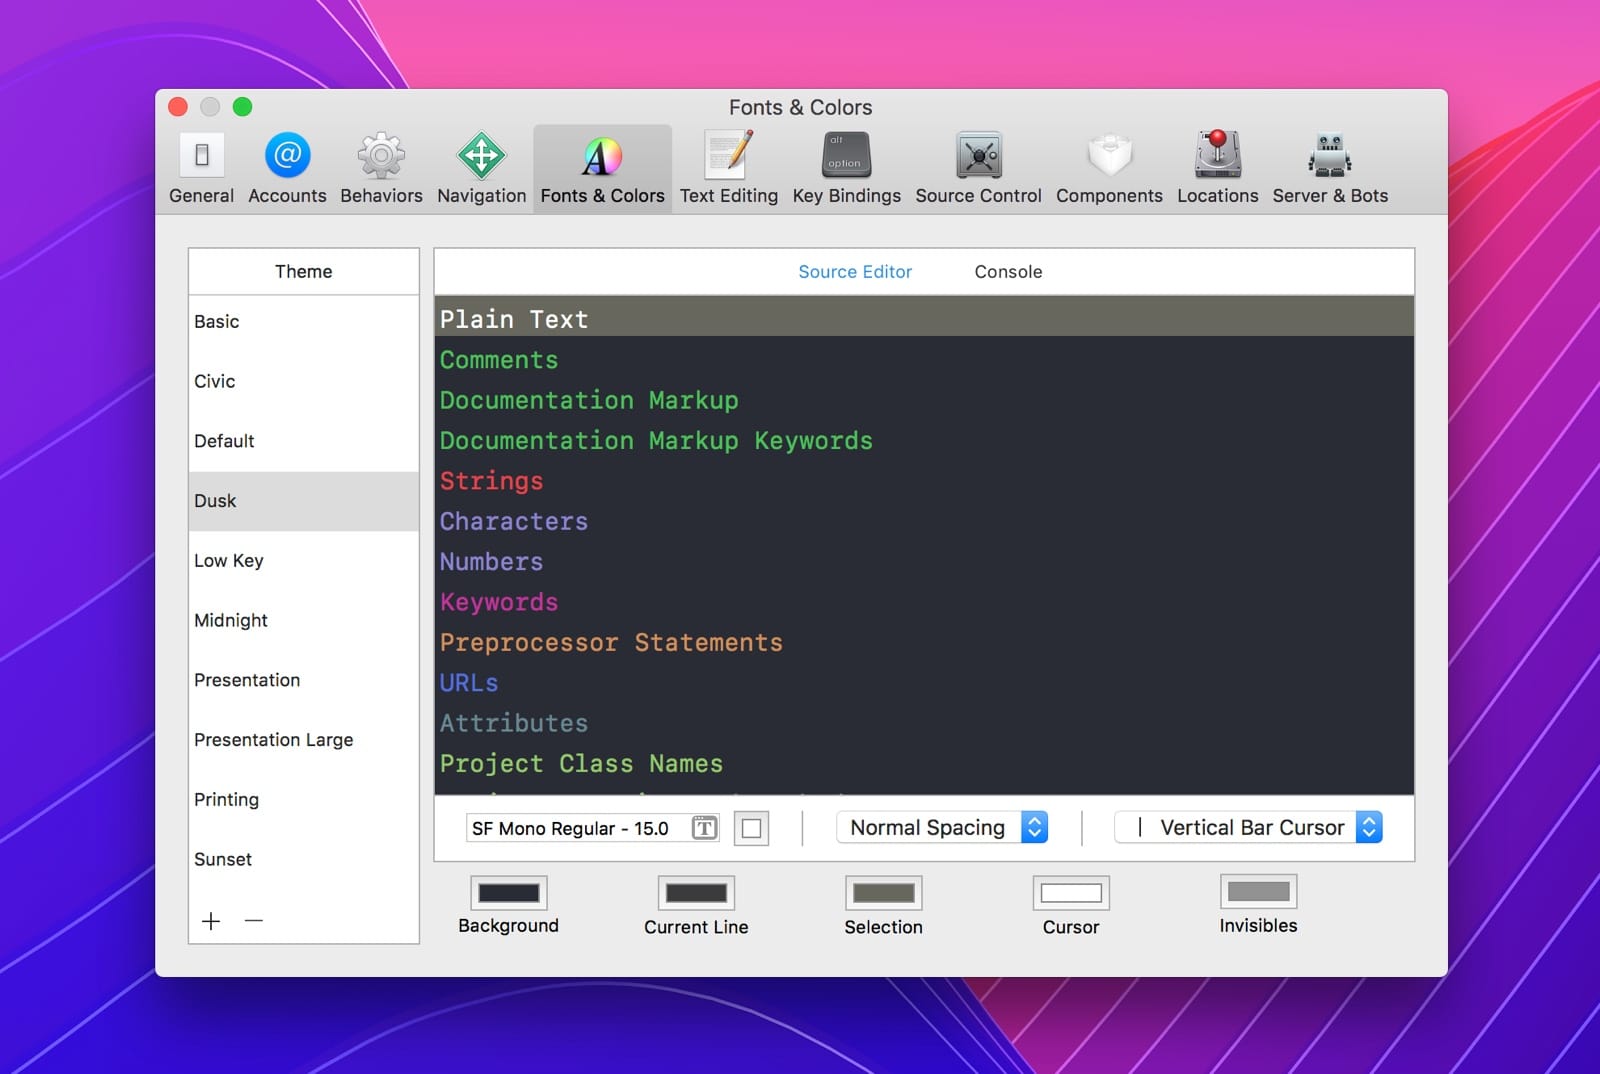
Themes for Xcode
Xcode is filled with options. It’s best not to cover all of them right now, since it would only distract you from building the actual product. But there’s a pretty neat feature that allows you to change the code theme in Xcode. Go to Xcode > Preferences > Fonts & Colors. There you can choose the Dusk theme, which is my favorite.
Running your first App!
Now that you’re getting familiar with the way the layout works, let’s run your first app by clicking on the Run button. If you didn’t do anything terrible, like deleting files by accident, an iOS Simulator will come up. This how your app will look like as you build it. It’s fully interactive.
The first time that you’re running your app, it’ll just be a blank white screen.
While it may be tempting to run your app on iPhone X, one thing to note is that the performance isn’t great. That’s because the iPhone X renders at 3x, so on the iOS Simulator, the experience isn’t great. On the other hand, running on the device is butter smooth!
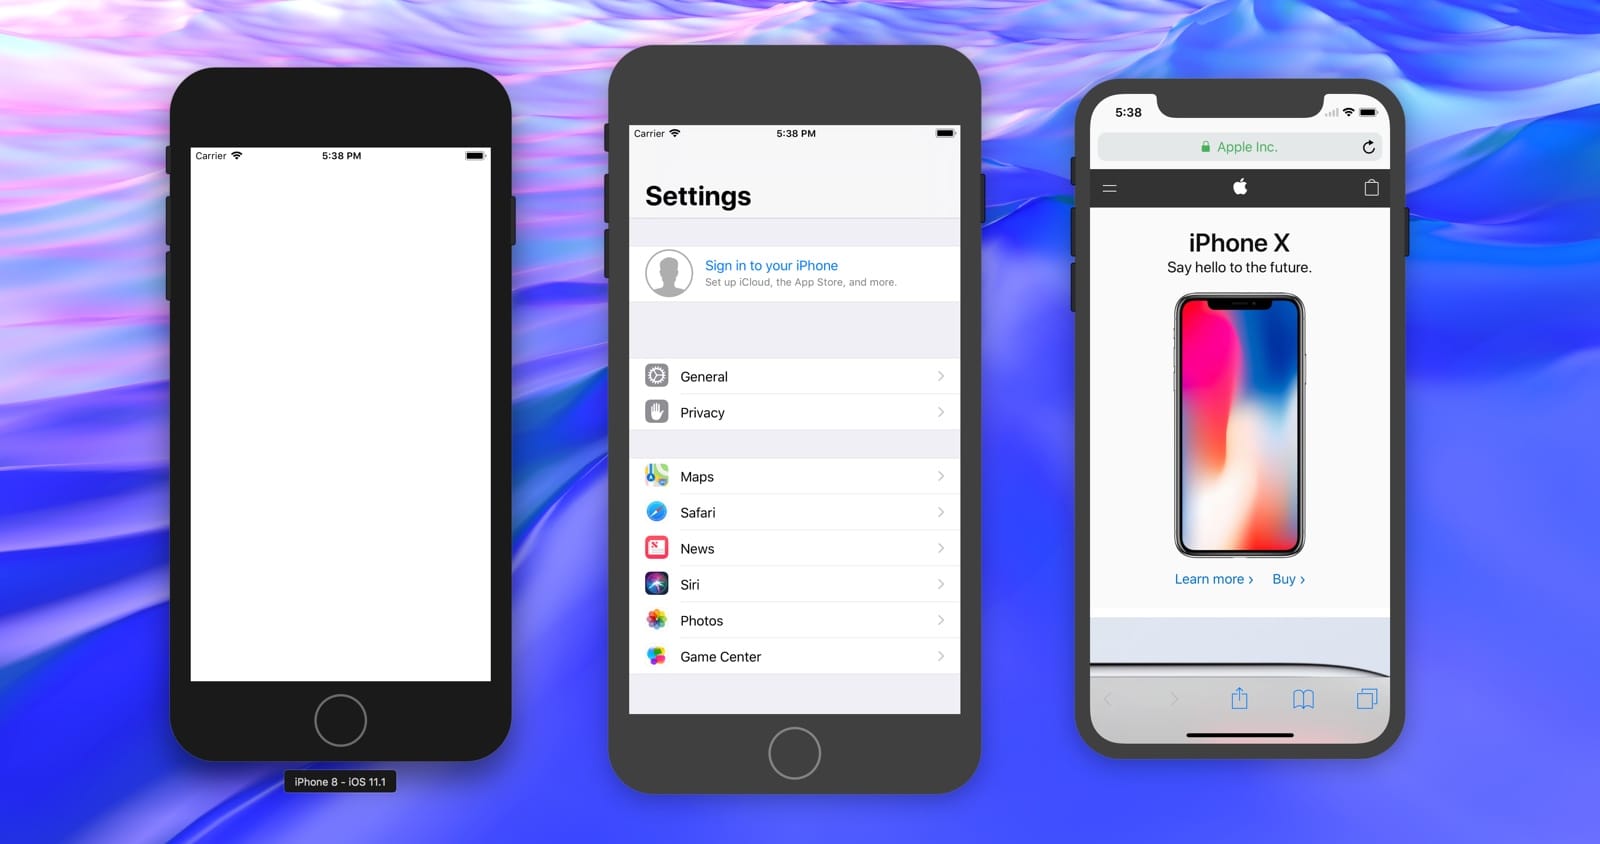
Customizing the iOS Simulator
You can change the size of your iOS Simulator by going to Window > Scale > 100%, or by pressing Command + 1, 2 or 3.
You can press Command + Shift + H to go back to the Home screen and play with iOS’s default apps like Safari or Settings. Safari is extremely useful for testing your site, especially on the iPhone X device.
New in Xcode 9, you can open multiple Simulators at once!
To rotate, use Command + Right Arrow or Left Arrow. To reset the content, just go to File menu > iOS Simulator > Reset Content and Settings. Finally, you can take screenshots by pressing on Command + S.
Xcode Source Control
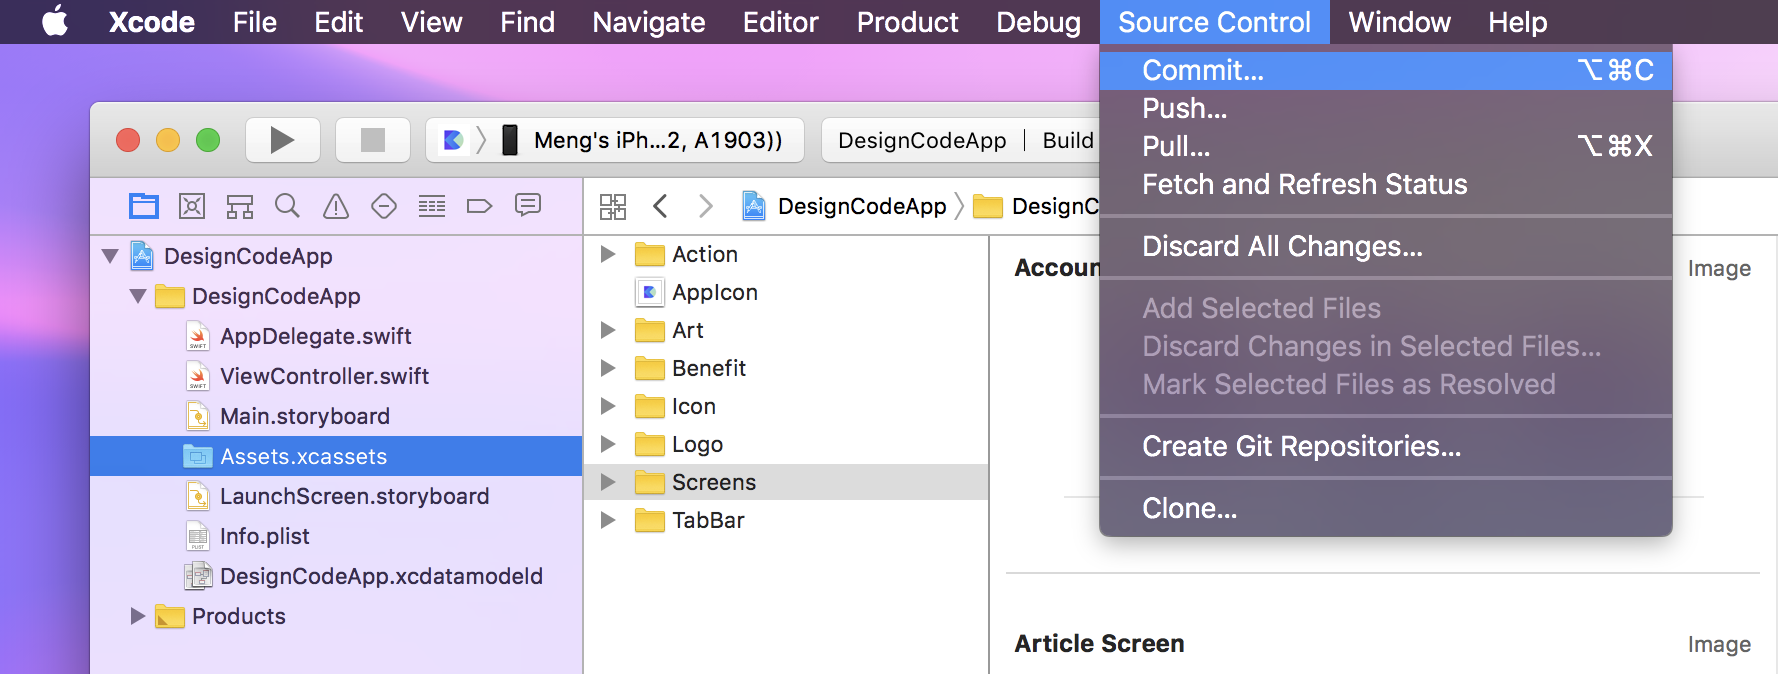
Let’s go back to Xcode and save our current changes into a version, so that we can keep a history. This also allows us to go back to previous versions when mistakes happen, or collaborate with teammates. To do that, go to Source Control and click Commit…. Then, enter a description of your commit like “Added the assets” and click Commit Files. Once that is done, you’ll notice that the M next to Assets.xcassets will disappear. This simply means that the changes were saved in a version.
Every time you finish a feature, task or section, it is recommended to commit your changes.
Conclusion
This concludes the short intro to Xcode. These are the features that I use the most for building apps. As for the rest, you’ll learn them progressively as we face problems.