Sketch Runner Workflow
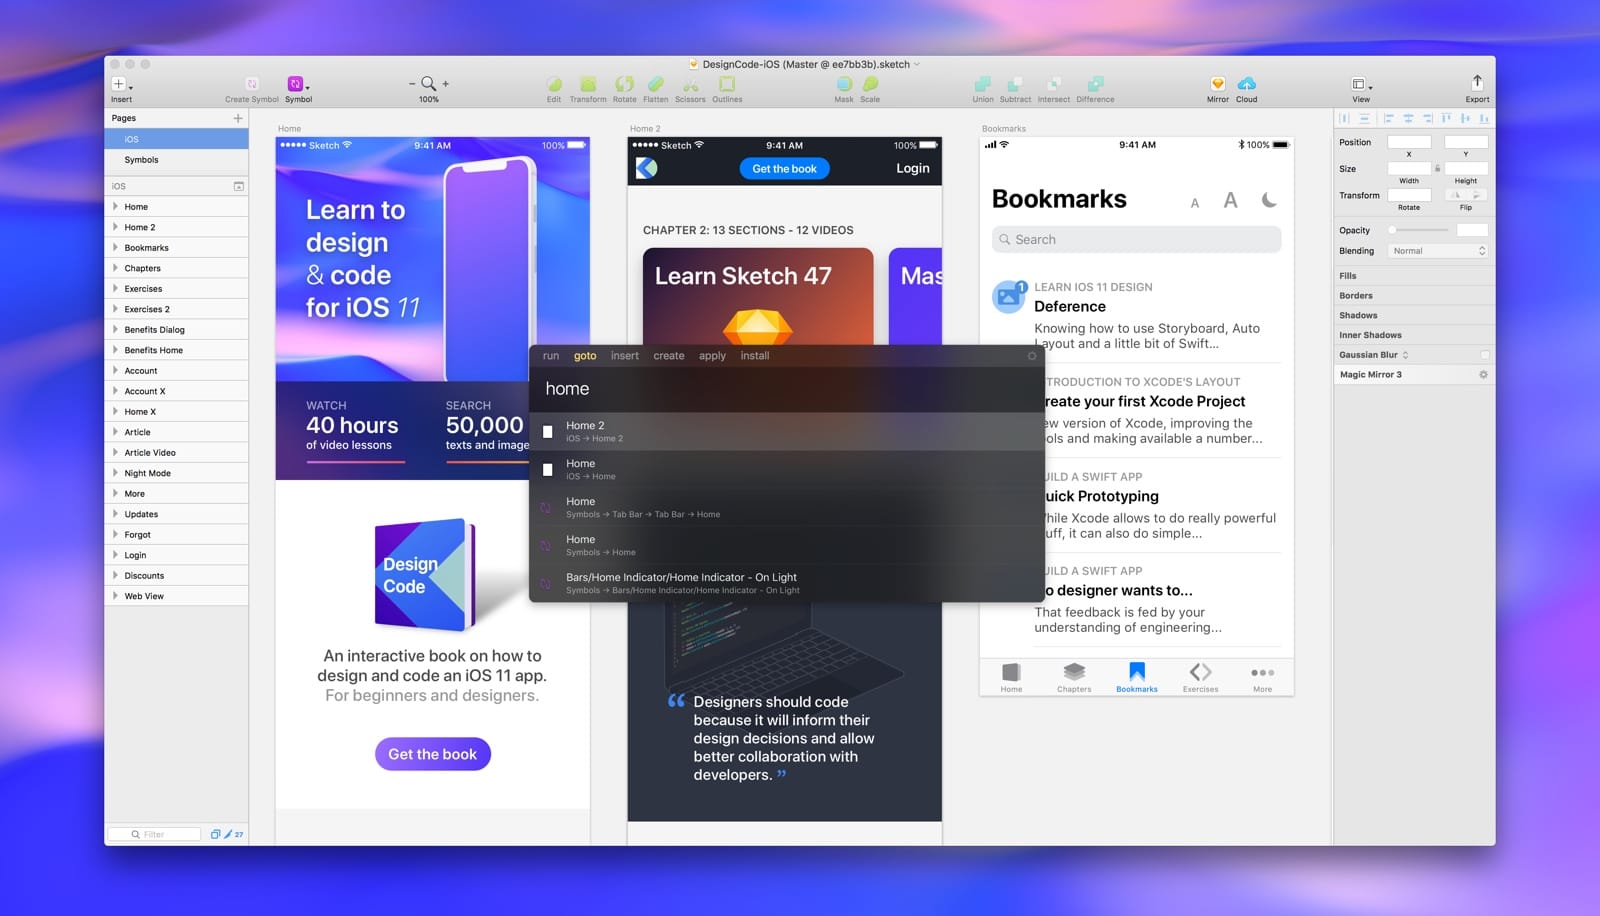
Probably the most popular and efficient plugin of all is Sketch Runner. It’s absolutely the first thing you need to download. Runner is an essential multi-purpose Plugin (on steroids) for inserting UI elements and installing new plugins. It’s like the Mac’s Spotlight or Alfred within Sketch. To developers, this is the equivalent of Packages in Atom. And it can do so much more:
Install Plugins
One of the most useful things about Runner is that it lets you install plugins without leaving Sketch.
To access runner you just need to press (Command + Apostrophe), you can navigate between Tabs, just by pressing the Tab key and you can install any plugin you would like.
The search is really powerful and descriptive, with a useful shortcut to launch the plugin’s site (Option + Enter). Plugins are like iPhone apps, as in they make your Sketch experience far more personal and enhanced. Sometimes, the plugin does a better job than what’s found in the native features. In fact, some of these plugins have inspired native features, such as Resizing Constraints and Plugins Manager.
Insert Symbols from iOS UI Kit
Since the iOS UI Kit is now a Library, getting access to it requires you to click Insert or Symbols from the Toolbar. However, with Runner, this experience is drastically better because of the search. In Runner, you simply Tab twice to get to Insert, then type iPhone X Status, for example, to get the status bar. This works for your own Libraries or Symbols.
Generating Content
When it comes to getting beautiful photos from Unsplash automatically generated, Craft and Runner got you covered. Select any shape and make a search for the Command name of your Plugin. In this example, we’re using Craft’s Unsplash command. This also works with Content Generator or any Plugin for that matter. Some great uses are: Measure’s sizes and properties or Craft’s extensive commands. Of course, you can also use this to activate hard-to-reach native commands like Collapse All Groups, Uppercase, Align, Arrange, etc.
iOS 11 Templates and Libraries
Once we have Runner set up, we can immediately start exploring the various UI Kits and Plugins made by the community. The exciting part is that there are thousands of resources out there.
Since we’re designing for iOS, we’ll need to download Apple’s UI Kit and Great Simple Studio iOS 11 GUI. These kits can be saved to your Templates collection (File / Save Template…), or they can be used as a Library. Also, we have Sketch’s preloaded iOS UI Kit for inserting UI elements on the fly. Libraries can be added from the Preferences pane.
Working With Data
Craft is an all-in-one plugin that can generate dynamic content, duplicate Symbols with dynamic content, inspect and deliver assets, and even prototype directly in Sketch. Next to Runner, Craft is arguably the most comprehensive plugin. In big team environments, this is an essential tool because it can deal efficiently with a lot of moving parts.
If you’re already working with InVision’s full suite of services, you’re in luck, since you can basically sync your prototype, Freehand and Libraries with them. If not, you can still use their content features, as they will come in handy for any type of user.
Version Control with Abstract
When you’re in a team with multiple designers working on the same Sketch file, it can become erratic to find a common ground and be on top of things. Should you beach ball the files via email? Should you have multiple files of the same design? Well, Abstract will solve that problem for you. It’s like the Github for designers. Every Sketch file will be stored in one repository and shared across your team. Everyone will use the same Master files. Team members, including designers, developers and product managers can open those files without worrying about making destructive changes.
If you’re an active Collaborator, you can Branch from the Master file. In other words, you create your own version of that file. When finished, you can commit changes to the Master file. If conflict is detected, you have the choice to compare and choose which change is correct. If not, you can merge those changes to the Master file. Abstract is really robust, allowing you to follow long history of changes and communicate with your team through comments and commits.
Nested Symbols
With all the essential UI Kits and plugins installed, we can finally start combining with the powerful native features already in Sketch. Let’s dial back a little and learn about how to work with Sketch’s built-in features.
When you have a lot of repeating elements, such as a list of items, or a grid of content, you’ll want to use Symbols. That way, when you modify something in that item, it’ll automatically update across all the Symbols.
Sometimes, contents in the Symbol are not just restricted to images and texts. You may need to change the icon, or the background color. That’s where Nested Symbols come in. With this powerful workflow, you can customize all sorts of grouped layers.
Overrides
When you have multiple Symbols, you’ll want to customize the content individually. With Overrides, you can quickly replace the texts and images on the fly. When working with Nested Symbols, you can override Symbols instead of just texts and images. This opens up all kinds of possibilities in term of dynamic content that can be overridden.
Libraries
Working in a team environment requires a different workflow than working alone. What happens when you have there are 3+ people working on the same design? What if you have a large style guide, comprised of hundreds of Symbols, like colors, buttons, contents, dialogs and menus? With Libraries (new in Sketch 47), you can put all your Symbols in a separate Sketch file that exists in a common folder, like on Dropbox or Abstract. Libraries can be imported to your main Sketch file and used as local Symbols. However, Symbols inside Libraries can only be modified from that folder, separately. Whenever a change is made in that Sketch file, it can be synchronized back to your main Sketch file.
For example, let’s say I have a Sketch file called main. I also have a Library file named styleguide. From main, I import styleguide in order to use all its Symbols. I can’t modify those Symbols from main. But I can open styleguide and edit the Symbols there. When I save styleguide, the changes are sent to main.
Adaptive Layouts
Designing for multiple devices has become a necessity. We don’t design for a single iPhone anymore. We design for dozens of different iPhones and iPads, all with their own resolution and pixel density. We design for landscape, and for Web, which has no set resolution. You get the picture. Your Artboard has to react to the screen changing in size. That’s where Resizing Constraints comes in.
For example, by setting the constraint to be against Top, Left, Right or Bottom, you get a box that follow those borders. If your box has a 10 px distance from the Left, it’ll remain 10 px, no matter how much you resize the containing Group or Artboard. Additionally, you can set your element to have a fixed width or height. Like this, when the container gets resized, the element will keep the fixed size.
Advanced Constraints with Auto Layout
Auto Layout truly closes the gap between design and development. When you work with so many resolutions (iPhone X, iPhone 8, Android, Web), you can save a ton of edits by setting up constraints, similarly to how you’d use Auto Layout in Xcode. Working with adaptive layouts has been a major need for designers and this is the answer.
While Sketch has its own Constraints feature, it is still fairly basic compared to Xcode’s Auto Layout and Stack Views. For example, you can’t pin real pixel values against the borders. You can’t stack similar elements, so that they become dynamic with each other, reacting to resizing in a way that a dynamic layout would. With Anima’s Auto Layout, you can take this to the next level.
Smooth Corners
The iOS app icon doesn’t have a traditional rounded corner. It has something we call “Super Ellipse”. Typically, designers have to edit the Bezier path to get the right corners. But with this new feature, you can get the same exact result by turning on “Smooth Corners”.
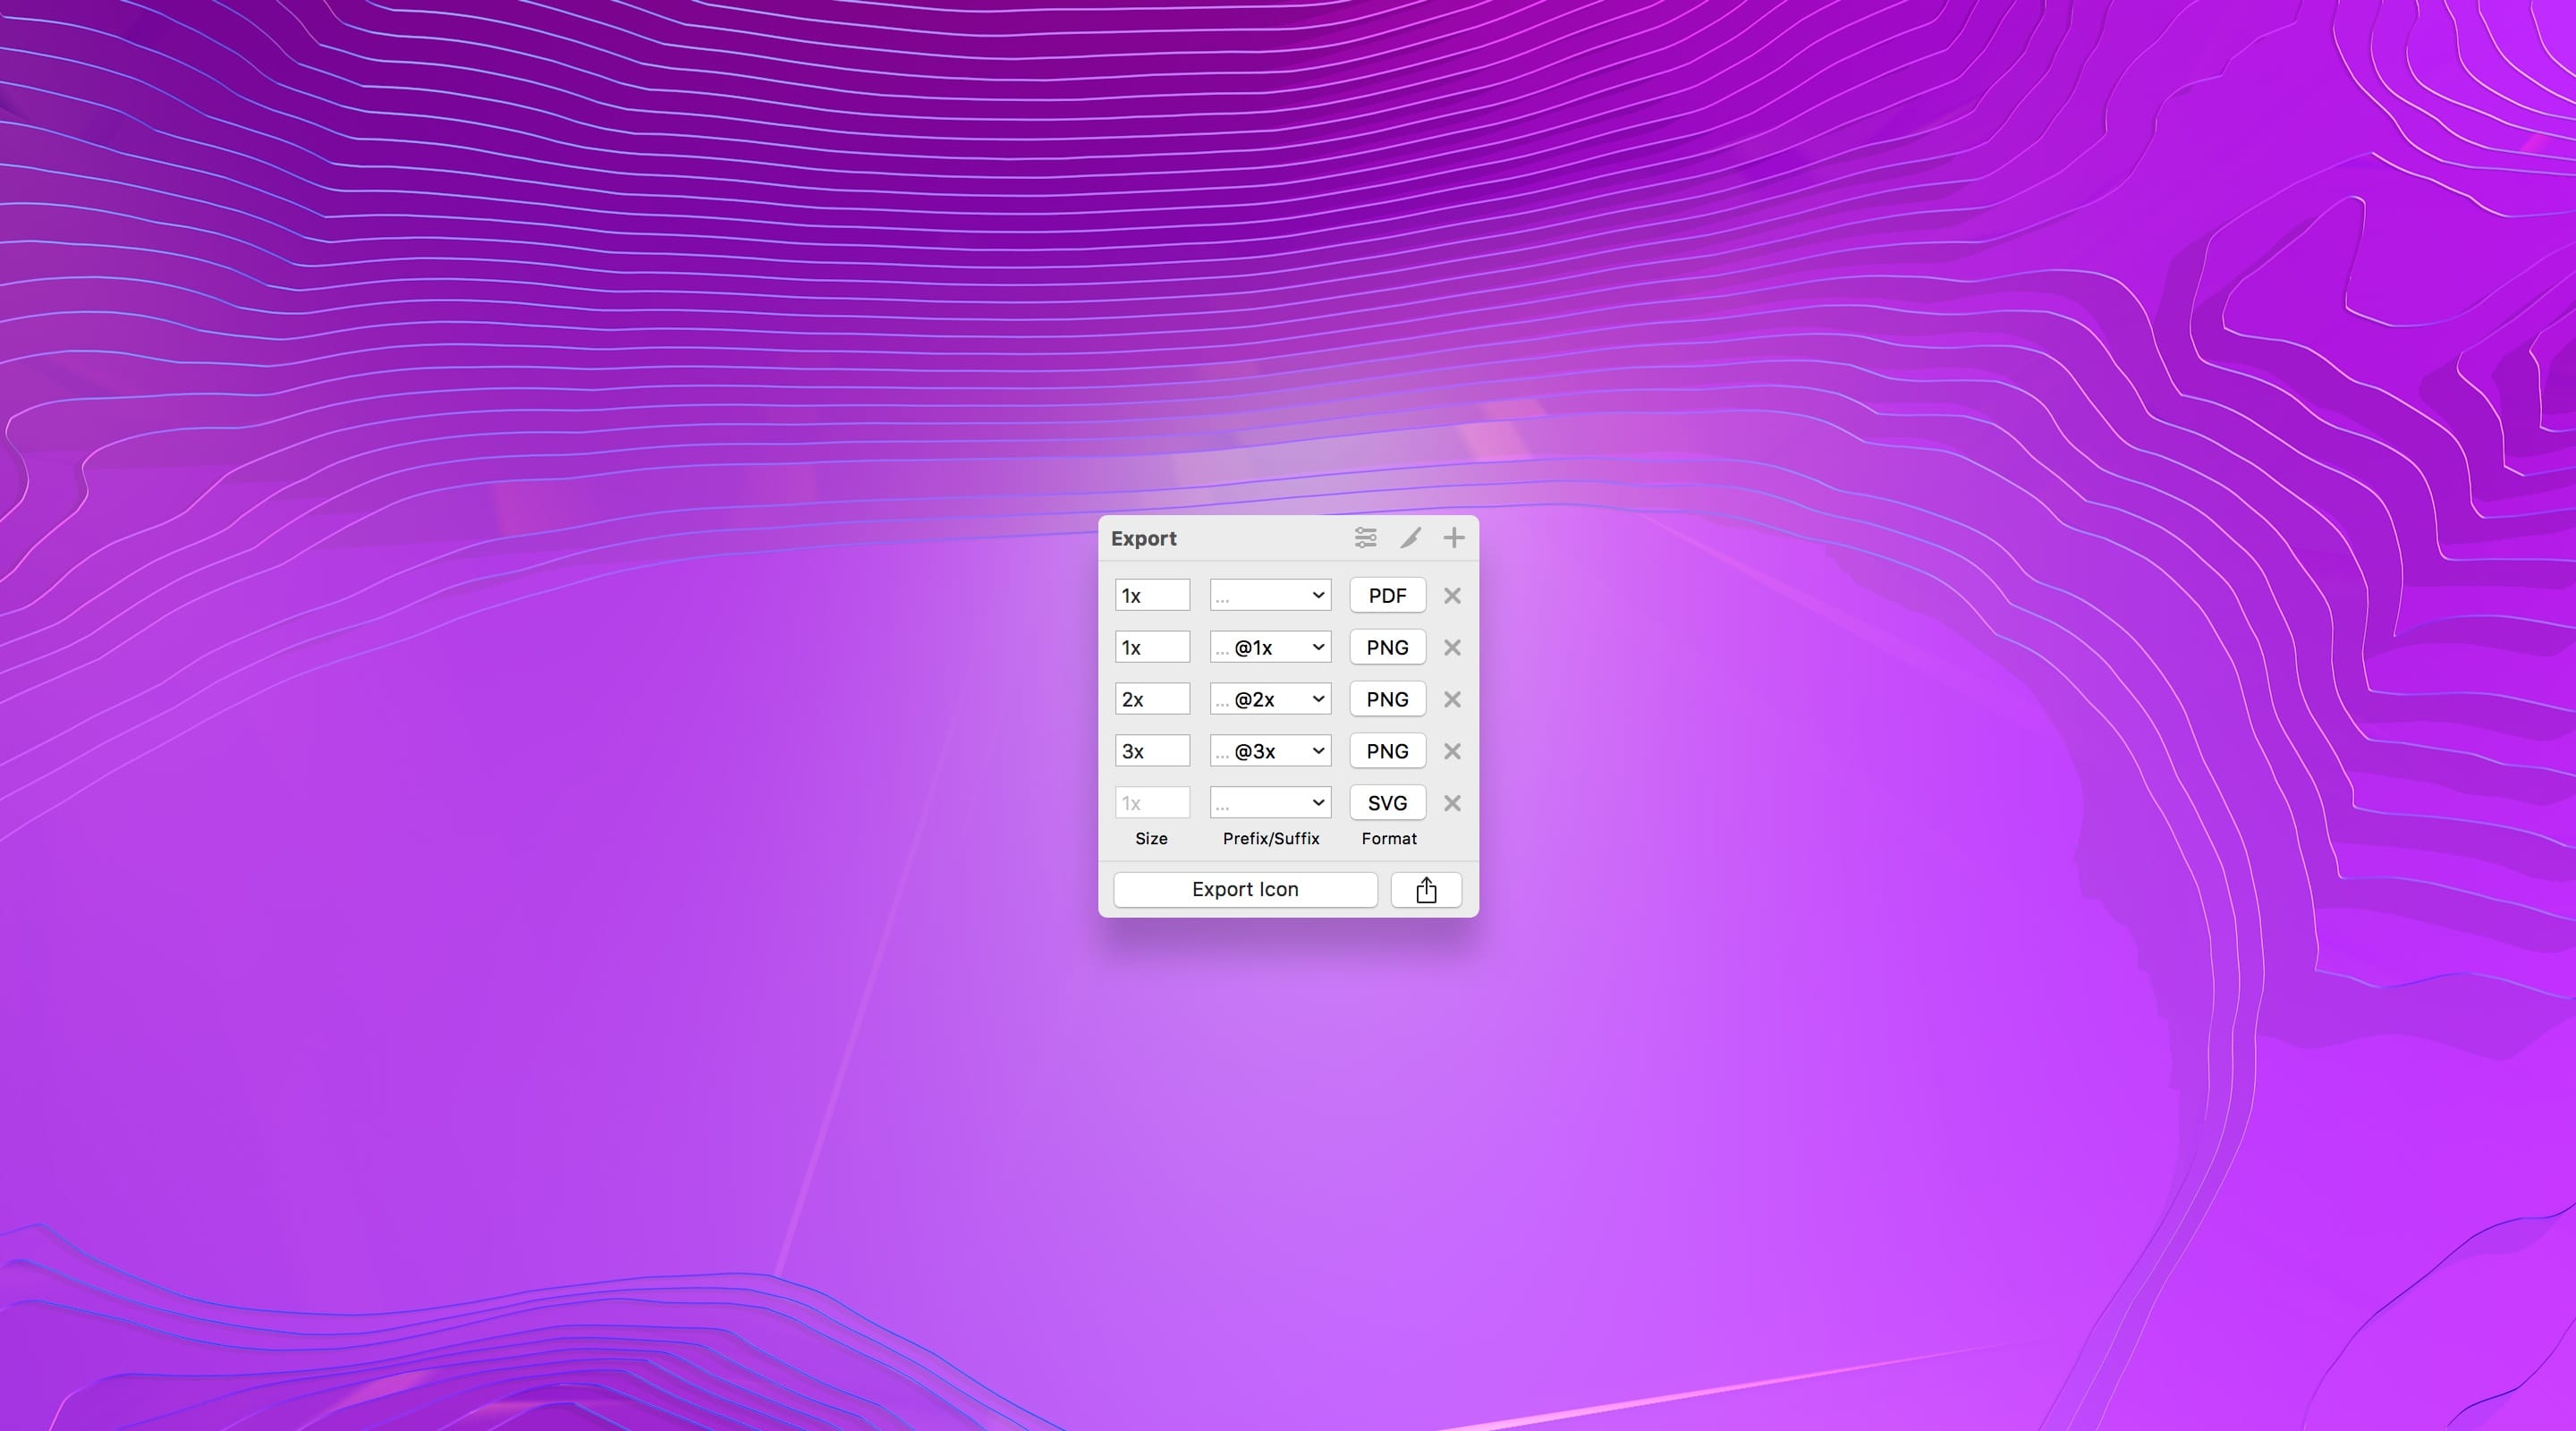
Exporting Assets to Multiple Resolutions
One of my favorite features is the ability to easily export at multiple screen resolutions. By using Make Exportable in the bottom right of the screen, you can export at any scale (1x, 2x, 3x) and 6 file formats (JPG, PNG, SVG, PDF, TIFF and EPS). PDF in particular is useful for iOS assets, and SVG is a fantastic format for the Web. For many users, this is what makes Sketch shine from the other apps.
Click Make Exportable to set up your slices. By default, it’ll set the scale at 1x, but click again and you’ll quickly get 2x, then 3x. You can also set the scale to a width (w) or height (h). For instance, if you wish your asset to export at maximum 800 px wide, set 800w.
Image Optim
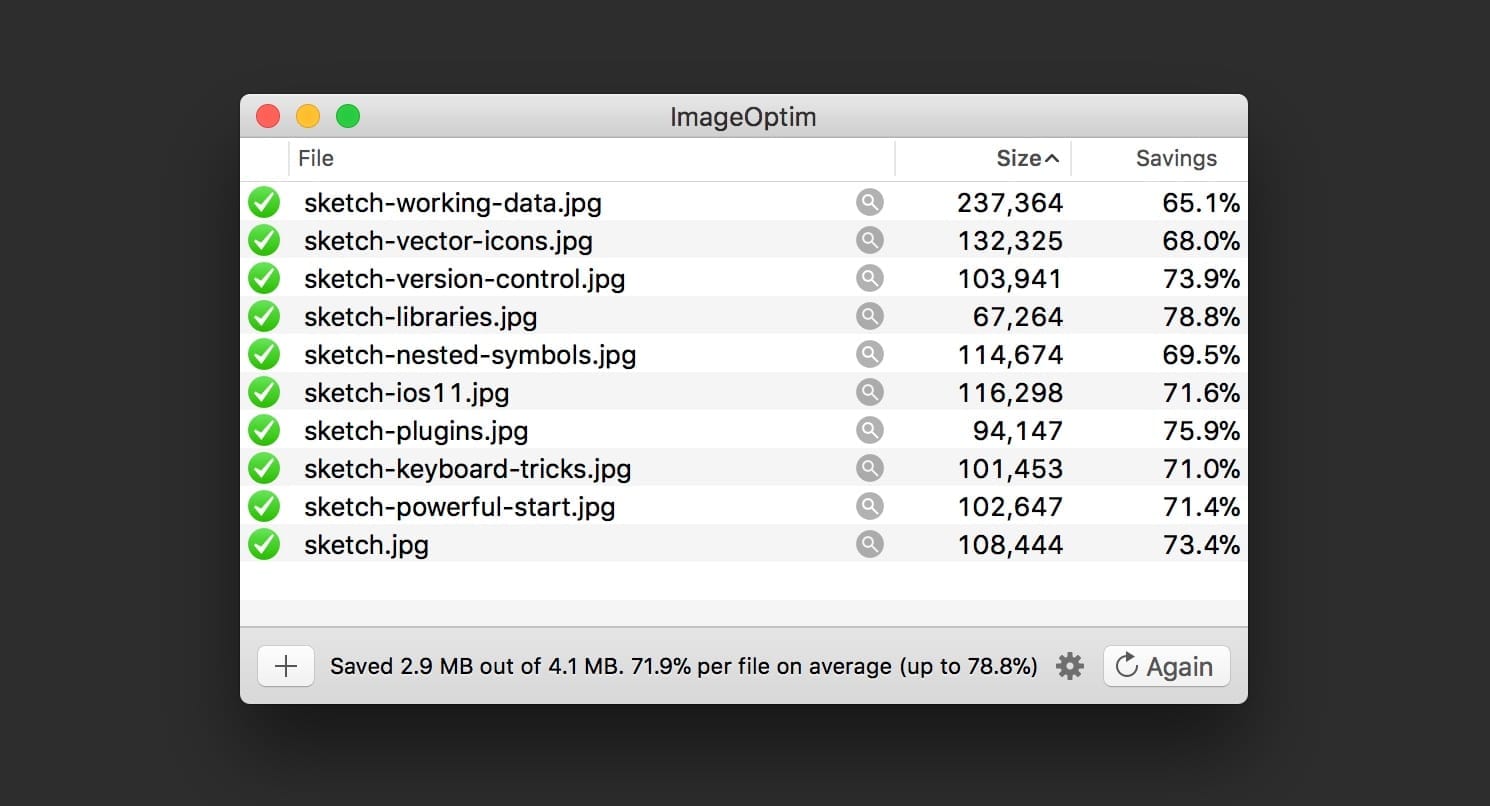
Images exported from Sketch (or any other app) are not well-optimized for consumption. Apps and Websites tend to have a bloat issue. That’s why plugins like Image Optim is a necessary step whenever you export a PNG or JPG file. From my experience, you can shave up to 80% of the original file size. Plus, there’s very little compromise in term of quality, even less apparent today because of Retina screens.
Optimization Tip
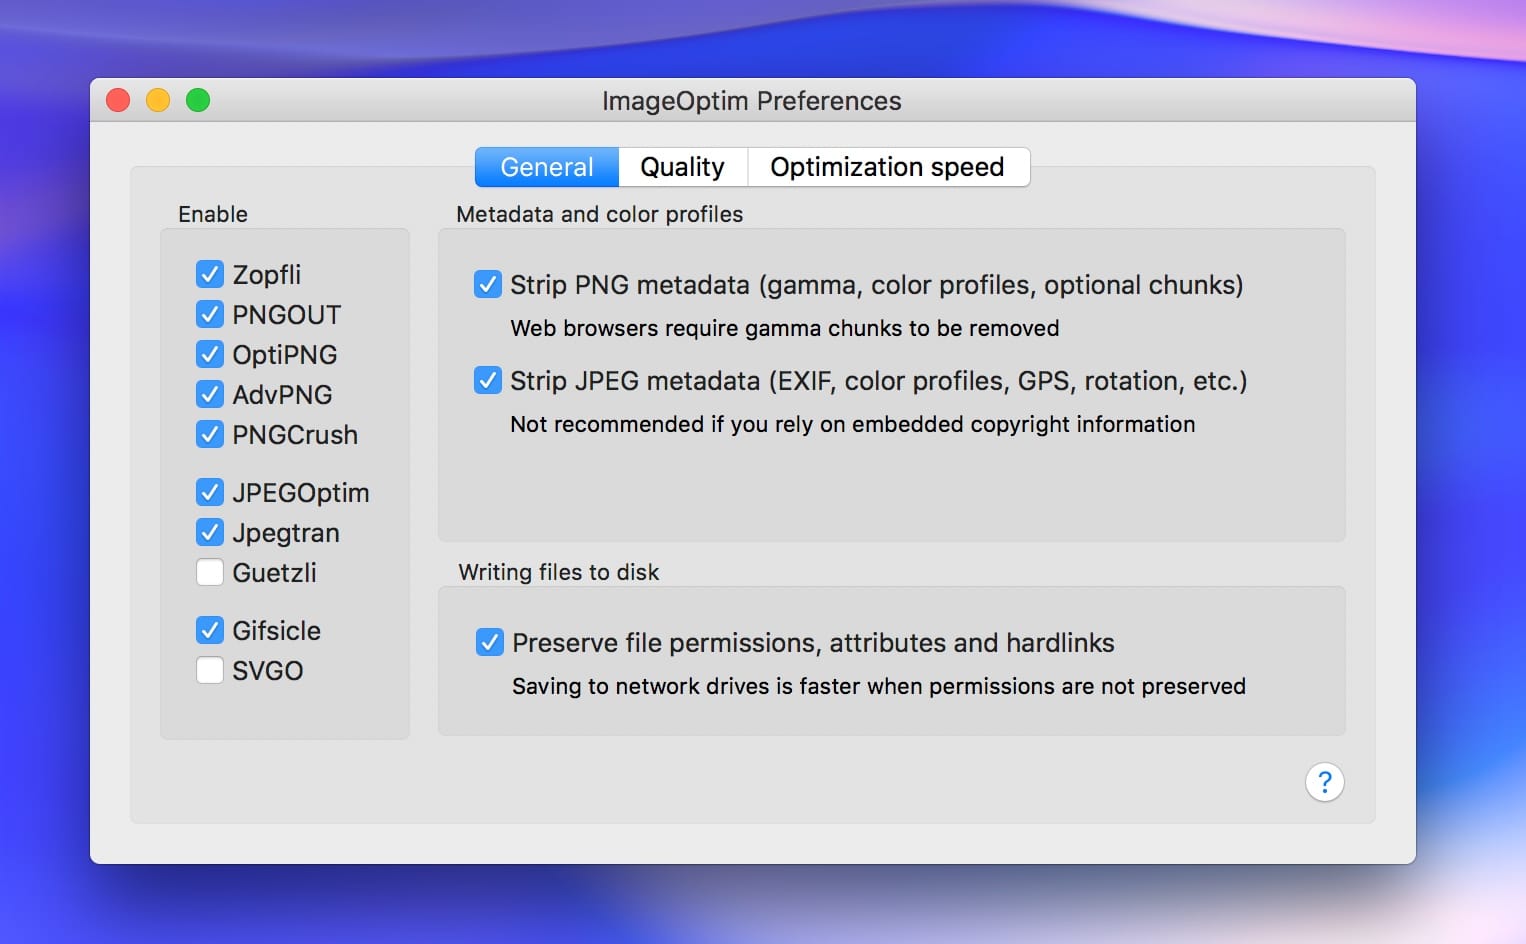
You can shave an additional 50% by enabling PNGCrush and JPEGOptim. Keep the quality at 80%. Because you design 2x and 3x screens, the loss in quality won’t be noticeable. In fact, this site uses these aggressive optimization techniques. Without this, I would end up having 30 MB per page, rather than the current 5 MB. While this may seem high, we must not forget that we have multiple videos and high-resolution images.
Sketch File Optimization
Sometimes, you will work with large Sketch files of over 100 MB. This can cause a strain to your hard drive and to the performance. You may not always need full quality of the bitmaps found in your document. In Sketch, you can use the built-in File > Reduce File Size, which can reduce a sizable amount. To get an even better result, you can use Reduce, which in my own experience reduces even more, and keeps the color integrity better.
Styleguide and Handoff
Documentations are time-consuming. You have to spend days or weeks on them. When you need to update, you have to do it manually. With each update, you have to inform your whole team about them. It’s like a major project on its own. That’s time that you could be spending on perfecting the project and getting real feedback from users.
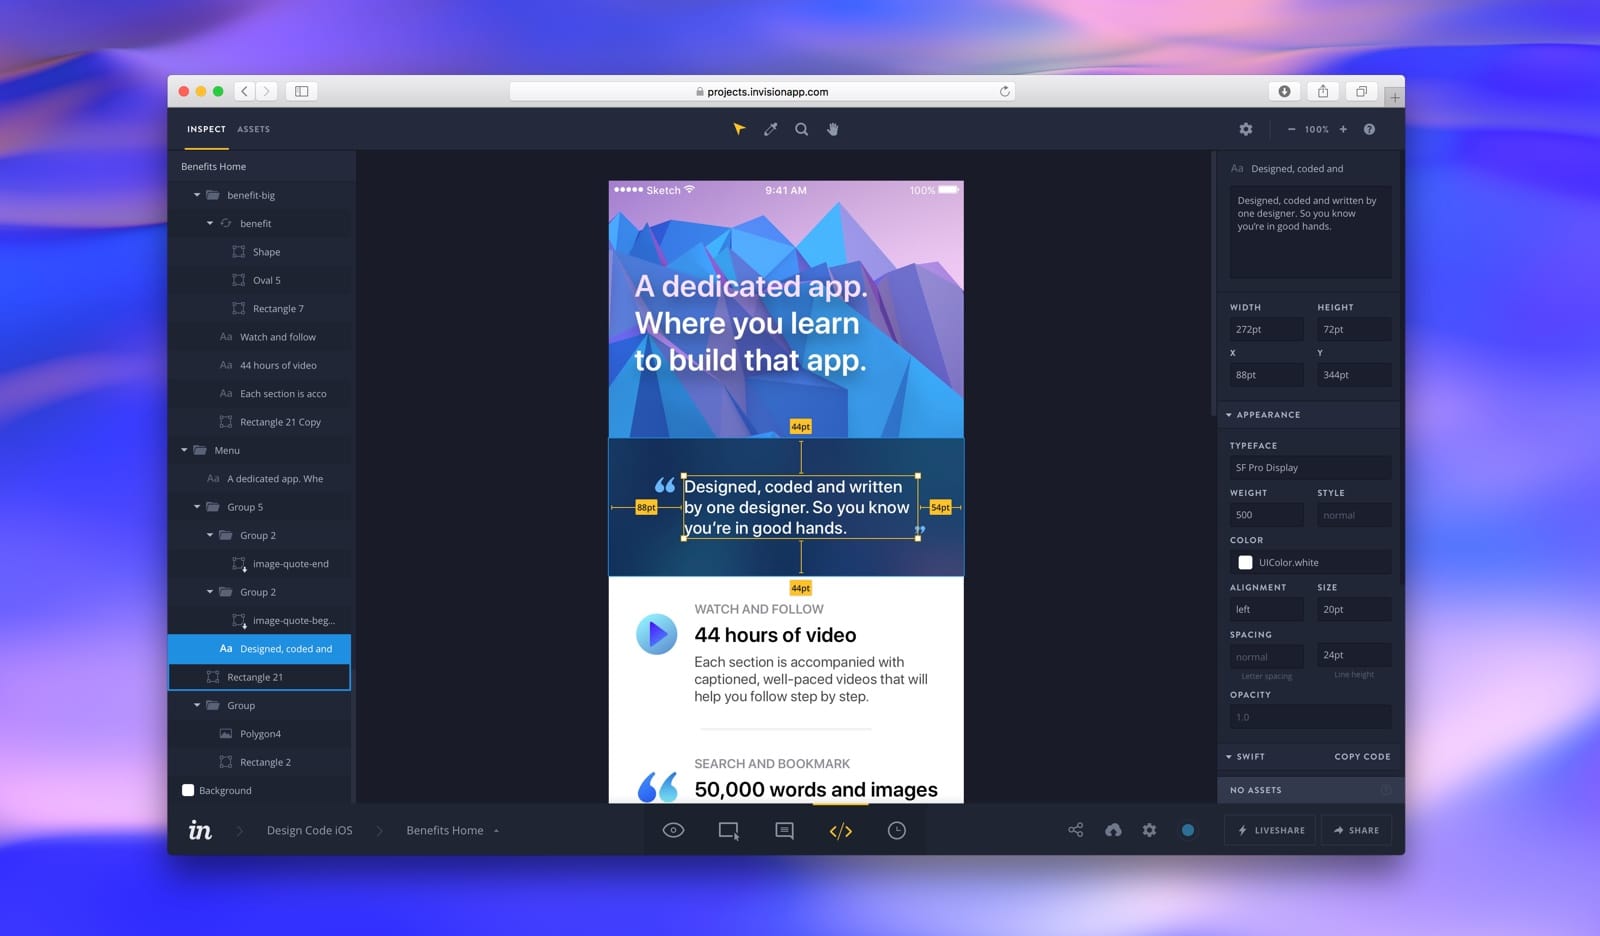
That’s where InVision Inspect, Zeplin and Sympli come in. With their Sketch plugin, you can just export all your Artboards and the Mac or Web app will automatically pick up all the styling specifications. When your team opens your designs, they get the latest updates, find all the sizes, distances and font properties right there. Additionally, developers will find the assets embedded and can even make comments on specific parts of your designs.
Comparing with Implementation
To compare your Sketch Artboards with real implementation in iOS Simulator, I recommend using Flawless. You can simply drag and drop your Sketch file and it’ll automatically detect all your Artboards. Then, it’ll show an overlay of your design on top of the Simulator. This is also useful for testing your site on mobile, since you can use Safari in the iOS Simulator.
The Feedback Process
When you’re done with your design, you’ll want to share it with your co-workers to get feedback. Sketch’s integrated Cloud sharing allows you to automatically upload all your Artboards to their server and share your designs via a link, privately or publicly. Additionally, people can make comments. This feature works well for any type of user who just wants to quickly share something they made.
If you’re in a large team and require more features like annotations and collaboration, you might want to consider more specialized services. InVision is well-integrated into Sketch. You can sync all your Artboards to their system with the click of a button. Freehand can make this process really fun and collaborative.

Previewing on iOS Devices
What looks great on your computer screen may not be usable on your iPhone. Thanks to Sketch Mirror, you can preview your designs just by connecting via Wi-Fi or IP address. If you’re on the go a lot, you might find that setting a Personal Hotspot from your phone will give better results.
The Artboards can be swiped left and right on your phone. Swipe up and down to switch between Pages. Double-tap to zoom in or adjust to fit the screen. Mirror also supports scroll during preview so you can expand your screen as tall as you want.

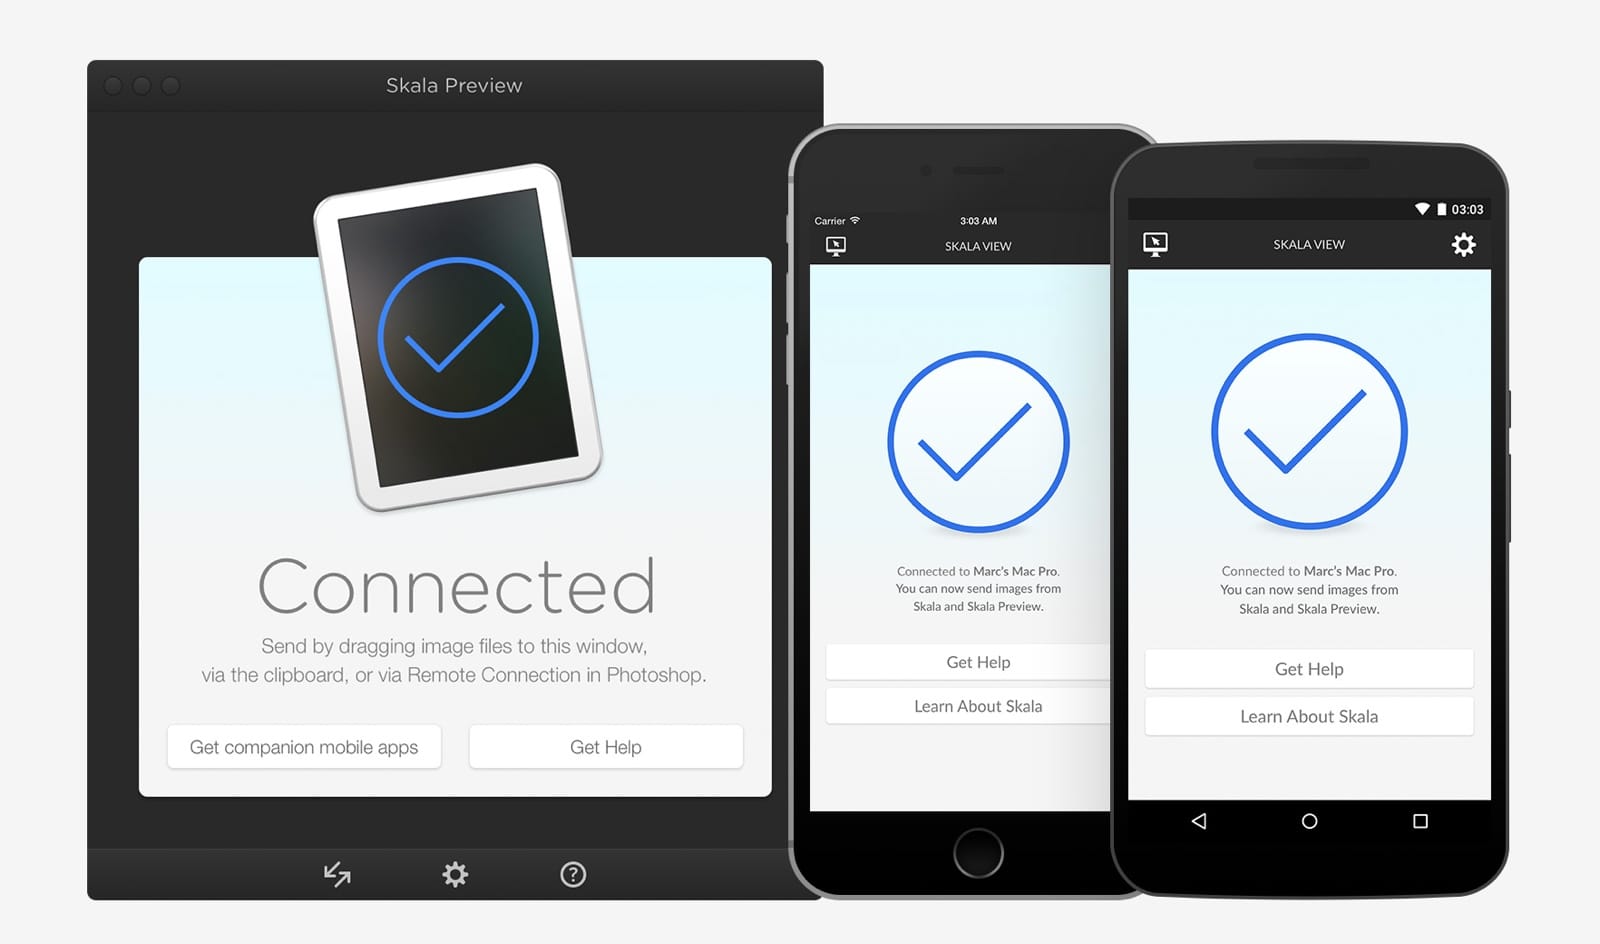
Previewing on Android Devices
For Android users, you might want to use Crystal. Another fantastic tool that works cross-platforms is Skala Preview (a plugin called Sketch Preview is required).
Prototyping In Sketch
Sketch doesn’t have a built-in prototyping tool. But with Craft, you can quickly prototype a flow by connecting screens. Then, you set a Click, Tap or Swipe gesture.
Prototyping Animations
Prototyping animations can be a labour-intensive process, especially with tools that have a steep learning curve. For those who just don’t want to learn code, Flinto or Principle are perfect. They yield maximum results for little investment in time and efforts. Both apps let you import all your Artboards and do powerful animations in a matter of minutes.
Prototyping in Framer
For those who love code for its limitless possibilities, you’ll love Framer. It’s designer-friendly, because you can create and edit your UI in it, which directly translates into code. There is a full section on Framer.
Designing Icons
Often times, you’ll need to customize existing icons or draw them from scratch. You'll need in your arsenal a nice library of vector icons. The ones by PixelLove and Streamline will work well for iOS. Sketch is entirely vector-based so you can easily import SVG icons (a universal vector format), and edit them as you see fit. If you’re uncomfortable working with vector paths, you can at least change the color and size to fit your project. To get an introduction to vectors in Sketch, I suggest heading to the section Working with Vector.
Keyboard Shortcuts
Design is easy to learn but hard to master. While less obvious, the Keyboard shortcuts are what makes Sketch so efficient at user interface design. Having to click too many times is one of the reasons why I wanted to switch from Photoshop.
This is a list of the most essential shortcuts to learn. Because I do these actions hundreds of times a day, I find it important to remember them by heart. Note that I didn't include the usual suspects of Copy (Cmd C), Paste (Cmd V), Zoom (Cmd +/-) and Save (Cmd S).
Select Any Layer: Cmd Click
Edit Text or Vector: Enter
Rectangle: R
Oval: O
Text: T
Show Distance: Alt
Group Layers: Cmd G
Ungroup: Cmd Shift G
Show/Hide Pixels: Ctrl P
Color Picker: Ctrl C
Duplicate: Cmd D
Lock/Unlock Layer: Cmd Shift L
Hide/Show Layer: Cmd Shift H
Switch Windows: Cmd ~
Focus on Layer: Cmd 2
Paste in Place: Cmd Shift V
Resources
The best way to learn Sketch is to download other people's work and analyze them. The community is growing at a rapid pace and new resources are popping out every day. SketchAppSources, Sketch Repo, Sketch App Hub and Sketch for Designers are some of the best places for download Sketch files. Together, they have over 5,000 user-submitted Sketch designs.
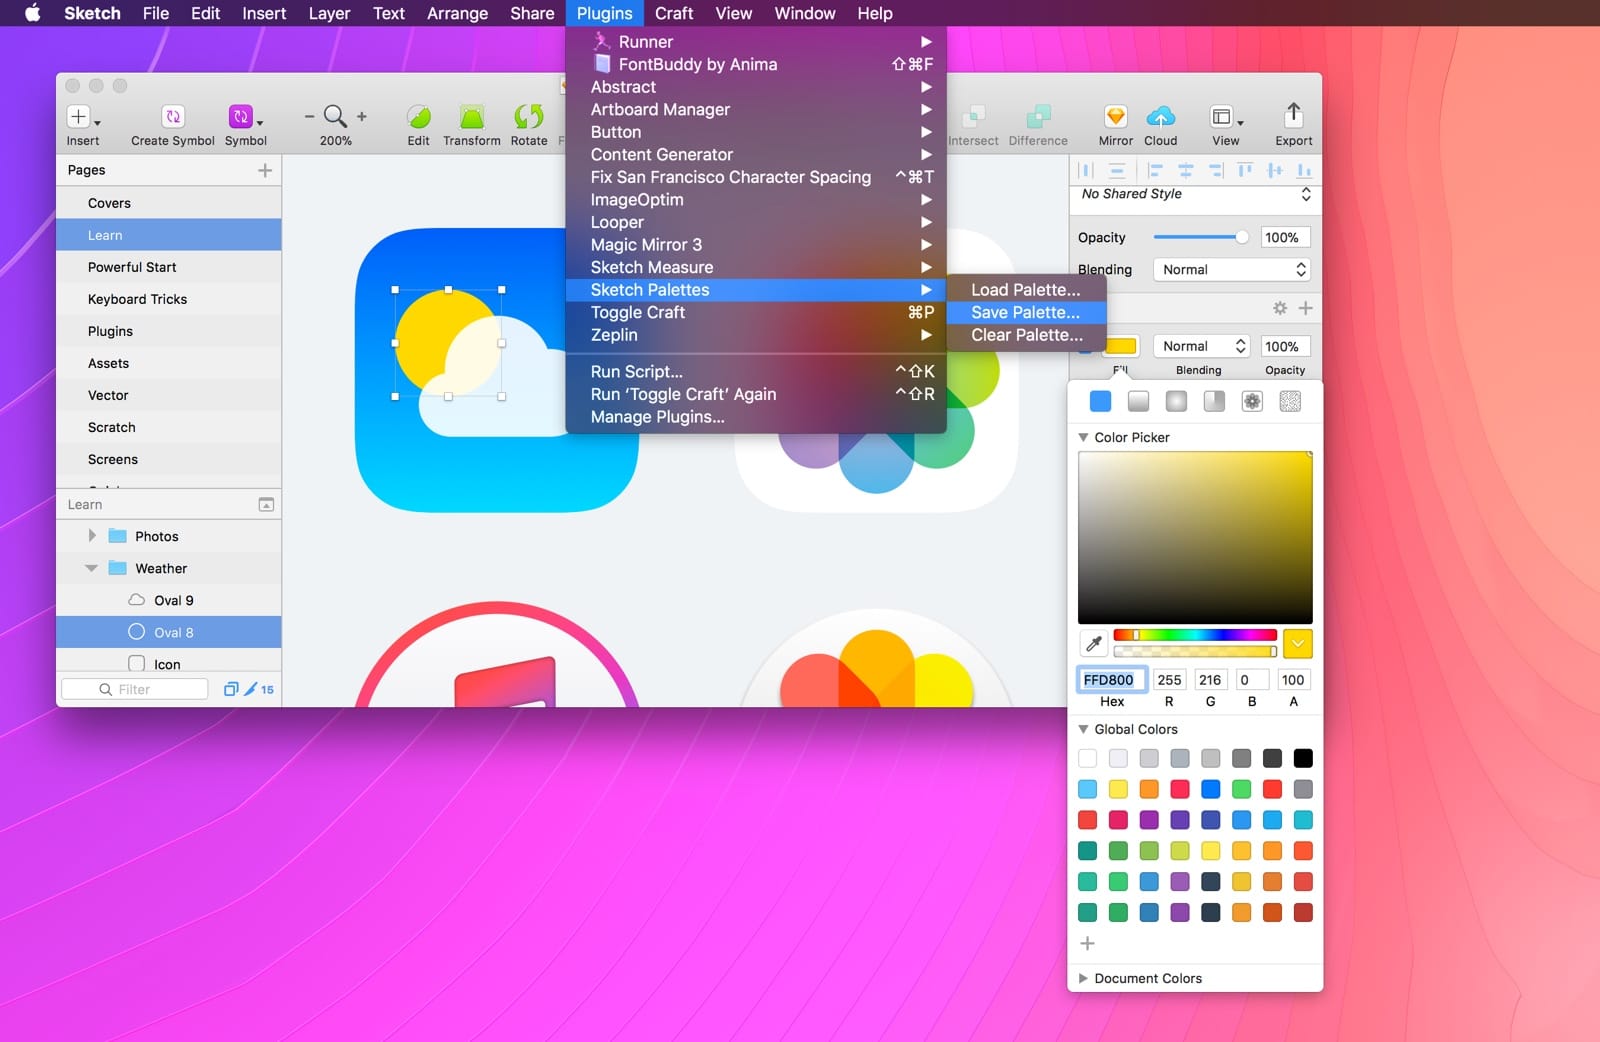
Starting Color Palette
Color palettes are shareable as a file, so I made one that you can download here. Download the Sketch Palettes plugin to be able to quickly import color palettes. To install a new plugin, click on the Download ZIP button in GitHub, and once unzipped, double-click the .plugin file.
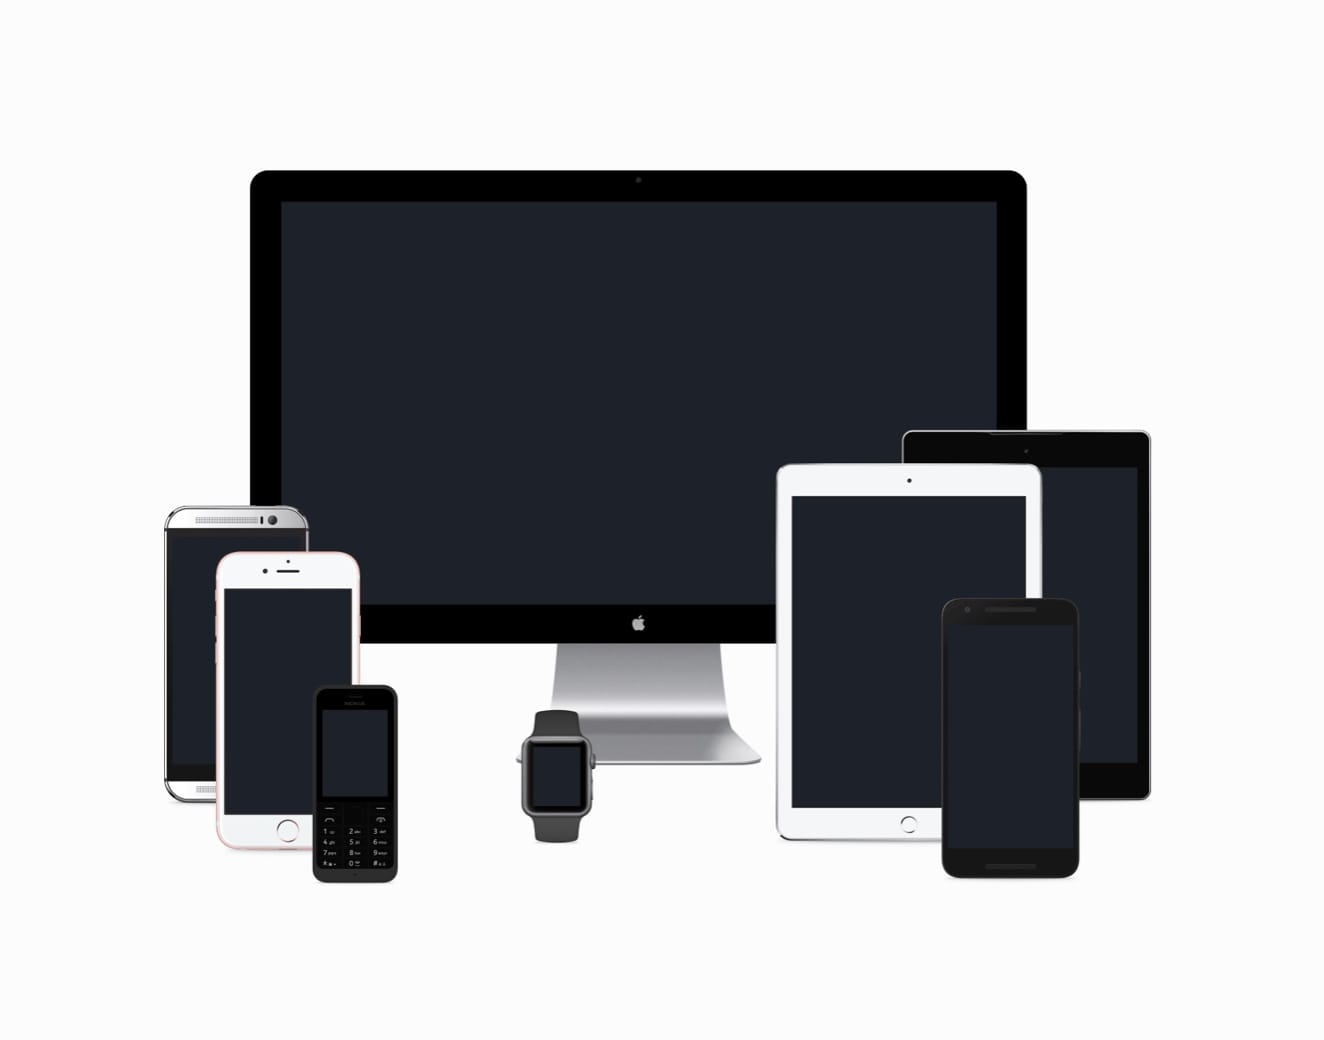
Vector Devices and Mockups
Having a strong presentation of your app in a Keynote or on the front page of your site gives your product an edge. Download the free sample from Angle, a massive library of over 260 mockups. You’ll find the iPhone, iPad, Mac and Apple Watch devices entirely made in vector, which means you can edit at your heart’s content. Additionally, you can download more devices and Diverse Device Hands by Facebook.
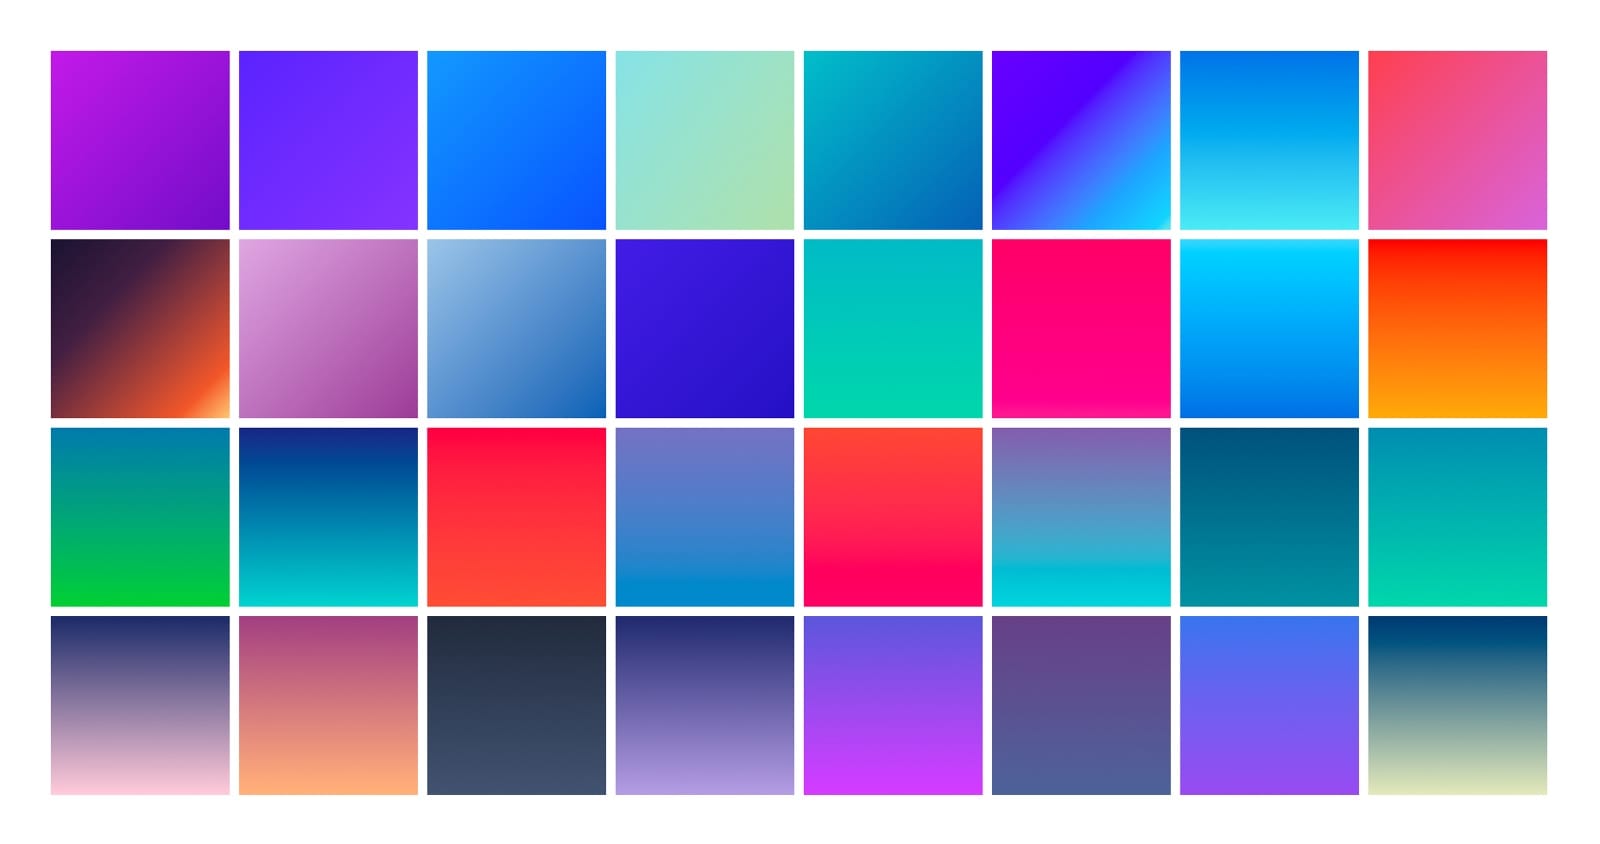
Sketch Gradients
Gradients can’t be as easily imported, but you can add them manually like in this video. Download the Gradients Sketch file to follow the demo.
InVision Sketch UI Kits
InVision has created a number of fantastic and free UI Kits for Sketch that you can download and start digging.
Nested Symbols & Auto-Updating Styleguides
There is a really comprehensive styleguide template for creating a Website. Highly suggested for those who like to have a complete design system in place. Or, you can simply download it to study a well-executed example of that workflow.