Workflow
Nested Symbols will open new possibilities to streamline your current workflow. Furthermore, Nested Overrides can override Nested Symbols to other Symbols with the same size. Now you can create reusable components and stop reinventing the wheel on every design.
Creating a Nested Symbol
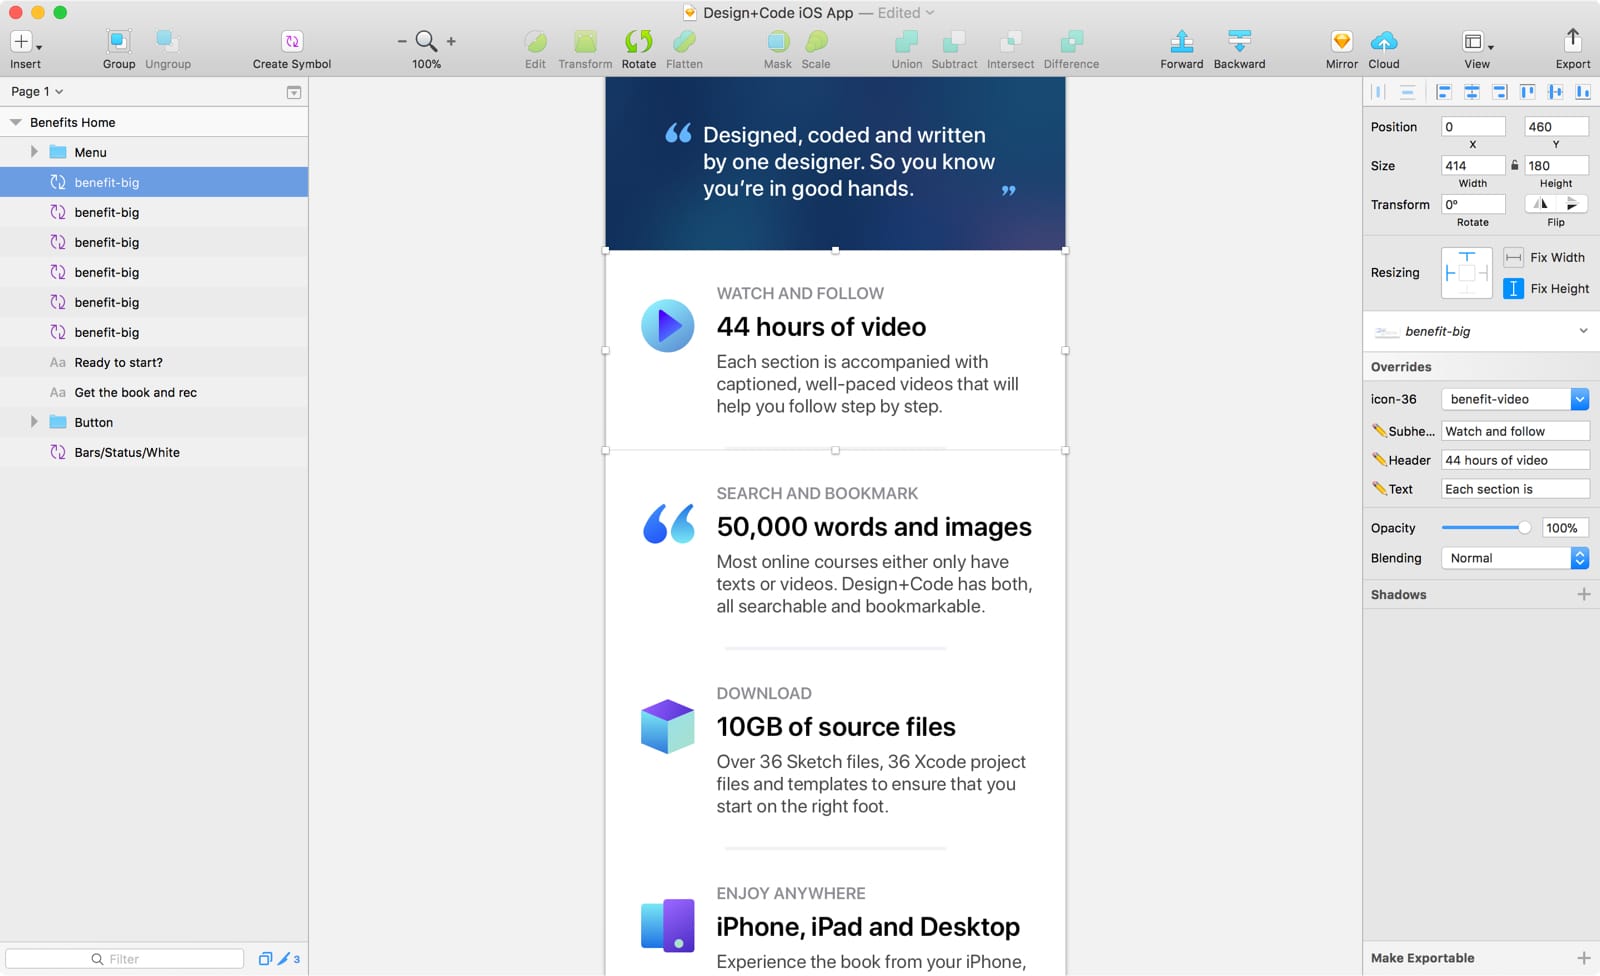
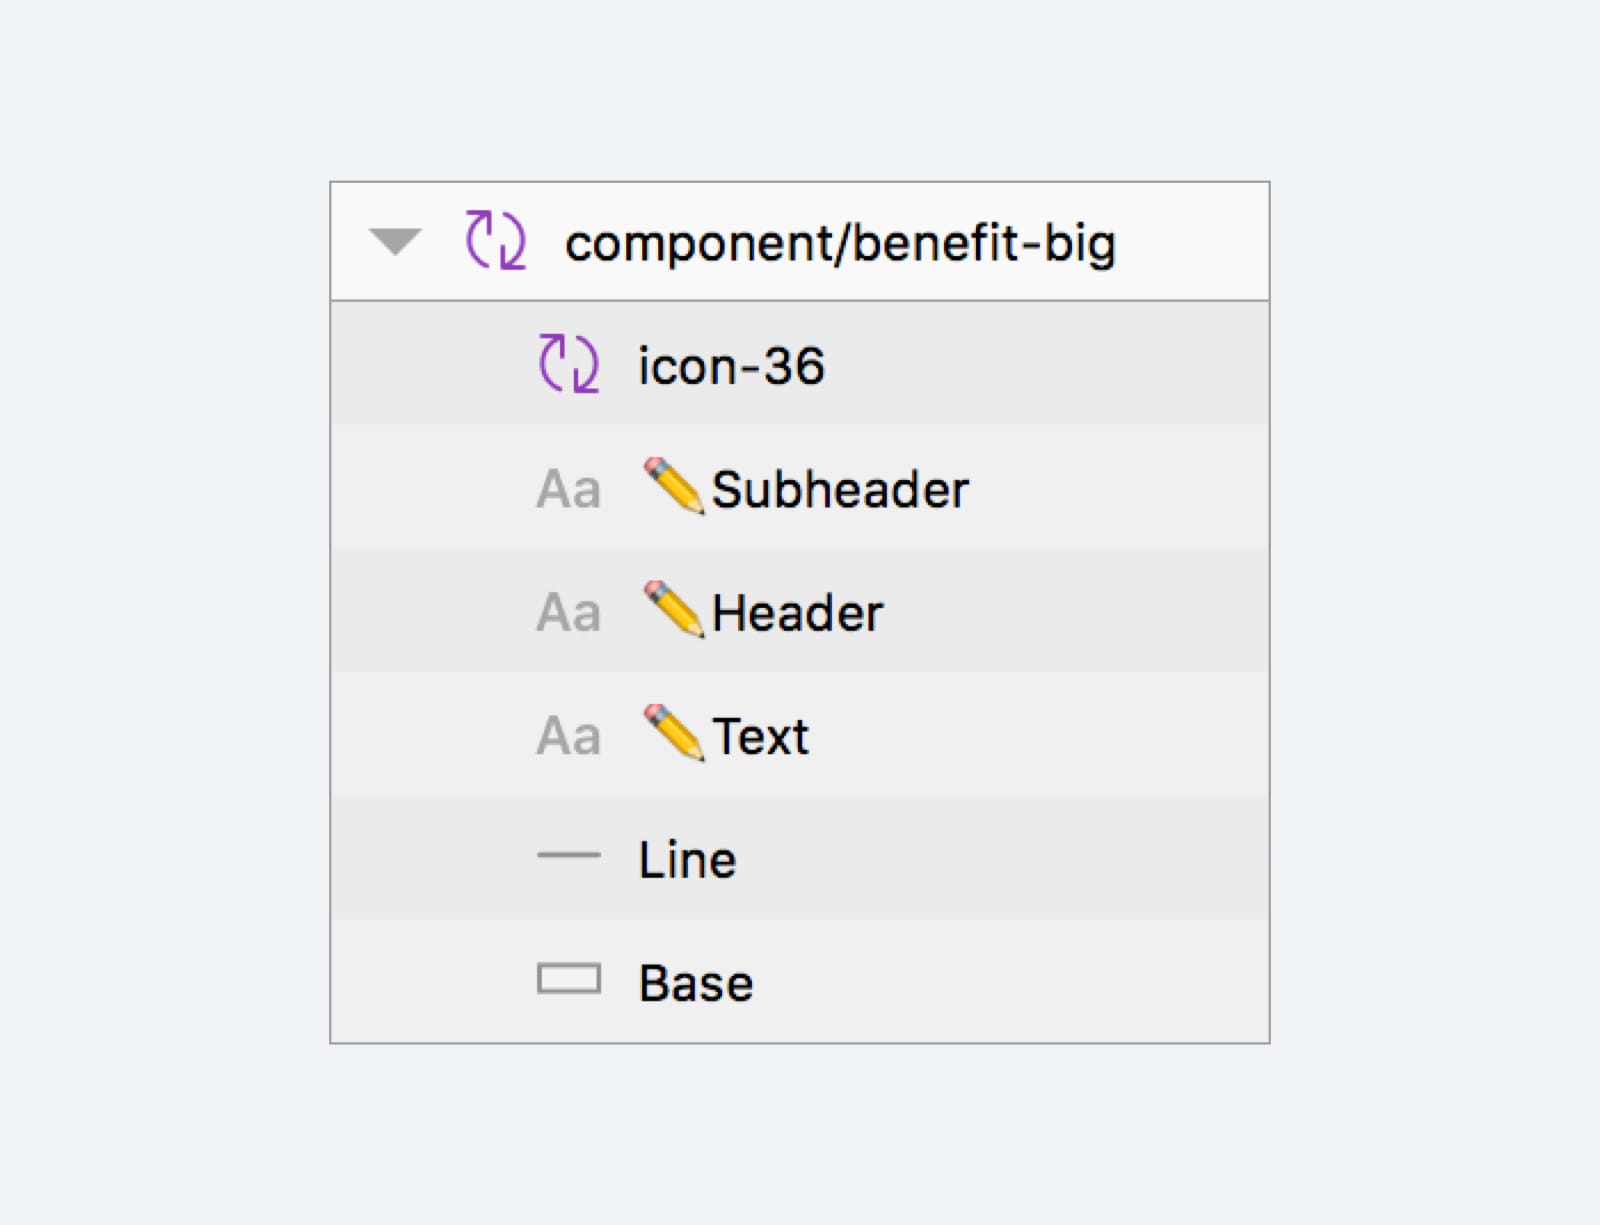
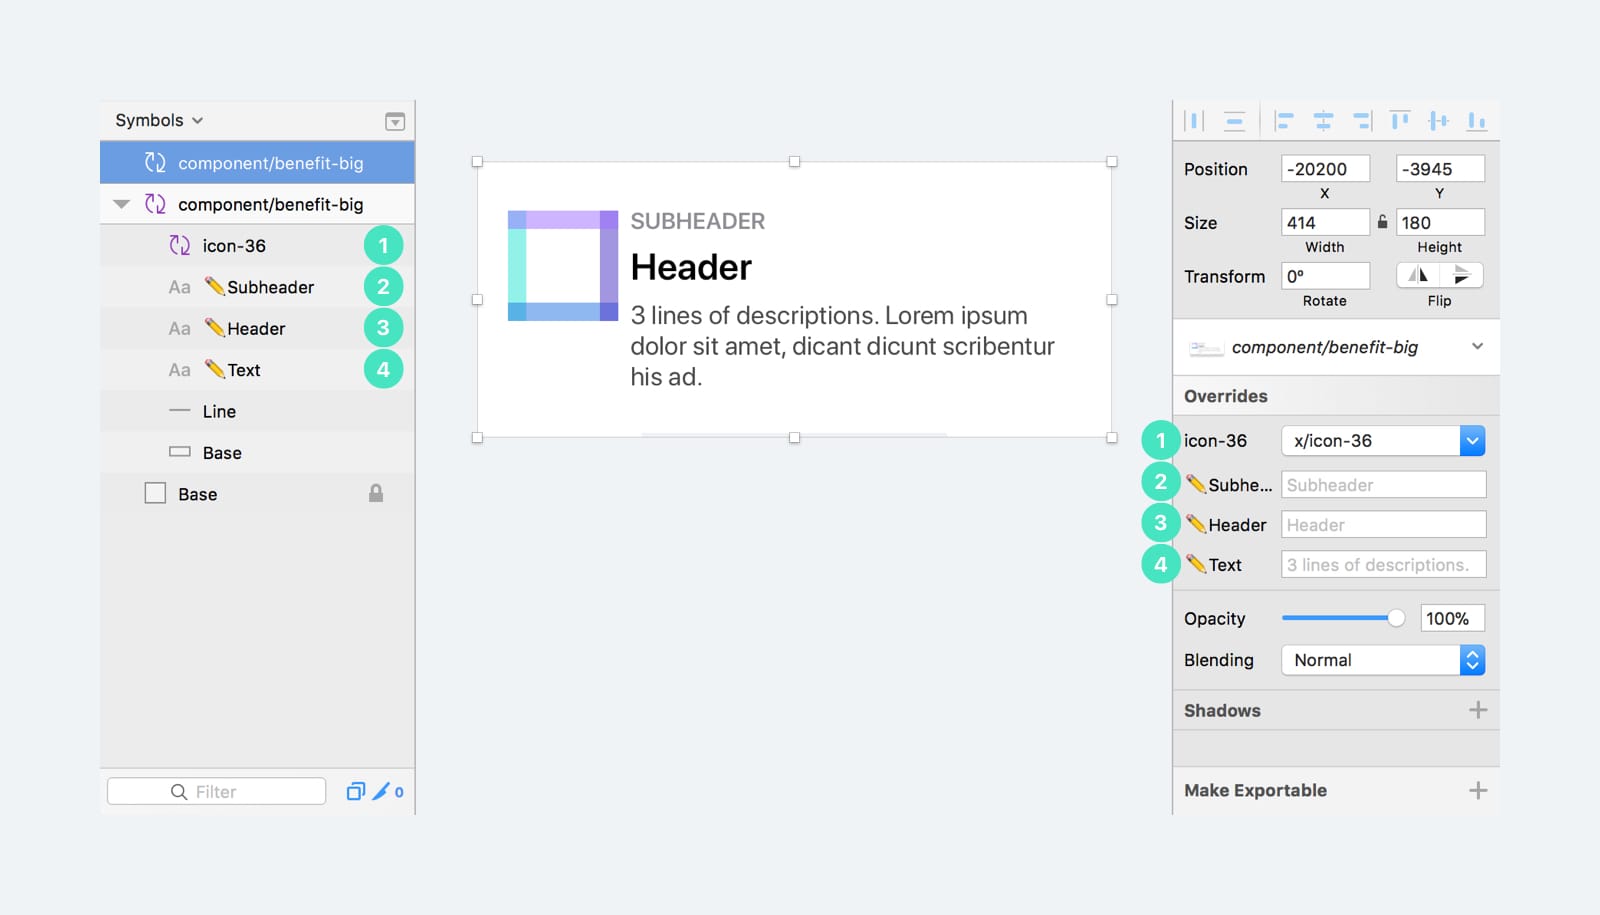
You can place a Symbol inside another Symbol’s master Artboard. This Nested Symbol contains an icon placeholder, six icons for different benefits, and three text layers.
Updating the Symbol
Any update you make to the Symbol will apply throughout your document, no matter if it is a Nested Symbol or not.
Text Layers
For text layers, it is good to label them according to what type of text it contains. Like this, it will be easy to recognize what kind of content needs to be filled in the Overrides panel.
Naming Symbol
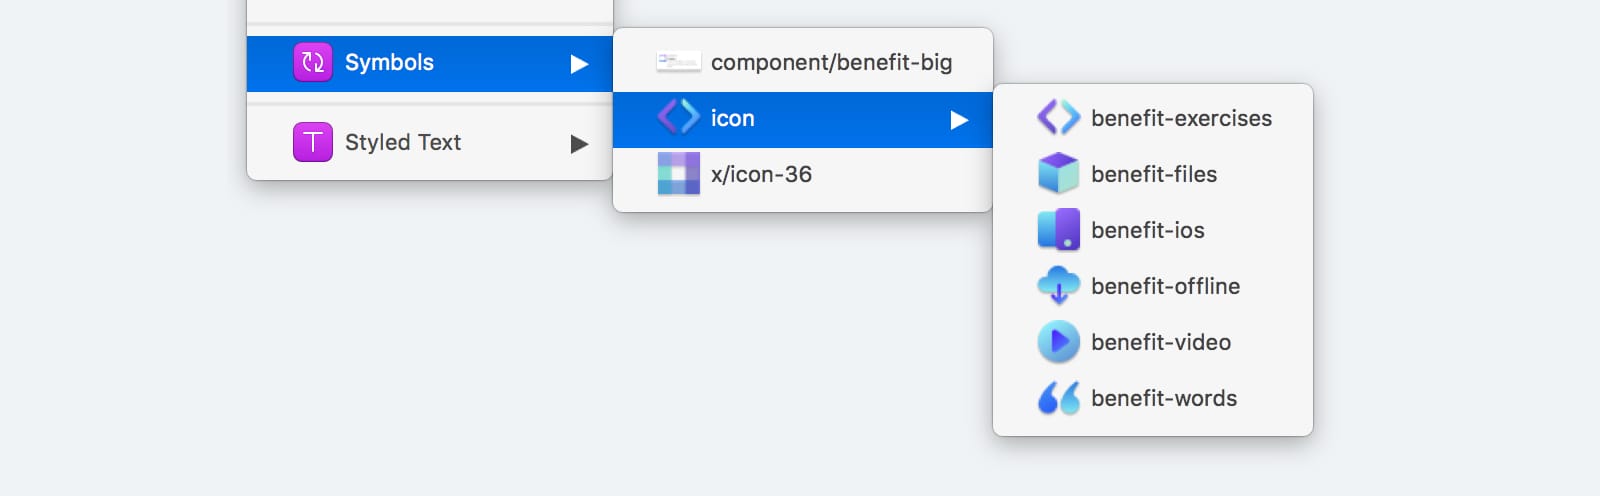
Give an easy name to the Symbol's Artboard to find it quickly. Using “/“ in the name will help you neatly organize the symbols menu.
Sketch Runner
Use the Sketch Runner plugin to search the symbol. Runner gives you a preview, and you can search any Symbol quickly if you’ve established a good naming convention. After you downloaded and installed Sketch Runner, go to the Plugins menu, choose Runner > Run to activate Sketch Runner. Then go to the Insert tab and search for your Symbol.
Using Emojis
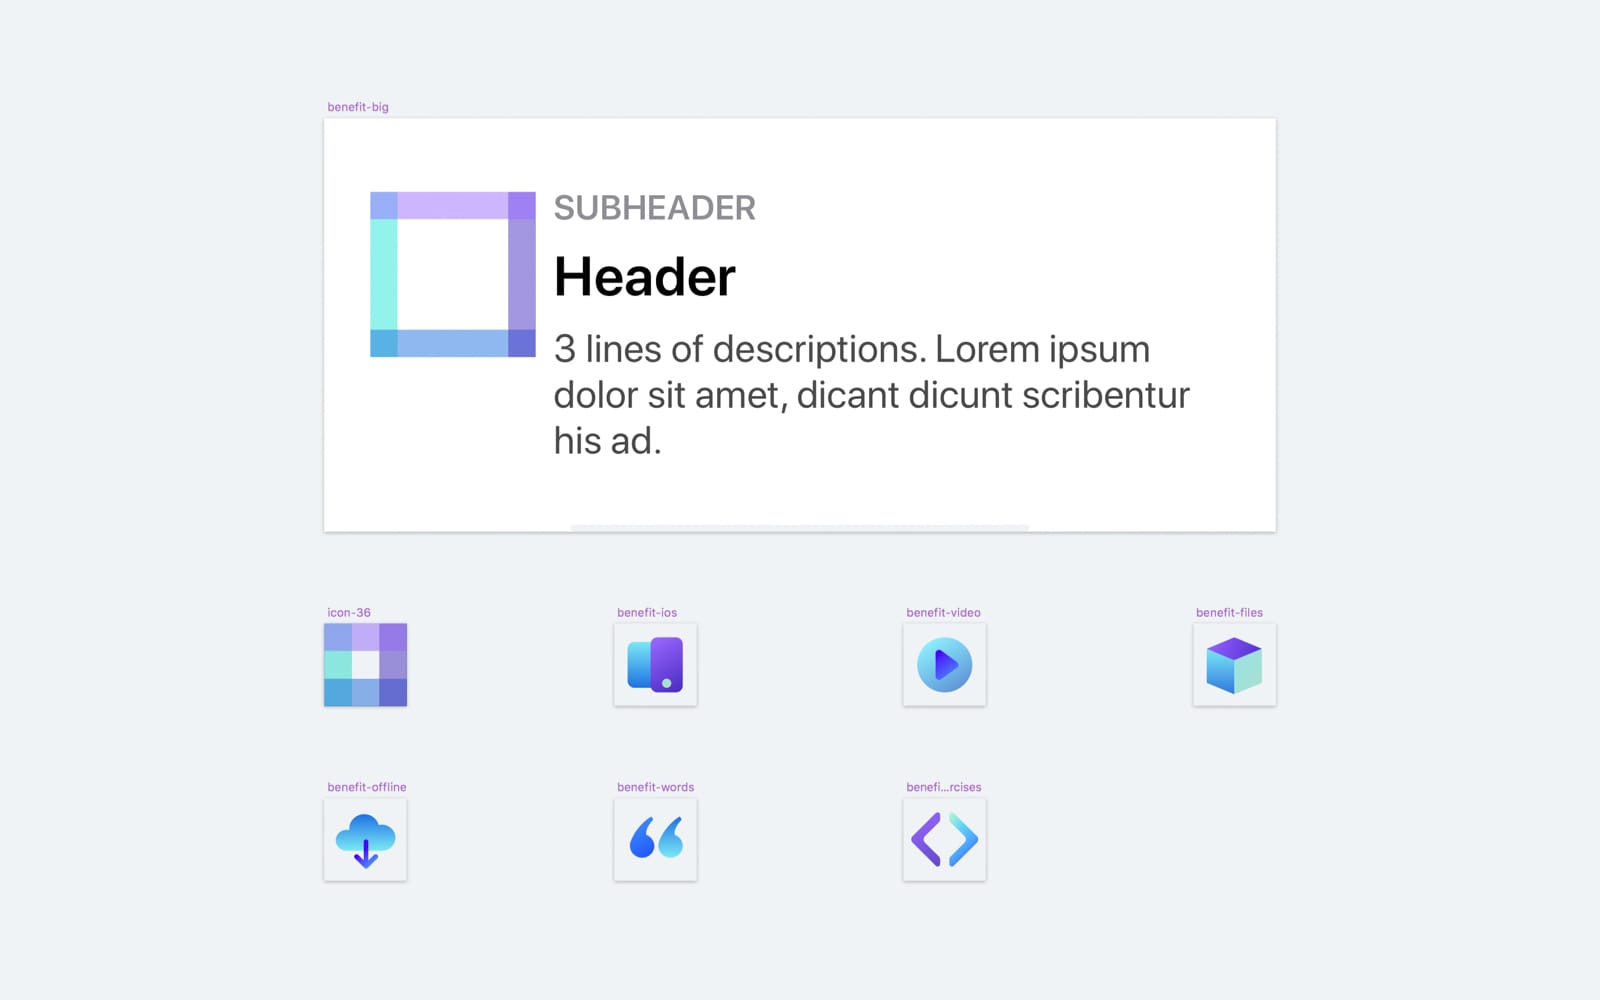
You can use Emojis in front of the text layers to help quickly identify what needs to be done in the Override panel. Edit the layer name and press Command + Control + Spacebar to bring up the Emoji quick panel. For the Benefits Symbol example, we use a pencil emoji ✏️ to determine a text layer. Use 😃 for avatar, 🎨 for colors, 💡 for on/off states, etc., based on what works for you.
Organizing Symbol Layers
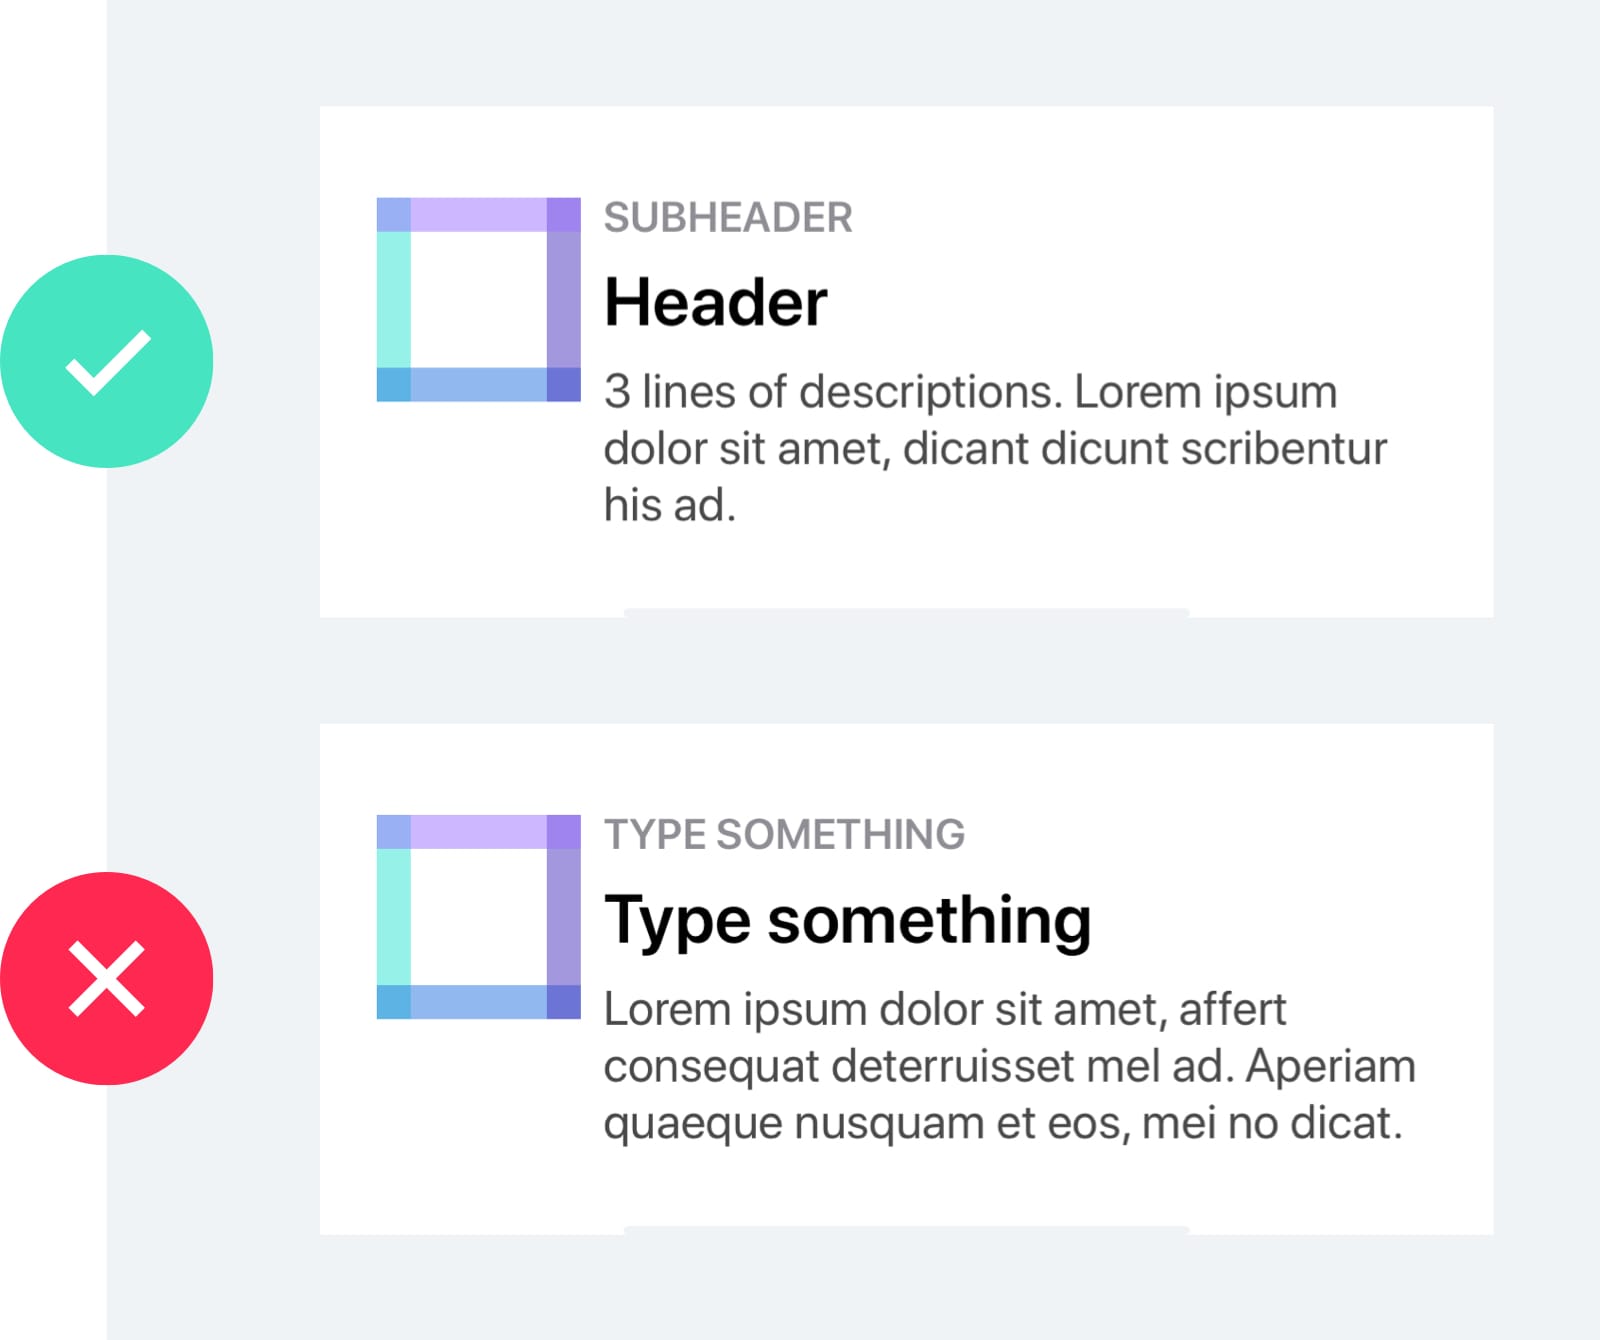
The order of the Symbol layers is reflected in the Overrides panel. Make sure all of your Symbol layers are organized based on the hierarchy reflected in the Overrides panel. The common way to arrange is from Top to Bottom.
Nested Overrides
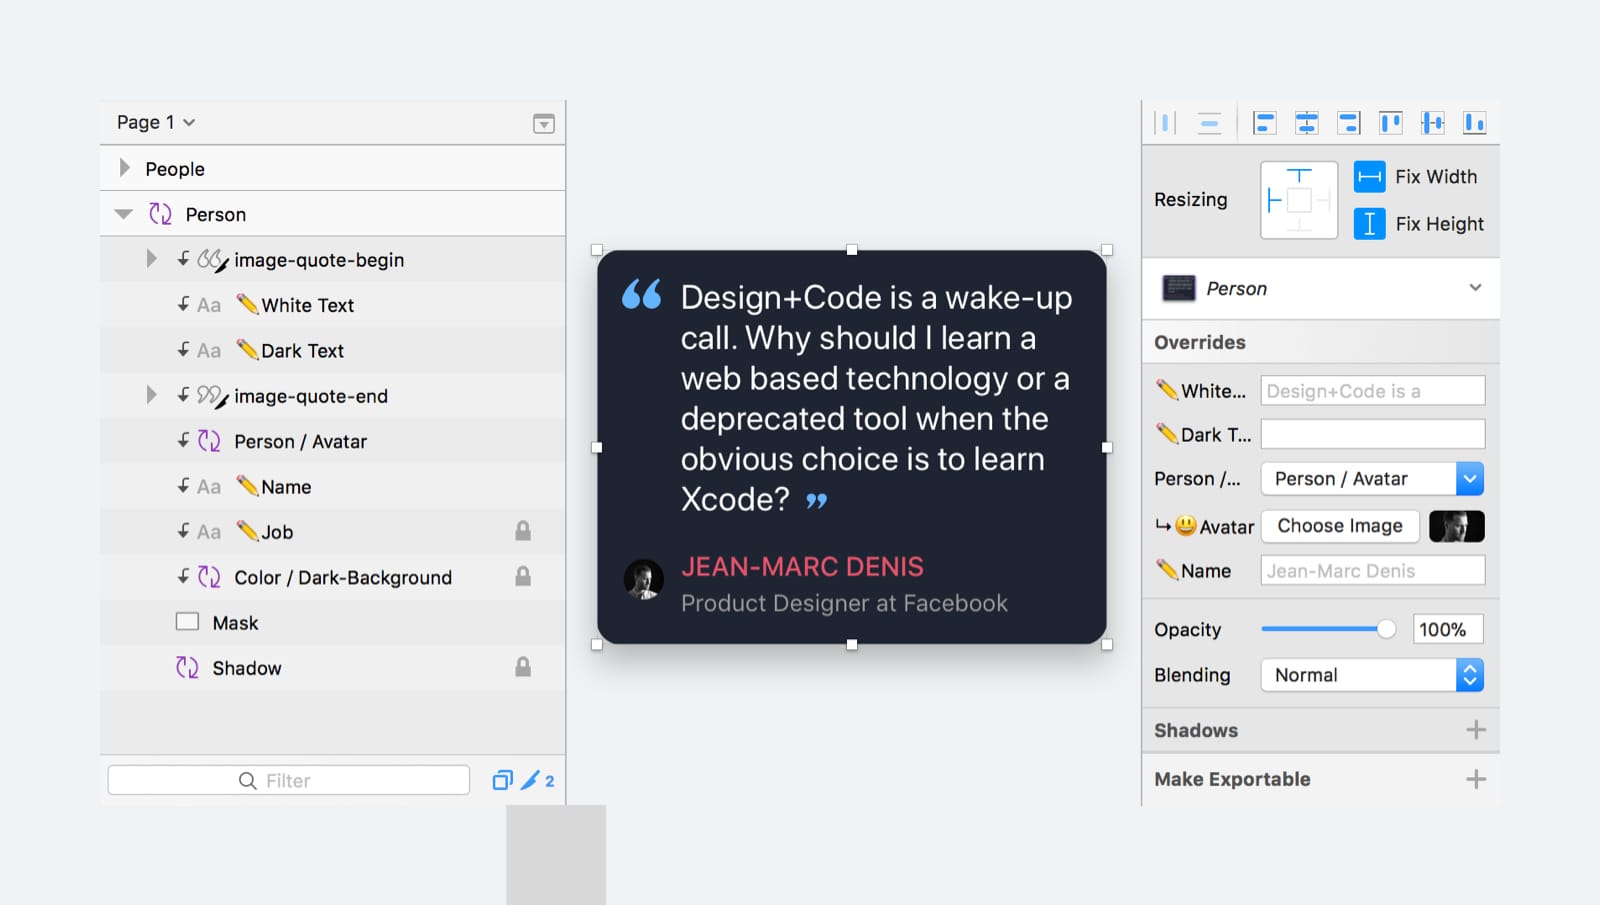
Nested Symbols can be overridden, along with images and text in a Symbol’s instance. You can swap any symbols as long as they are all in the same size. With the power of overrides, you can change the Symbol with a different image, different state, different icon all in just one Symbol.
To take a step further, you can change the color of the background, add or remove shadows, etc. As long as it is a Symbol, anything is replaceable.
For Text Layers, to make it disappear in the Symbol, you can set the value to blank by pressing the Spacebar and then Return key in Overrides panel.
Disabled Overrides
If you don’t want a Symbol inside a Nested Symbol to be overridden, you can lock the layer. The override option will be hidden in the panel. Disabled Overrides work for text layers too. Go to the Symbols Page and lock the layer by mouse over the layer, then press and hold the Option key and the Lock icon will show up. Click on it and the layer will lock. Return to Instance and select the Symbol, you will notice that the layer is now hidden from the Overrides panel. If you unlock the Symbol or Text, it will show again in the Overrides.
Recover Original Image
You can reset the Symbol’s image back to its original image by right-clicking the image in Overrides panel and then choose Remove Image Override.
Replace Symbol
Sometimes, you might find it hard to override in the panel. There’s a different way to change the content or states by using two similar Symbols. Sketch is smart enough to retain the overridden content.
However, the downside is that you will have multiple Symbols that are similar. If there are changes needed, then you will spend more time updating related Symbols.
Tips
With the flexibility of Nested Symbol, there is a lot of different ways to create a component. Most importantly, you can keep your Symbols organized and reusable. Like this, your design workflow will improve significantly.
Always Make Text Layer Fixed
Always make the Text Layer in Symbol Fixed, this will make it align properly and retain its padding and position when resizing.
Add Symbol Shortcut Into Toolbar
You can speed up your workflow by adding the Symbol icon to the toolbar. Go to the Toolbar and right click it, choose the Customize Toolbar, and a modal will show up. Find the Symbol icon and drag it to the Toolbar. You can place it anywhere you like. Like this, you can view your Symbols in a multi-level menu view. There are many icon shortcuts that you can add to the Toolbar to speed up your workflow.

Plugins For Symbols
Here are some useful Sketch plugins that you can add to your Symbols workflow.
Sketch Runner
Using Sketch Runner, you can search and place Symbols very fast as long your naming convention is well-thought out. This plugin works best for other things too. You can press the shortcut Command Apostrophe to activate Sketch Runner.
Symbol Instance Renamer
Sometimes, you want to change the name of some Symbols across your documents, but the name won’t be updated. You can use Symbol Instance Renamer to make this task a breeze. Go to Plugins and choose Symbol Instance Renamer > Rename all Instances on All Pages. This will help you update their names across all your documents.
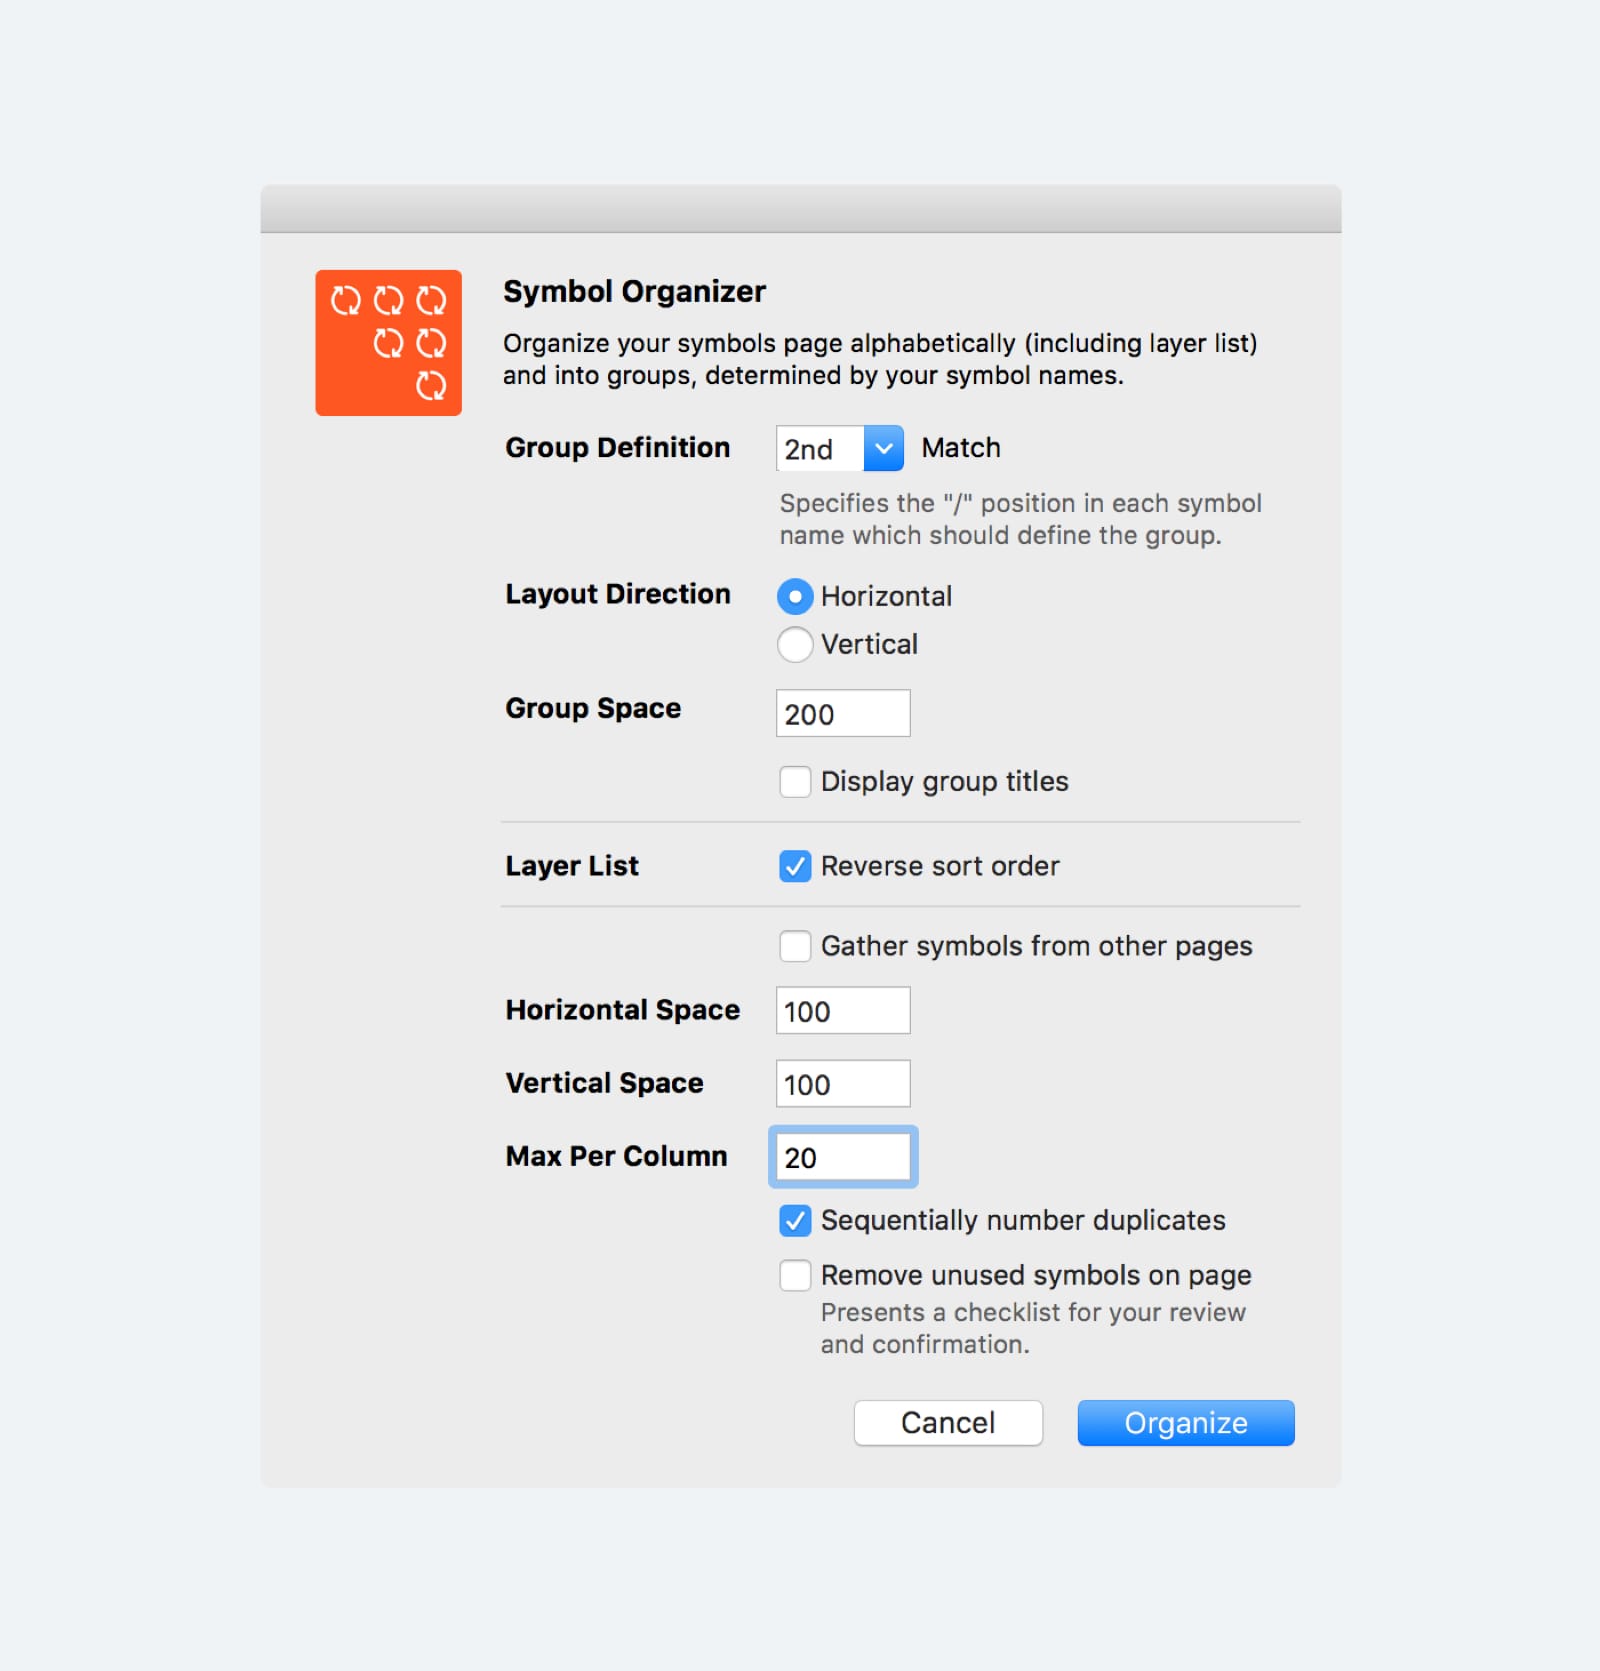
Symbol Organizer
Once you create a new Symbol, it will show up in the Symbols Page. And if you check the Symbols Page you will find the symbols all over the place without a proper placement. Symbol Organizer will help us to organize the Symbols page and make it align and arrange appropriately according the naming of your symbols. It can help to remove all the unused Symbols from the document as well.
You can use Sketch Runner to install the Symbol Organizer plugin. Before we run the Symbol Organizer, you should configure its settings first. This is how I setup the settings for Symbol Organizer. Once you press Organize, the Symbols Page will arrange neatly according to the naming and the Symbol Organizer configuration.
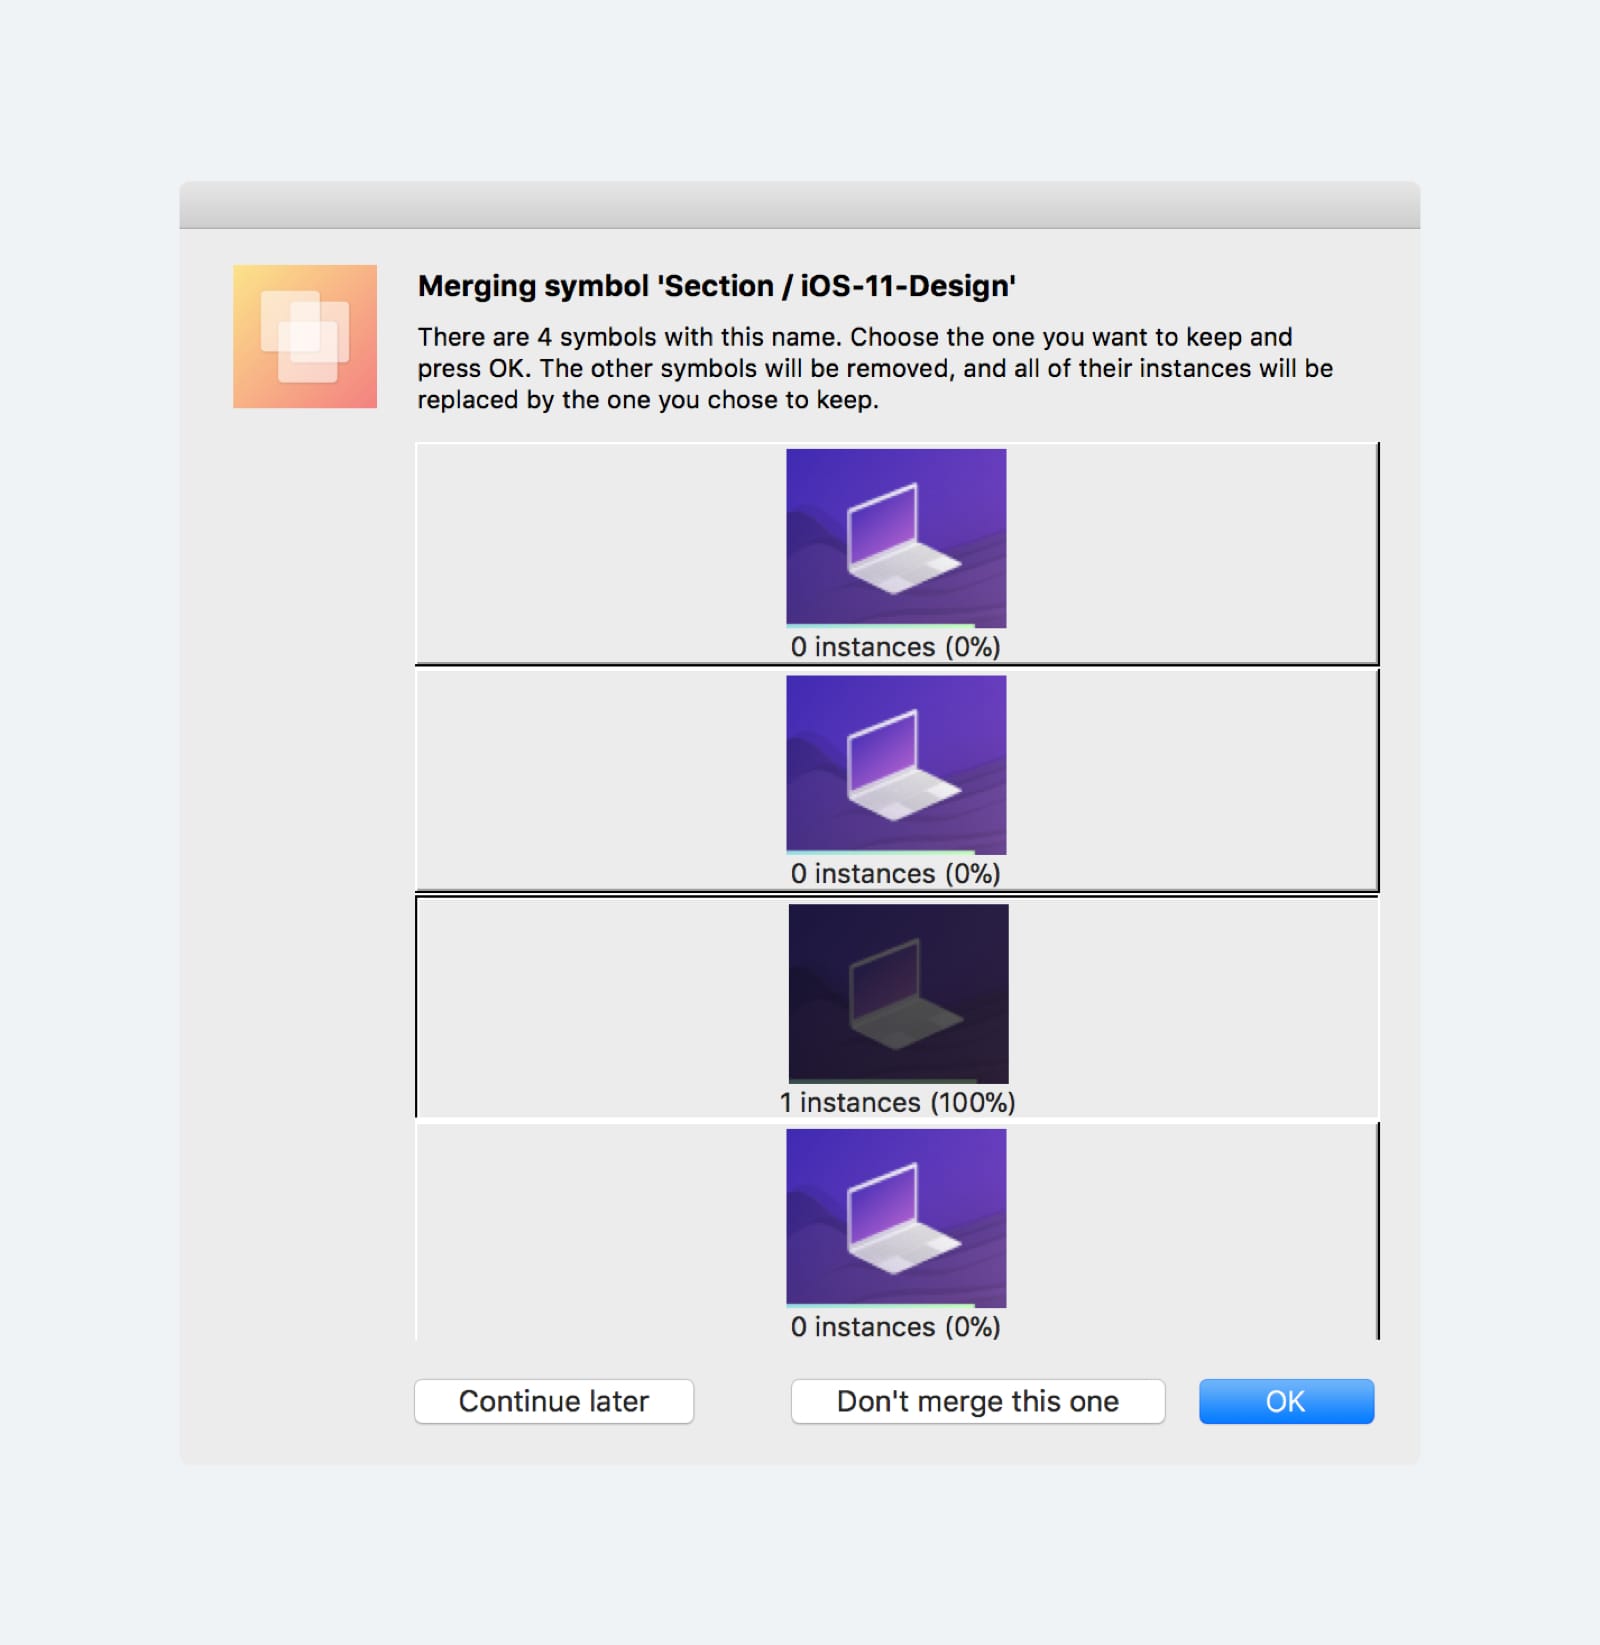
Merge Duplicated Symbols
Often, you’ll find duplicated Symbols in your document. A plugin called Merge Duplicated Symbols will help you find Symbols that have the same name. You can choose the ones you want to keep and merge the others. Once you Run the plugin, a pop-up window will appear, there you will be able to choose the Symbols that you want to keep, then press OK and the Symbols will be merged. You can click on Continue Later or Don’t Merge This One, if you’re not sure yet.
Credit
Special thanks to Pizza Yap for co-authoring this section.